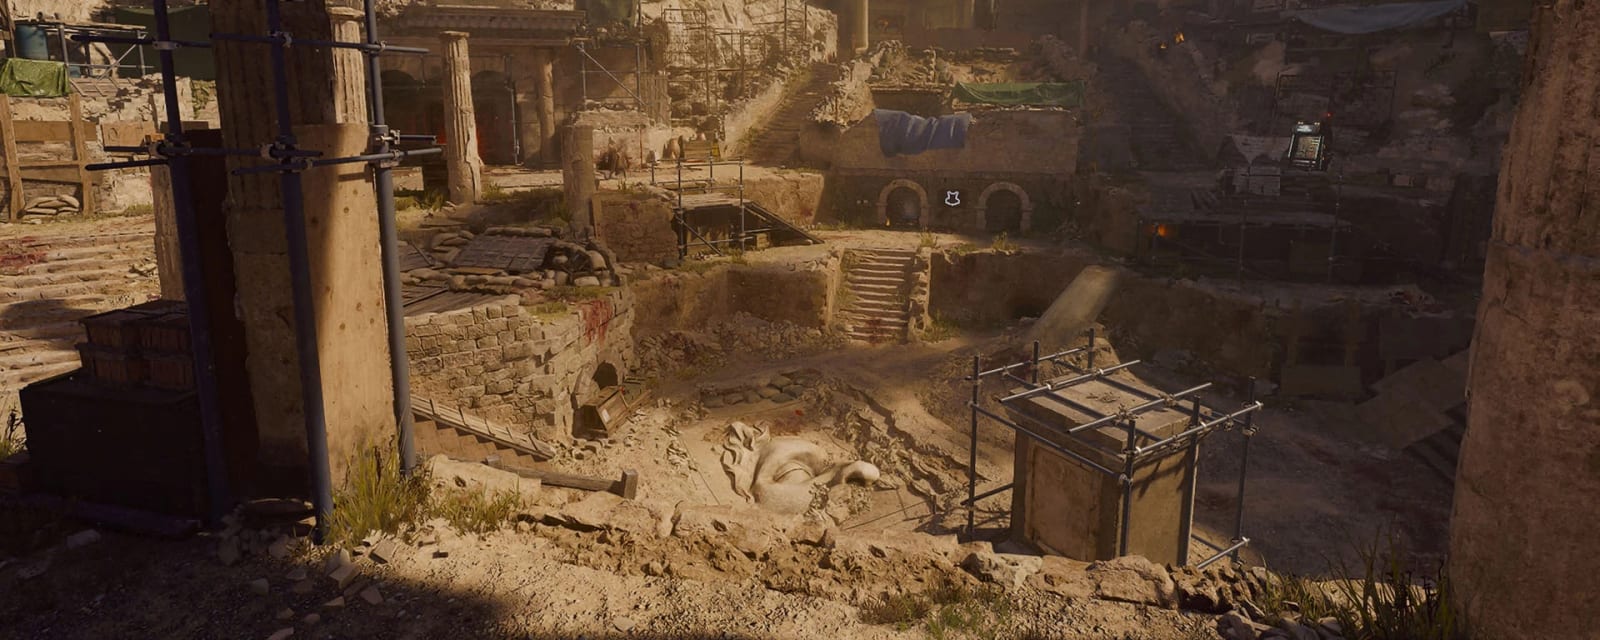

The Tomb
A BO3-Origins throwback in an Egyptian dig site — build the Staff of Ice, upgrade it into Ull's Arrow, return four refined creature crystals, and capture the Sentinel Artifact in the Dark Aether Nexus. Fully solo-capable; one to four players.
Quick answers
The Tomb is a Black Ops 6 Zombies map — a Black Ops 3 Origins throwback set in an Egyptian dig site. Its 9-step main quest has you build the Staff of Ice, upgrade it to Ull's Arrow, clear four creature trials, then capture the bullet-only Sentinel Artifact boss in the Dark Aether Nexus. Rated Medium; 35–60 minutes, solo-capable.
Where is Pack-a-Punch on The Tomb?
Pack-a-Punch is in the Dark Aether Nexus. Buy through to the Subterranean Temple and the Door to Nowhere, then place the amulet from Citadelle des Morts on the table marker — that opens the red gateway into the Nexus where Pack-a-Punch sits.
What is the Wonder Weapon on The Tomb?
The Wonder Weapon is the Staff of Ice, upgraded to Ull's Arrow. Kill the round-8 shock mimic for the Monocle, solve the Hunter and Bull murals for two staff parts, build it in the Nexus, then complete the symbol-rock and orb-escort steps to upgrade it.
Who is the boss of The Tomb?
The boss is the Sentinel Artifact, and it takes damage only from ordinary bullet weapons — Ull's Arrow and explosives do nothing. Survive its orange laser phases by floor-swapping, burst the ghostly purple artifacts, kill the carrier enemies, and destroy the final artifact before the timer wipes the team.
How do you beat the Sentinel Artifact on The Tomb?
Bring a Legendary, tier-3 Pack-a-Punched rifle, LMG or shotgun — bullets only. Dodge the orange laser sweeps by staying high when the beam is low and low when it is high, then focus all fire on one purple artifact per damage phase, clearing the elite carriers from about phase five.
How many steps is The Tomb Easter egg?
The Tomb main quest is 9 steps and takes roughly 35–60 minutes, rated Medium and solo-capable for 1–4 players — one of the shorter Black Ops 6 Easter eggs. Note the staff build cannot start before round 8.
Map & Key areas
The map layout first, then the areas worth knowing by name. Map imagery © Activision, self-hosted.
Excavation Site
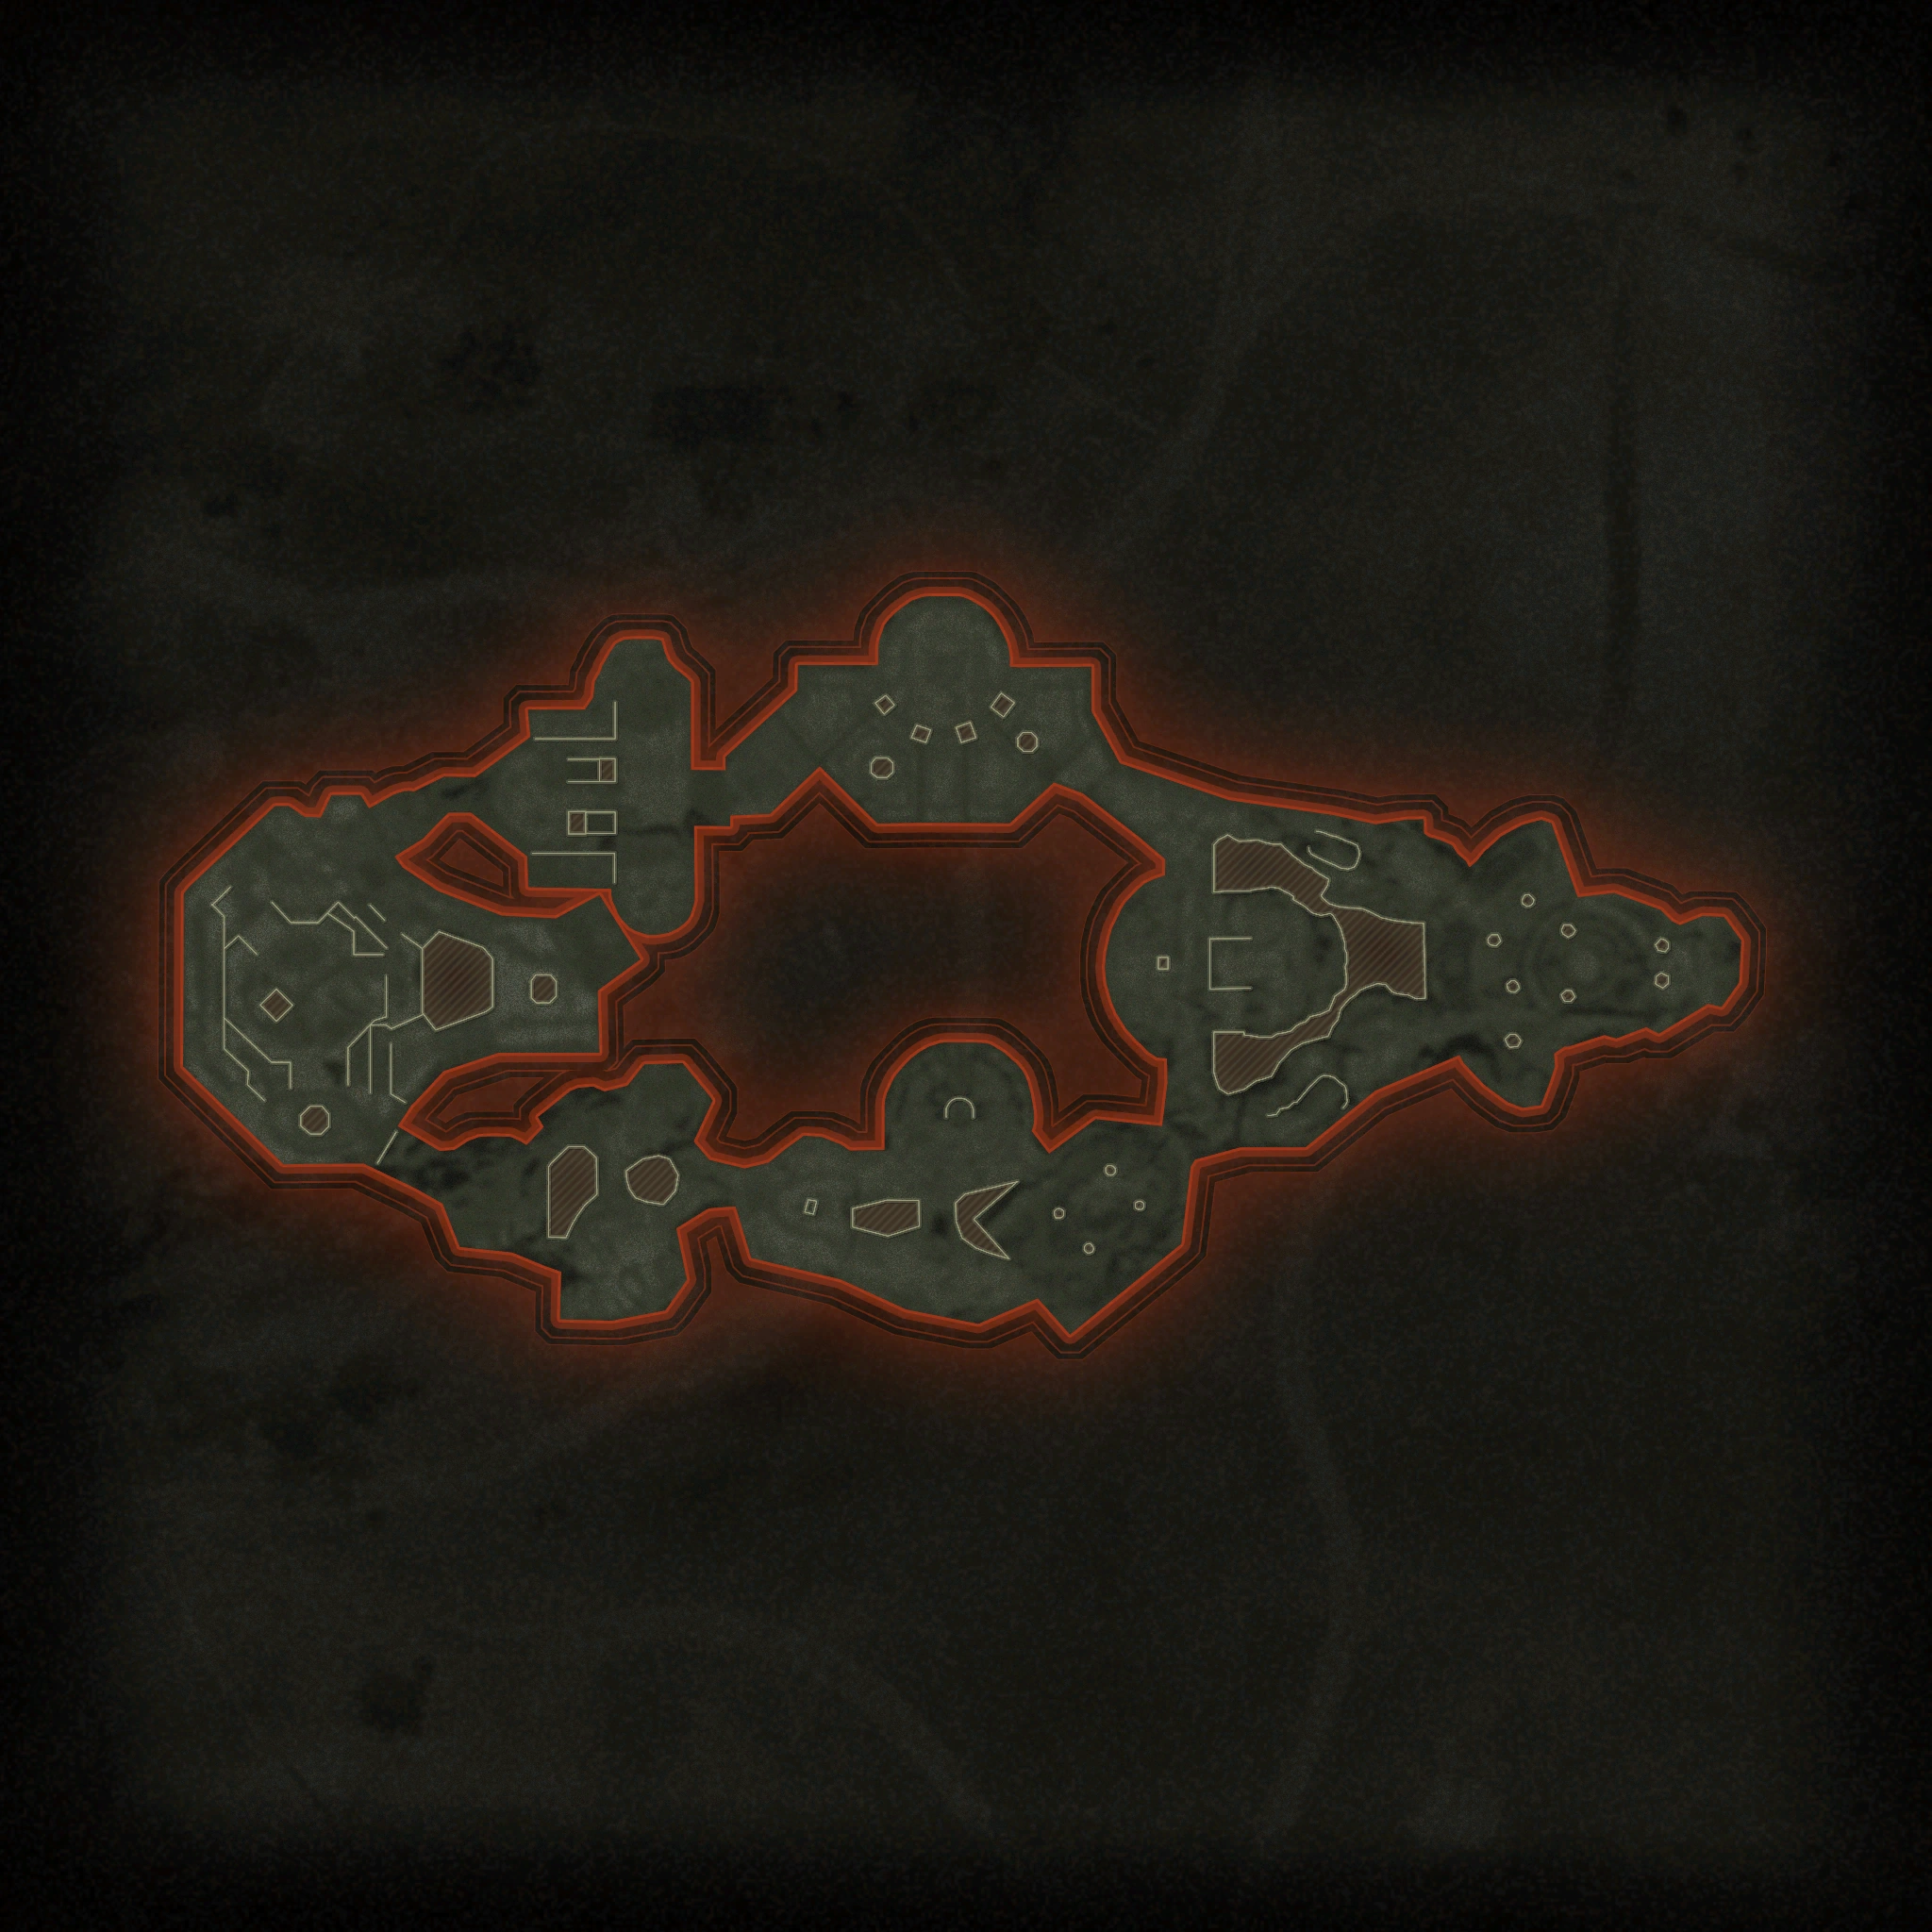
Dark Aether Nexus
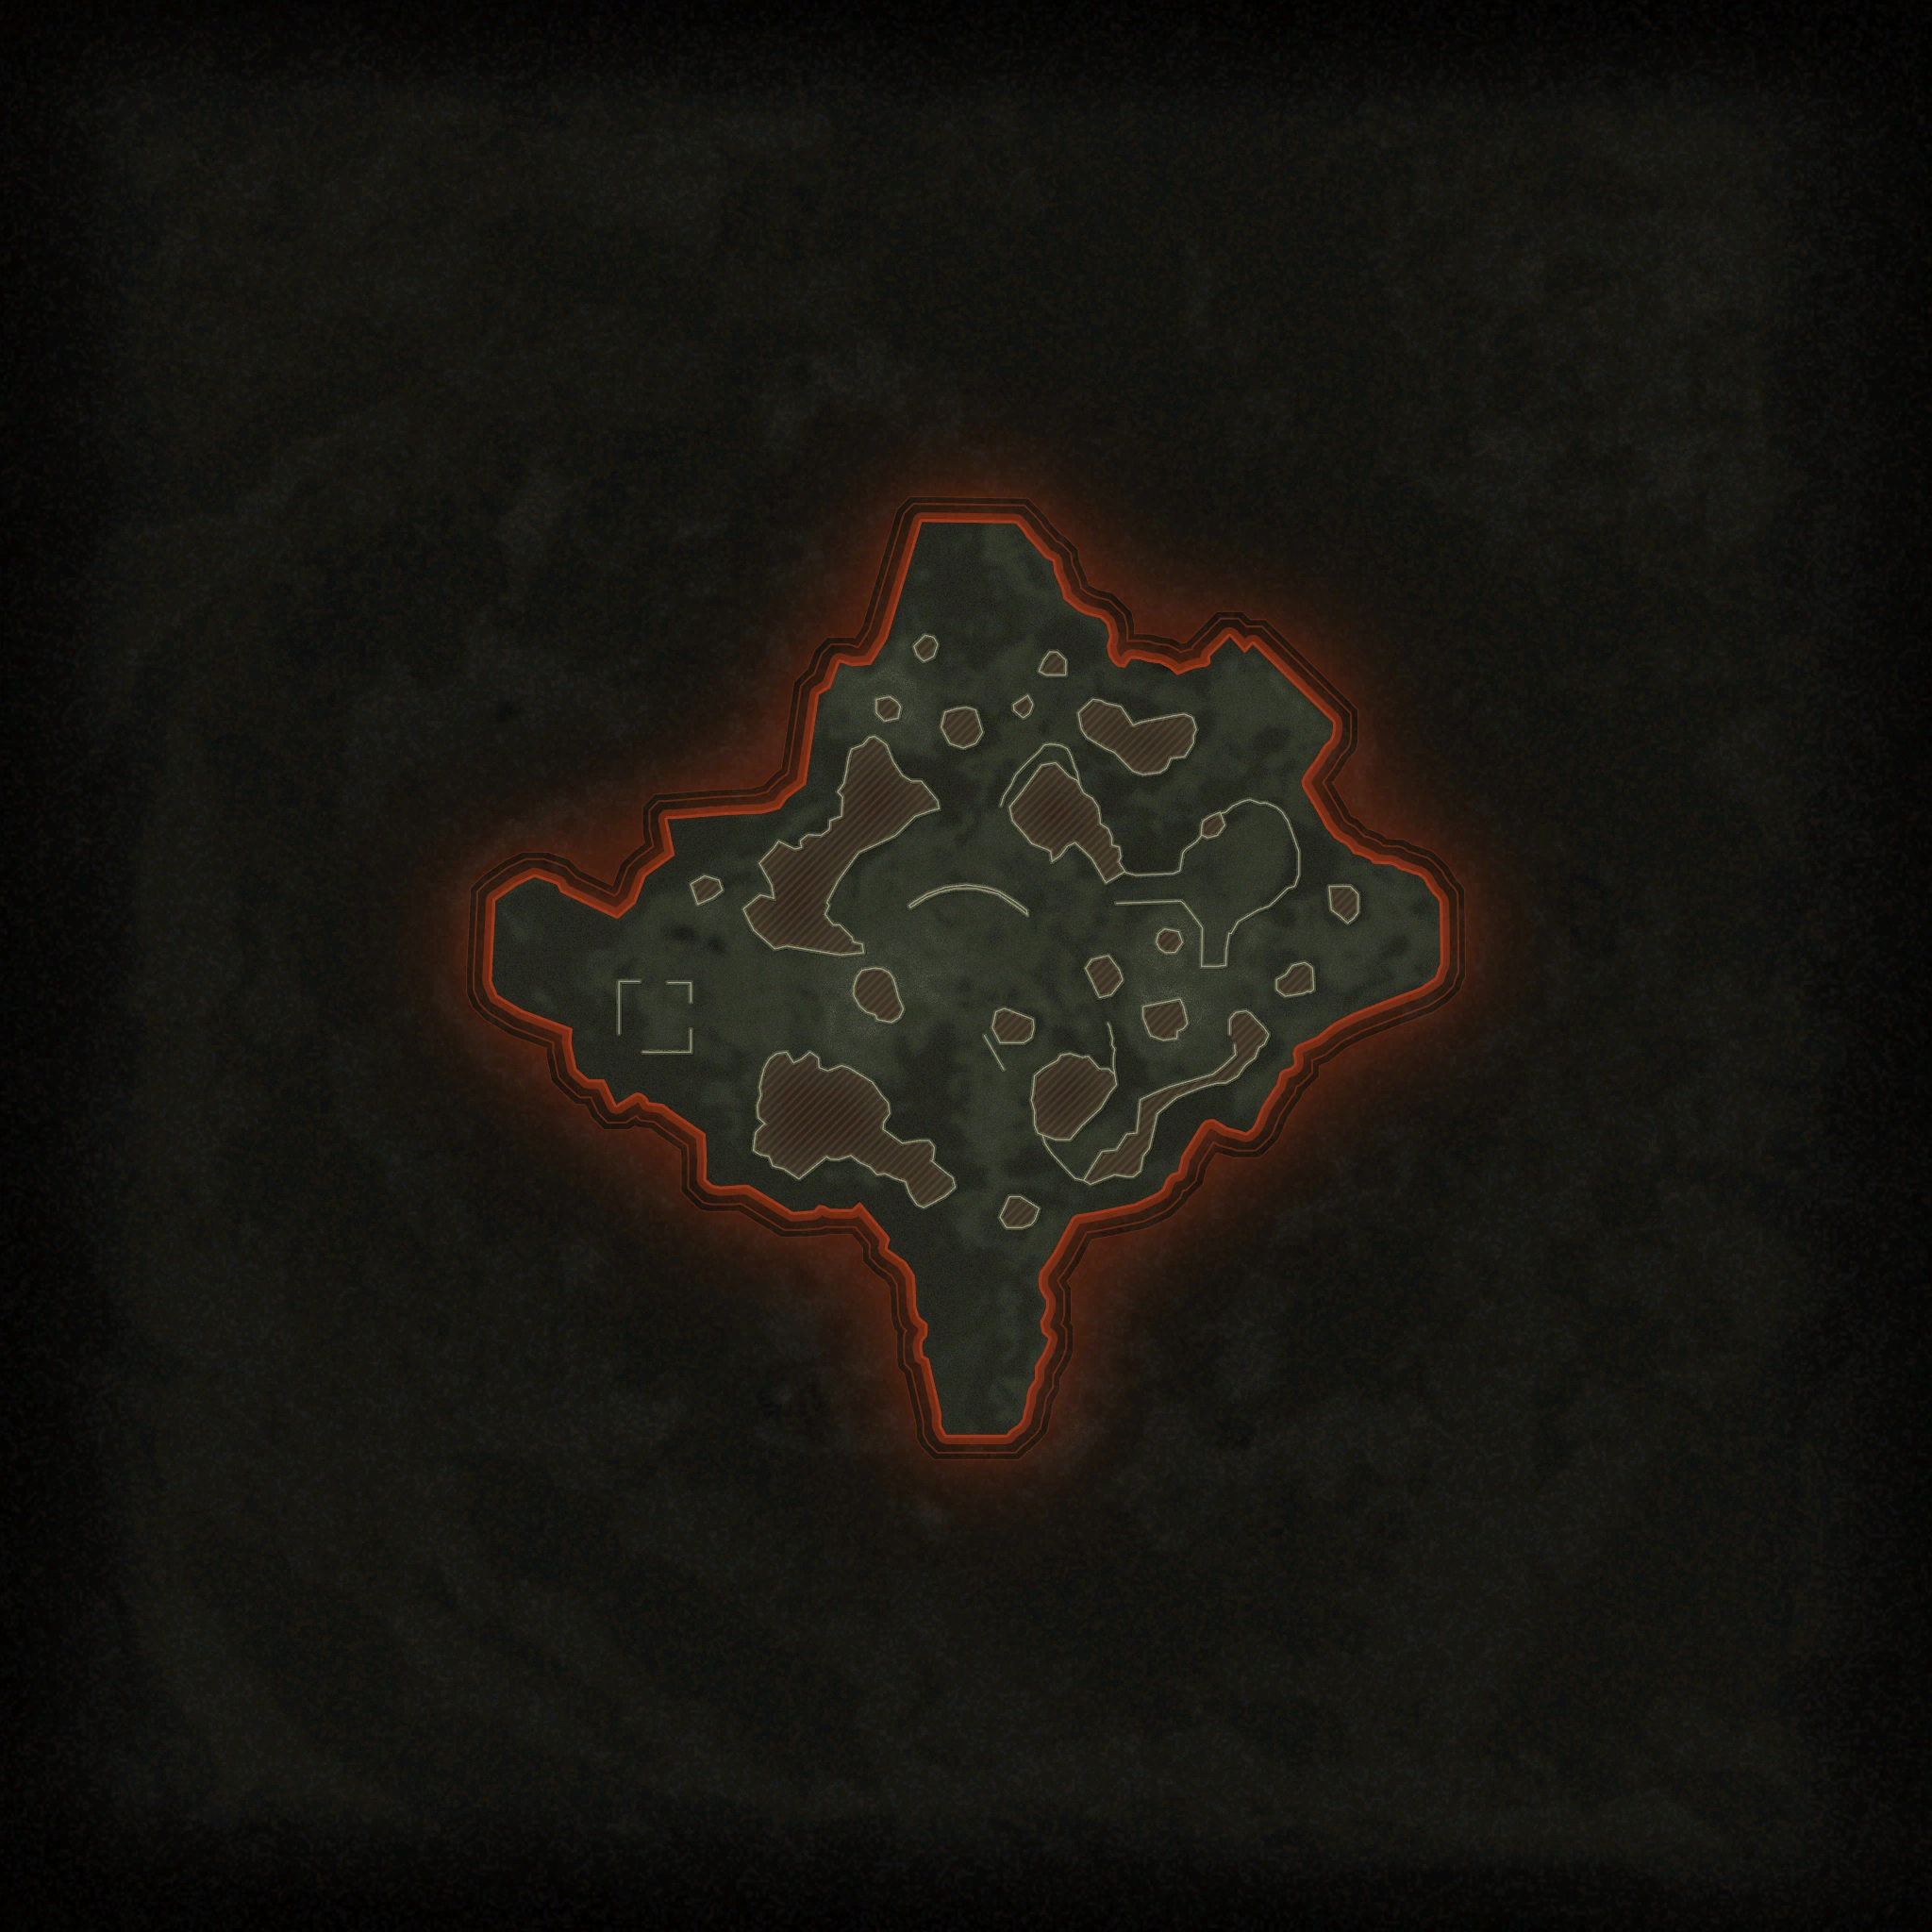
Pinch or double-tap to zoom in — the full map is a single image.
Dig Site
Spawn. Vermin trial statue, shovel/dig routes, headless Gold-Armor statues, an exterior gateway.
Neolithic Catacombs
Deadshot Daiquiri; the Head-Piece lantern and the 1–10 Roman-numeral wall by the Crafting Table.
Tombs
Death Perception; the Staff-Piece lantern, the bull mural with its 1–8 sequence, and the Ray Gun dig statue.
Subterranean Temple
The Door to Nowhere pedestal (opens the Nexus) and the central travel hub.
Shrine / Ossuary / Deep Excavation
Parasite, Doppelghast and Amalgam trial statues; Gold-Armor sacrifice route; lantern rooms.
Dark Aether Nexus
Pack-a-Punch, Staff construction structure, the eight symbol rocks, the four creature statues, and the boss bridge.
Steps at a glance
- Buy to the Subterranean Temple and the Door to Nowhere
- Place the Citadelle amulet → opens the Dark Aether Nexus and Pack-a-Punch
- Round 8: kill the shock mimic for the Monocle
- Hunter mural (10 symbols) and Bull mural (8 symbols) → 2 staff parts
- Build the Staff of Ice in the Nexus → 60-second defence
- Freeze three burning crystals within ~10 seconds
- Shoot 3 floating symbol rocks → match them on the sealed portal door
- Escort the purple orb around the Nexus → upgraded staff
- Four trials: vermin, parasite, Doppelghast, Amalgam
- Extend the bridge → Sentinel Artifact boss (~10 phases)
- Survive orange laser phases, burst the ghostly purple ones
- Kill the carrier enemies and burn the final artifact before the timer
Full walkthrough
Open the map and reach Pack-a-Punch
Stay in spawn for the first few rounds building points — the Rampage Inducer speeds rounds up without changing points per kill. The first vermin round lands around 5 or 6; push through it, then start opening up.
Follow the objective markers and buy doors until you reach the Subterranean Temple and the Door to Nowhere. Hold interact on the table marker in the temple to place the amulet from Citadelle des Morts, opening a red gateway into the Dark Aether Nexus where Pack-a-Punch sits.
Watch for this: placing the amulet also spawns burning purple crystals at around fifteen locations across the map — by Quick Revive, Speed Cola, Stamin-Up and elsewhere. Those crystals drive the staff steps below, so start noticing where they are now.
Loadout: an AR or LMG with a drum mag — you want a big magazine for artifact damage in the boss fight, and explosives are weak there. Aether Shroud is the field upgrade both creators run; in co-op take the Group Shroud augment plus Extra Charge. Solo, Dead Wire with Big Game so it affects Elites.
Ice Staff part 1 — the Monocle
The staff quest cannot start before round 8. On round 8 the first shock mimic spawns, guaranteed. Kill it and it drops the Monocle on the floor — pick it up.
Shortcut worth knowing: a Wonderbar! gum spins the Mystery Box for a guaranteed Wonder Weapon, which can hand you the Ice Staff outright and skip the entire build. MrRoflWaffles puts it at roughly a 50/50 chance of being the staff on this map; MrDalekJD simply calls it not guaranteed. Repeated box spins can also get lucky.
Ice Staff parts 2 and 3 — the mural puzzles
Two mural puzzles, one behind the first door off spawn on the right (Neolithic Catacombs, by Deadshot Daiquiri and the crafting table — the Hunter) and one on the left (the Tombs — the Bull). Both need the Door to Nowhere open and the Nexus visited.
Move the light source. Destroy the burning purple crystal in the zone with a bullet weapon; roughly 45 seconds later it respawns at another of the spots in that area. Repeat until it lands directly beside the Hunter or in front of the Bull. If ten or so tries get you nowhere, start destroying crystals slightly further afield too.
Confirmation cue: with the light in the right place, glowing symbols illuminate the mural wall — left of the crafting table on the Hunter side.
Shoot the symbols in numerical order. Each is a Roman-numeral variant. The Hunter mural has ten symbols, the Bull has eight. The on-wall arrangement is randomised every game, but the numeral-to-symbol mapping is fixed and identical on both murals — the Hunter simply runs two numbers higher.
Fail state is forgiving: a wrong symbol does not end the attempt — you resume from the last correct numeral. If fewer symbols than expected display, that is a known visual bug: shoot any symbol to reset and redraw them.
Mini-lockdown. A purple wisp then moves through three or four spots in the area, one wave each — purple-wisped zombies, parasites, Doppelghasts, vermin, and shock mimics on the Bull side. A Max Armor drops mid-sequence. When the orb returns to the numeral wall, clear the final wave.
Confirmation cue: screen flash and a Max Ammo, and the mural yields its part — the headpiece on the Hunter side, the staff piece on the Bull side.
Build the Staff of Ice
Take all three parts into the Dark Aether Nexus and interact with the broken wall machine directly in the middle to start the build. Then defend it for about 60 seconds.
The rule that matters: only enemies trailing purple smoke attack the staff and drain its health — everything else is coming for you. Train the normal zombies in front of the machine, prioritise parasites, and keep checking behind you for anything smoking purple.
Fail state: too much damage to the staff fails the step. Advance one round and retry.
Confirmation cue: the horde wipes out — pick up the Staff of Ice.
Freeze three crystals in ten seconds
Shoot three of the burning crystals with the Ice Staff so they freeze rather than explode, all within roughly ten seconds.
Set it up first — do not just run at it. Shoot a crystal with a bullet weapon to destroy it and it respawns about 45 seconds later somewhere else. Use that to line up three spots you can either sprint between or hit down a single sight-line.
Speed help: PhD Flopper’s Tribologist augment or Stamin-Up’s Hot Foot. In co-op, two Ice Staffs can exist in one game — split the crystals between two staff-holders.
Confirmation cue: a voice quote from the board character. Do not move on until you hear it. This one takes several attempts for most people; failing just means re-freezing.
The other guide: MrDalekJD reports needing the three in three separate map sections, finishing with the Subterranean Temple. MrRoflWaffles imposes no such rule, so try any three first.
Symbol rocks and the sealed portal door
In the Nexus, look up. Three floating rocks near you — not the distant skybox ones — carry purple glowing symbols and give a hit-marker and blue tint when shot with the staff. Spawns vary, so walk the whole area looking up, and check both sides of each rock since symbols can face away.
Shoot all three with the Ice Staff in any order; each shot lowers its rock toward you. Note the three symbols before you leave.
Confirmation cue: a quote after the third rock, and one of the four exit portals seals. Portal colours map to locations — blue is spawn, red near Quick Revive, yellow near Stamin-Up, green near Speed Cola.
Leave through a still-open portal and go to the map-side door of the sealed one. It shows eight symbols: shoot the three matching your rocks with the Ice Staff, in any order. The portal reopens whether you were right or wrong.
Fail state: the teleporter puts you on a high platform — if your symbols were wrong, it drops you out of the sky. That fall is the fail message. Retry next round at a different, newly sealed door.
Escort the purple orb
If you were right, the platform holds a purple orb — hold interact to start the escort. It descends and circuits the Nexus, spawning zombies, mimics and Doppelghasts, behaving like a mobile soul box: kills near it feed souls in and keep it moving.
Stay glued to it. Straying any real distance fails the step instantly. The whole escort is about a minute and a half.
Co-op rule: all team members must enter the Dark Aether together and all must escort the orb, or it fails.
Fail state: the orb flies off into the sky. Next round, shoot three symbols on a new sealed door and restart the escort.
Kill the Amalgam that spawns near the Pack-a-Punch stretch — taking it down powers the orb on. MrDalekJD skips it, but do not count on high soul income carrying you.
Confirmation cue: the orb flies into the broken-wall staff machine. Hold interact there with the staff to upgrade it.
Needs confirming: the upgraded staff’s name is garbled across both transcripts — Ull’s Arrow or Ull’s Fury.
The four trials
All four run the same loop. In the Nexus, flip the staff to its alt-fire end (left on the d-pad — the staff spins 180° to a green tip). Shoot the matching statue podium’s crystal so it glows, hold interact to take the dark energy, carry it out to the matching map statue, complete the lockdown, take the energy again and return it to the same podium — via any portal except the one you came out of.
Carry rule: the energy has its own health bar and zombie hits drain it. Destroy it and you re-grab from the podium and redo the whole run.
The other guide: MrDalekJD reports only one teleporter being active for each return trip, which is stricter than the rule above.
Confirmation cue: with all four done, four purple beams fire from the crystal above toward the boss door.
- Vermin — blue portal to the spawn room. A huge vermin flood; charged Ice Staff shots freeze whole groups and trivialise it
- Parasite — yellow portal to the Shrine of the Hierophants. Certain parasites glow purple; kill them, collect the purple orbs they drop and carry them to the central statue before the timer
- Doppelghast — green portal to the Ossuary. Masses of Doppelghasts while the floor throws spikes and lasers; a charged staff blast at the ground shreds the pack
- Amalgam — red portal, down through the Subterranean Temple to Deep Excavation by Quick Revive. The Elite raises a bubble shield tethered to a nearby armoured zombie; kill the tethered heavy to break it, then resume damage
Boss fight — the Sentinel Artifact
Prep — this is the point of no return: all perks (Perkaholic ideal), tier-3 Pack-a-Punch at max rarity, tier-3 armour, and an AR or LMG with a drum mag for artifact damage. A Mutant Injection is a genuine run-saver in the late phases. Shields Up, Idle Eyes and Kazimirs are strong; skip explosive spam. Solo, bring the upgraded Ice Staff for wave-clear.
At the very back of the Nexus, hold interact on the pedestal to extend the bridge. Interacting with the Sentinel Artifact starts a team vote.
The structure: there is no physical boss. The Artifact multiplies and cycles orange laser phases (survive) and ghostly purple damage phases (shoot it). Health drops about 10% per phase, and a Max Ammo spawns centrally after each one — grab it immediately, then kill zombies to recharge Aether Shroud before the next window.
Laser phases: beams sweep the lower floor then the upper and back, stunning and heavily damaging — later they one-shot. Dodge by floor-swapping: stay high when the beam is low, low when it is high. Solo, MrDalekJD found underground much safer from about four artifacts onward.
Damage phases: when the artifacts turn transparent purple-blue, pop Aether Shroud and focus all fire into one artifact — ping it in co-op. Broken ones float back to the middle and turn red, meaning immune.
Carrier phases — waves build 1, 2, 3 then 4 artifacts, and from about phase 5 instead of appearing centrally, an artifact is carried by a special enemy — an armoured heavy, then a supercharged red Doppelghast, then an electrified Mimic, then a supercharged Amalgam. Clear the Elite escorts first, kill the carrier, then pour everything into the dropped artifact immediately — if the cycle ends first it returns to the middle and the phase repeats with fresh spawns. Do this while the central artifacts are in their orange phase.
The red Doppelghast carrier one-hits you even at full health and armour without Jugger-Nog. Keep maximum distance and keep a full LMG mag reloaded and ready for the drop.
Final phase — the one that can end your run: all artifacts align in a semicircle in the centre and one moves slowly away. Dump absolutely everything into it. If it is not destroyed before the timer ends, the whole team wipes and the Easter egg ends.
Finish: interact with the Sentinel Artifact in the middle to place the amulet — ending cutscene, quest complete.
The other guide: MrDalekJD counts the artifacts 1→2→4 with a single heavy phase, and reports the Mimic-phase artifact splitting into two when shot down.
Side Easter Eggs & extras
Everything beyond the main quest. Tap any entry to open the full how-and-where breakdown.
“Dig” — Mister Peeks headphones
Activate the three Mister Peeks headphones to trigger the hidden track: one in the Shrine of the Hierophants, one in the Ossuary, and one in the Dark Aether Nexus. Interact with all three to start the song.
Golden Tier III Armor
In the Nexus, break the two wooden crates by the Jugger-Nog / green-gateway side for two statue heads; fit them to the two headless statues in Dig Site. Activate one statue for a Blood Sacrifice (dropped to 1 HP, armour kept) and kill its three empowered Shock Mimics; refill armour, then the second statue's three empowered Doppelghasts. Collect the renewable Golden Armor in the Roman Mausoleum.
Ray Gun — dig quest
Buy Death Perception and find a shovel (common spots: Death Perception/Tombs, near the Ossuary Ammo Box, the red-portal route). Dig glowing mounds for Ancient Gems (roughly one per round), place three at the bull statue beside Death Perception, kill the two spawned Doppelghasts and take the Ray Gun. Not a boss weapon — its explosive damage does nothing to the Artifact.
PaP I + Cryo Freeze
Shoot the starter moving/electrified Nexus rock, then each newly moving marked rock quickly; the centre reward upgrades one weapon and can grant Cryo Freeze.
Aether Tool — waterfalls
Freeze the two waterfalls with the Staff / Cryo route; the Aether Tool's tier scales with the current round.
Self-Revive + Light Mend
Shoot all ten breakable quest vases distributed through the tomb rooms.
Friendly zombie soldiers
Equip Brain Rot and shoot the four X-marked skulls in their required quick sequence to animate friendly soldiers.
Hidden power-ups & Fire Sale
Shoot generators in Dig Site and distant rock/alcove props in Catacombs, Ossuary, Temple and Nexus for power-ups, plus an all-door Fire Sale — use an interactive map for exact sight lines.
Recommended loadouts
Three strong picks for this map — the map's Wonder Weapon plus reliable box/wall options. Each weapon lists a full recommended attachment build and the perks to pair with it, every perk shown with its Major and Minor augment. Push weapons to Legendary rarity and Pack-a-Punch; augment/attachment metas shift with balance patches, so treat these as a strong current baseline.
Ull's Arrow (upgraded Staff of Ice)
Wonder Weapon — crowd control & trials+Charged shots freeze clustered targets and clear the trial arenas fast; the Sekhmet's Vigor alt-fire releases every creature crystal. Preserve ammo for survival — it does NOT damage the Sentinel Artifact's health.
Attachments
- —Wonder Weapon — no Gunsmith attachments
Perks & augments
- Jugger-NogMajorReactive Armor — plate breaks stun nearby zombiesMinorDurable Plates — tougher armour
- Speed ColaMajorClassic Formula — even faster reloadsMinorQuick Swap — faster weapon swaps
- Stamin-UpMajorDasher — longer tactical sprintMinorHot Foot — speed burst on equipment kills
- Elemental PopMajorElectric Cherry — shock burst on reloadMinorChill Berry — faster Ammo-Mod cooldowns
- PhD FlopperMajorPhD Slider — slide into a group to detonateMinorTribologist — longer, faster slides
- Quick ReviveMajorDying Wish — brief invulnerability on lethal hitsMinorSlow Death — longer last-stand timer
PU-21 (Legendary · PaP III)
High-capacity boss DPS+A big-magazine LMG is the safest bullet weapon for the Artifact's short vulnerability windows — max the rarity, Pack-a-Punch to III, add Dead Wire or Brain Rot, and keep salvage for ammo. This is the gun the boss is immune-to-until-you-bring-it.
Attachments
- OpticKepler Microflex
- MuzzleSuppressor
- BarrelCHF Barrel
- UnderbarrelCommando Grip
- MagazineFast Mag I
- Fire ModsRapid Fire
- Rear GripQuickdraw Grip
- StockLight Stock
- LaserSteady Aim Laser
Perks & augments
- Jugger-NogMajorReactive Armor — plate breaks stun nearby zombiesMinorDurable Plates — tougher armour
- Speed ColaMajorClassic Formula — even faster reloadsMinorQuick Swap — faster weapon swaps
- Deadshot DaiquiriMajorDead Again — crits can add a bullet to the magMinorDead Break — extra armour damage
- Stamin-UpMajorStalker — faster movement while aimingMinorHot Foot — speed burst on equipment kills
- PhD FlopperMajorPhD Slider — slide into a group to detonateMinorTribologist — longer, faster slides
- Death PerceptionMajorDeath Stare — chance to instantly drop wounded specialsMinorBird's-Eye View — faster minimap scan
Ray Gun (free dig quest)
Survival insurance+Excellent add-clear from the shovel/Ancient-Gem quest and great through the trials, but explosives are poor in the Artifact arena generally — MrRoflWaffles advises against spamming them at all. Its explosive damage is useless on the boss — carry it alongside, not instead of, the bullet weapon.
Attachments
- —Wonder Weapon — no Gunsmith attachments
Perks & augments
- Jugger-NogMajorReactive Armor — plate breaks stun nearby zombiesMinorDurable Plates — tougher armour
- Speed ColaMajorClassic Formula — even faster reloadsMinorQuick Swap — faster weapon swaps
- Stamin-UpMajorDasher — longer tactical sprintMinorHot Foot — speed burst on equipment kills
- Elemental PopMajorElectric Cherry — shock burst on reloadMinorChill Berry — faster Ammo-Mod cooldowns
- PhD FlopperMajorPhD Slider — slide into a group to detonateMinorTribologist — longer, faster slides
- Quick ReviveMajorDying Wish — brief invulnerability on lethal hitsMinorSlow Death — longer last-stand timer
Recommended kit & gum picks
The Sentinel Artifact boss takes bullet damage only, so Ammo Mods here are for the four creature trials and the adds, not the boss itself — keep a clean Pack-a-Punch III bullet gun for the six phases. Weapons are in Recommended loadouts above.

Aether Shroud
The go-to for the lantern-freeze windows and staying alive through the bullet-only boss.

Energy Mine
Add clear for the Vermin/Parasite/Doppelghast/Amalgam trials.

Dead Wire
Stuns and strips the Doppelghast and Amalgam during their trials.

Napalm Burst
Burning area damage for the packed catacomb lanes.

Cryo Freeze
Slows and weakens crowds while you protect the escorted orb.

Light Mend
MrRoflWaffles puts one player on Light Mend and the rest on Dead Wire with the Big Game augment so it affects Elites. Solo, just run Dead Wire.
Frag Grenade
Reliable clear for the Nexus and staff-defence holds.

Monkey Bomb
Buys space during the rock-symbol and orb-escort steps.

Perkaholic
UltraEvery perk at once.

Phoenix Up
LegendaryRevive with all perks kept — insurance vs the six-phase boss.

Wall Power
LegendaryNext wall-buy comes Pack-a-Punched.

Dead Drop
EpicMore salvage and equipment for ~5 min.

Free Fire
EpicNo ammo for 60s — a clean bullet-damage window on the Artifact.

Shields Up
RareRefills armour at 2× strength for 3 min — the gum both creators bring on every map, and blue rarity so you will actually have it.

Idle Eyes
LegendaryZombies idle for 30s — the creators’ standard boss-fight reset when the room gets away from you.

Wonderbar!
UltraYour next box spin is a Wonder Weapon — both creators use it to skip the Wonder Weapon quest gate.
Perkaholic
UltraFull perks for whoever pops it.

Nowhere But There
EpicTeleport to a downed team-mate and revive nearby.
Free Fire
EpicNo ammo for 60s on the boss.

Temporal Gift
RareExtends your next timed power-up.
Dead Drop
EpicSalvage and equipment for the squad.
Per-map augments
The Major + Minor augment to run on each core perk for this quest. BO6 gives 3 Major and 3 Minor options per perk — pick one of each; these are tuned to this map's boss and steps. Augments unlock at Level 11; metas shift with patches, so treat as a strong baseline. Per-map augment recs are ground no competitor covers.
 Dead AgainMinor
 Dead Break
 Reactive ArmorMinor
 Durable Plates
 Phantom ReloadMinor
 Quick Swap
 DasherMinor
 Hot Foot
 PhD SliderMinor
 Tribologist
 Dying WishMinor
 Slow Death
Calling cards on this map
Cosmetic calling cards you can earn on this map. ⏳ marks time-limited main-Easter-Egg cards — miss the window and they're gone for good. Global Dark Ops challenge cards are in the reference section below.

Main-quest completion card
Main EEComplete The Tomb main quest.
Exact card name not yet confirmed.
⏳ Time-limited — only awarded if you finish before Directed Mode is added for this map; permanently missable afterwards.
GobbleGum reference — Black Ops 6
All 41 Black Ops 6 GobbleGums by rarity — Rare, Epic, Legendary, Ultra and the cosmetic Whimsicals. They drop at end-of-round and you hold up to three. Filter by rarity.

Kill Joy
RareDrops an Insta-Kill.

Cache Back
RareDrops a Max Ammo.
Temporal Gift
RareYour next timed power-up lasts longer.

Stock Option
RareAmmo drawn from your stockpile for 60s.

Anywhere But Here
RareRandom teleport plus a concussive blast.

Arsenal Accelerator
RareFaster Field-Upgrade charge for 5 min.
Shields Up
RareRefill armour at 2× strength for 3 min.

Power Keg
RareDrops a Full Power power-up. (Season 1)

Tactical Diffusion
RareNext Nuke is disabled and pays +2,000 Essence. (Season 3)

Respin Cycle
EpicRespin the Mystery Box to an equal or higher rarity.
Who's Keeping Score?
EpicDrops Double Points.
Free Fire
EpicNo ammo consumed for 60s.

Exit Strategy
EpicInstant exfil vote with fewer spawns.

Profit Sharing
EpicShare Essence with nearby players for 2 min.

Soda Fountain
EpicYour next perk buy grants +1 random perk.
Nowhere But There
EpicTeleport to a downed player and revive nearby.
Dead Drop
EpicIncreased salvage and equipment drops for 5 min. (Season 2)
Explosive Flourish
EpicEach reload triggers an explosion for 2 min. (Season 4)
Idle Eyes
LegendaryZombies idle for 30s.
Wall Power
LegendaryYour next wall-buy comes Pack-a-Punched.

Immolation Liquidation
LegendaryDrops a Fire Sale.
Phoenix Up
LegendaryRevive all downed players, perks kept.

On the House
LegendaryDrops a Random Perk power-up.

Wall To Wall Clearance
LegendaryWall-buys cost 10 Essence for 30s.

Crate Power
LegendaryYour next box gun comes Pack-a-Punched.

Modified Chaos
LegendaryReduced Ammo-Mod cooldowns for 2 min. (Season 2)

Support Group
LegendaryGrants an ARC-XD, Mangler Cannon, Sentry and Mutant Injection. (Season 3)

Flavor Hex
LegendaryGrants a random Ultra gum. (Season 4)
Perkaholic
UltraEvery perk on the map at once.
Wonderbar!
UltraYour next box spin is a Wonder Weapon.
Near Death Experience
UltraProximity revive with perks for 3 min.

Reign Drops
UltraDrops all core power-ups at once.

Hidden Power
UltraYour held weapon becomes Legendary rarity.

Time Out
UltraClear all enemies and end the round for 3 min. (Season 1)
Newtonian Negation · Indiegestion · Holiday Cheer · Quacknarok · Die Pitched · Rainburps · Jacked Lanterns
Whimsical7 cosmetic seasonal gums — flair only, no gameplay effect.
Field Upgrade reference (Black Ops 6)
Black Ops 6's 6 Field Upgrades — charged by kills. Each has 3 Major + 3 Minor augments (unlocked at Level 11); you equip one of each. All augment options are listed. Source: CoD Wiki + GameLeap/GameRant cross-check.
Energy Mine
A proximity energy explosion.
Healing Aura
Instant heal beams (also revives teammates in BO6/BO7).
Aether Shroud
Phase out of enemy detection.

Tesla Storm
Lightning links players, stunning and damaging enemies.

Frenzied Guard
Repair armour and taunt enemies; kills repair your armour.
Dark Flare
A penetrating shadow beam.
Dark Ops & mastery cards (Black Ops 6)
Global ‘Dark Ops’ challenge cards — hidden until completed, earnable on any map. Filter by category.
Another Round?
Dark OpsReach Round 100.
Reaper of the Undead
Dark OpsKill 1,000,000 zombies (lifetime cumulative).
Invincible
Dark OpsReach Round 30 without going down.
Social Distancing
Dark OpsReach Round 20 without taking damage.
Good Enough
Dark OpsReach Round 20 with your starting loadout only — no augments, perks, ammo mods or Field Upgrade.
Box Addict
Dark OpsBuy every Mystery Box weapon in a single game.

Gummed Up
Dark OpsConsume 25 GobbleGums in a single match.
Well That Was a Waste
Dark OpsGet downed within 10s of consuming Perkaholic.
Armed to the Teeth
Dark OpsHold 3 Pack-a-Punch-III Legendary weapons with ammo mods and 8 active perks.
Harbinger of Doom
Dark OpsKill 100 enemies with a single Scorestreak.
Sticks N' Stones
Dark OpsReach Round 25 solo using only melee / Combat Axes / Melee Macchiato.
Fatale
Dark OpsKill two Amalgams with a single shot.
Light 'Em Up
Dark OpsKill 10 ignited Elites using the Napalm Burst ‘Big Game’ augment.

Kunoichi
Dark OpsIn one Aether Shroud (Void Sheath), kill 3 standard + 2 Special + 1 Elite.

Zombies Dark Ops 100%
MasteryComplete 15 Dark Ops challenges.
Intel
22 collectibles, tracked under Barracks → Zombies Intel — 11 Audio Logs, 5 Documents and 6 Artifacts. All audio logs are fixed pickups; the documents are the five-part 'Potts and Pains' set (three shot from jars, two from side eggs) and the artifacts mix pickups, an enemy drop, the Ice Staff and the main quest. Story/lore only.
Audio Logs 11
Against A Wall
Shrine of the Hierophants (Stamin-Up room) — on the wall right of the crafting table, by the torch.
Making A Monocle
Ossuary (Speed Cola room) — on a stone jar left of the passage door, opposite Speed Cola.
The Infamous Mr. Rhodes
Dig Site (spawn) — NW corner, on a green crate by the GobbleGum machine.
Look At All The Bodies
Dig Site (spawn) — just right of the blue Dark Aether portal.
Grave Robbers
Tombs — at the base of the statue at the bottom of the stairs, across from Death Perception.
The Knaves
Subterranean Temple — on a slab at the bottom of the northern stairs.
Spring Time
Shrine of the Hierophants — left of the Stamin-Up machine.
Deep Trouble
Deep Excavation (Amalgam statue area) — at the base of a pillar by the Max Ammo crate.
Retirement Plan
Dig Site (spawn) — under the wooden platform, right of the Level 2 Armor wall-buy.
A Fabrication
Neolithic Catacombs (Deadshot room) — on the floor by a skeleton, on the stairs left of Deadshot.
Tortured Artist
Dark Aether Nexus — west-end ruins, near the crafting table by the green portal.
Documents 5
Potts and Pains Pt 1 — Stoneware
Deep Excavation / Quick Revive — shoot the jar between the NE stone pillars.
Potts and Pains Pt 2 — Earthenware
Subterranean Temple — shoot the jar above and left of the red portal.
Potts and Pains Pt 3 — Kiln Firing
Shrine of the Hierophants — shoot the jar on the ceiling, east of Stamin-Up.
Potts and Pains Pt 4 — Bring Back the Dead
Complete the Brain-Rot friendly-zombies skull egg (Ossuary); it spawns by the statue.
Potts and Pains Pt 5 — Precious Stones
Complete the free Ray Gun / ancient-gem egg — dig gems, place them at the Tombs statue, then beat the Doppelghasts that spawn.
Artifacts 6
Aetheric Lantern
Shoot any of the purple Aetheric lanterns hanging around the map.
Alas, Poor Bernard
Dark Aether Nexus — interact with the skeleton's skull at the Nexus centre (the Ice Staff crafting area).
Sir Archibald's Monocle
Kill the first Shock Mimic (around round 8) — guaranteed drop.
Monolith Crystal Shard
Main-quest step — drops after the statue/altar laser-beam challenge.
Staff of Ice
Build the Ice Staff Wonder Weapon via its crafting Easter egg.
Sentinel Artifact
Complete The Tomb main quest (defeat the final boss).
Common The Tomb questions
Direct answers to the specific things players look up mid-game — part locations, puzzle steps and more.
How do you build the Staff of Ice on The Tomb?
Three parts: the Monocle from the guaranteed round-8 shock mimic, plus the headpiece and staff piece from the two mural puzzles. Take all three into the Dark Aether Nexus, interact with the broken wall machine in the middle, and defend it for about 60 seconds — only purple-smoking enemies damage the staff.
How do you solve the Hunter and Bull murals on The Tomb?
Destroy the burning purple crystal in the zone with a bullet weapon until it respawns beside the Hunter or in front of the Bull, lighting the mural. Then shoot the Roman-numeral symbols in numerical order — the Hunter has ten, the Bull has eight, and the numeral-to-symbol mapping is fixed and identical on both.
How do you freeze the three crystals on The Tomb?
Shoot three of the burning crystals with the Ice Staff so they freeze rather than explode, all within roughly ten seconds. Set it up first by destroying crystals with a bullet weapon (they respawn about 45 seconds later) to line up three spots you can sprint between or hit down one sight-line.
How do the four trials work on The Tomb?
Flip the staff to its alt-fire end, shoot the podium crystal so it glows, take the dark energy and carry it to the matching map statue — vermin, parasite, Doppelghast or Amalgam — complete the lockdown, then take the energy back and return it to the podium via any portal except the one you came out of. The energy has its own health bar.
How do you get the free Ray Gun on The Tomb?
Buy Death Perception, find a shovel and dig the glowing mounds for Ancient Gems (about one per round), place three at the bull statue beside Death Perception and kill the two Doppelghasts that spawn. Note it is not a boss weapon — its explosive damage does nothing to the Sentinel Artifact.
How do you get the golden Tier III armor on The Tomb?
In the Nexus, break the two crates by the Jugger-Nog side for two statue heads and fit them to the headless statues in the Dig Site. Activate one for a Blood Sacrifice and kill its three empowered Shock Mimics, refill armour, then do the second statue's three Doppelghasts. Collect the renewable Golden Armor in the Roman Mausoleum.
What is the Tomb song?
The song is 'Dig'. Activate the three Mister Peeks headphones — one in the Shrine of the Hierophants, one in the Ossuary, and one in the Dark Aether Nexus — to start the track.
Visual guides & sources
Screenshots and exact part locations live in these — open one on a second screen.