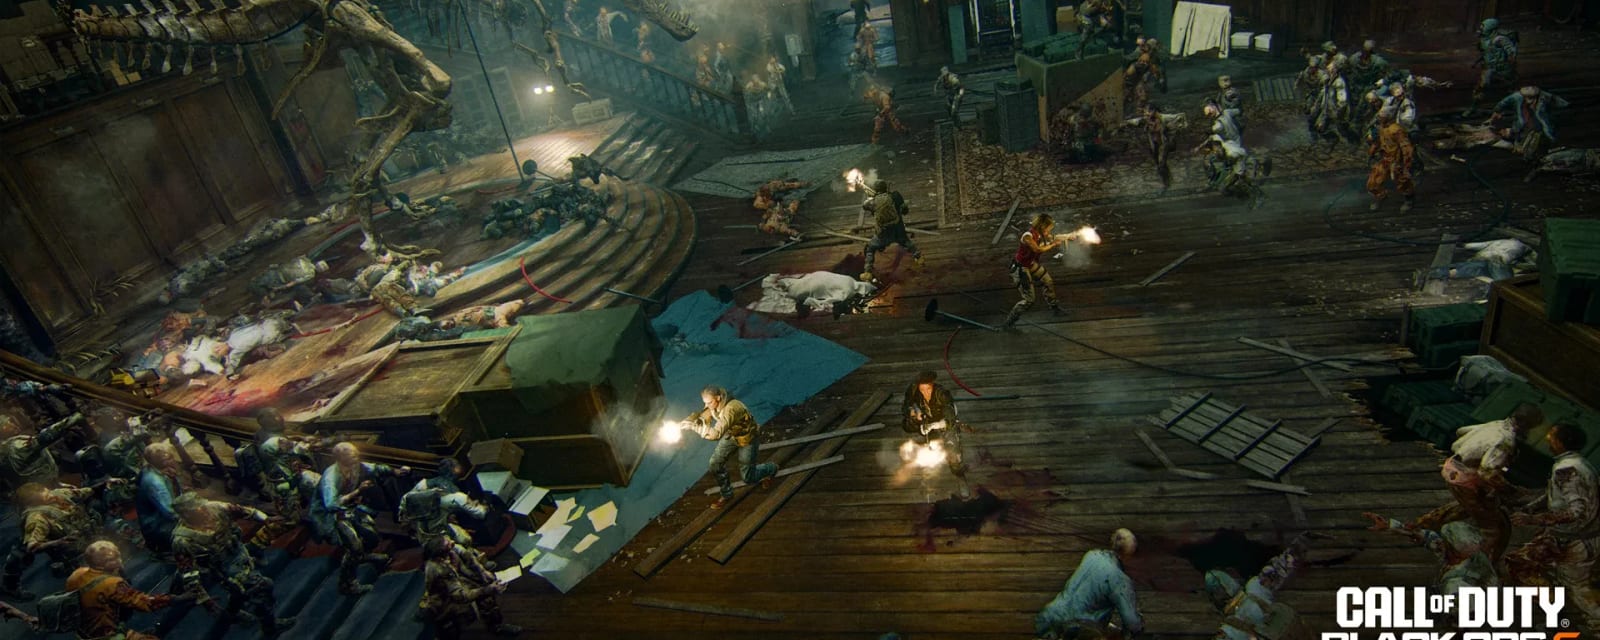

Shattered Veil
The Season 3 mansion map — a fog-bound estate over the Project Janus Mainframe. Repair the Banquet Hall elevator, claim the Ray Gun Mark II and build all three variants (Wraith Fire, Rot Blight, Preservation), clear their three Liminal rituals, then bring down the four-phase Z-Rex. Fully solo-capable, but every variant and every ritual is required even in solo.
Quick answers
Shattered Veil is a Black Ops 6 Zombies map — a fog-bound mansion estate over the Project Janus Mainframe. Its 10-step main quest has you repair the elevator, claim the Ray Gun Mark II and build all three variants — Wraith Fire, Rot Blight and Preservation — clear their three Liminal rituals, then bring down the four-phase Z-Rex. Rated Hard; 50–80 minutes, solo-capable.
Where is Pack-a-Punch on Shattered Veil?
Pack-a-Punch is in the Mainframe Chamber. Collect the fuse from the Library and the circuit board from the Director's Quarters, repair the Banquet Hall elevator from behind and call it, then take the rappel cord down the shaft into the Mainframe Chamber where Pack-a-Punch sits up the stairs.
What is the Wonder Weapon on Shattered Veil?
The Wonder Weapon is the Ray Gun Mark II, with three variants — Wraith Fire (W), Rot Blight (R) and Preservation (P). Earn the base Mk2 via the floppy-disk and chalkboard-code chain, collect three empty canisters, then charge each at its own station: the seed planters, the Serpent Mound and Shem's Henge.
Who is the boss of Shattered Veil?
The boss is the Z-Rex, a four-phase dinosaur. Hit the glowing eyes, the mouth when it opens to vomit acid, and above all the rib cage when it glows green — a Ray Gun Mk2 hit there does around 24–25k. Never stand near it, and back straight up if it chain-lunges.
Do you need Aether Shroud on Shattered Veil?
Yes — Aether Shroud is effectively mandatory. The three liminal-library parts in the final ritual can only be seen and picked up while in, or just after, an Aether Shroud. The Mainframe Chamber supplies one free single-charge Shroud if it is not your Field Upgrade.
How many steps is the Shattered Veil Easter egg?
The Shattered Veil main quest is 10 steps and takes roughly 50–80 minutes, rated Hard and solo-capable for 1–4 players. Every Ray Gun Mk2 variant and every Liminal ritual is required even in solo.
Map & Key areas
The map layout first, then the areas worth knowing by name. Map imagery © Activision, self-hosted.
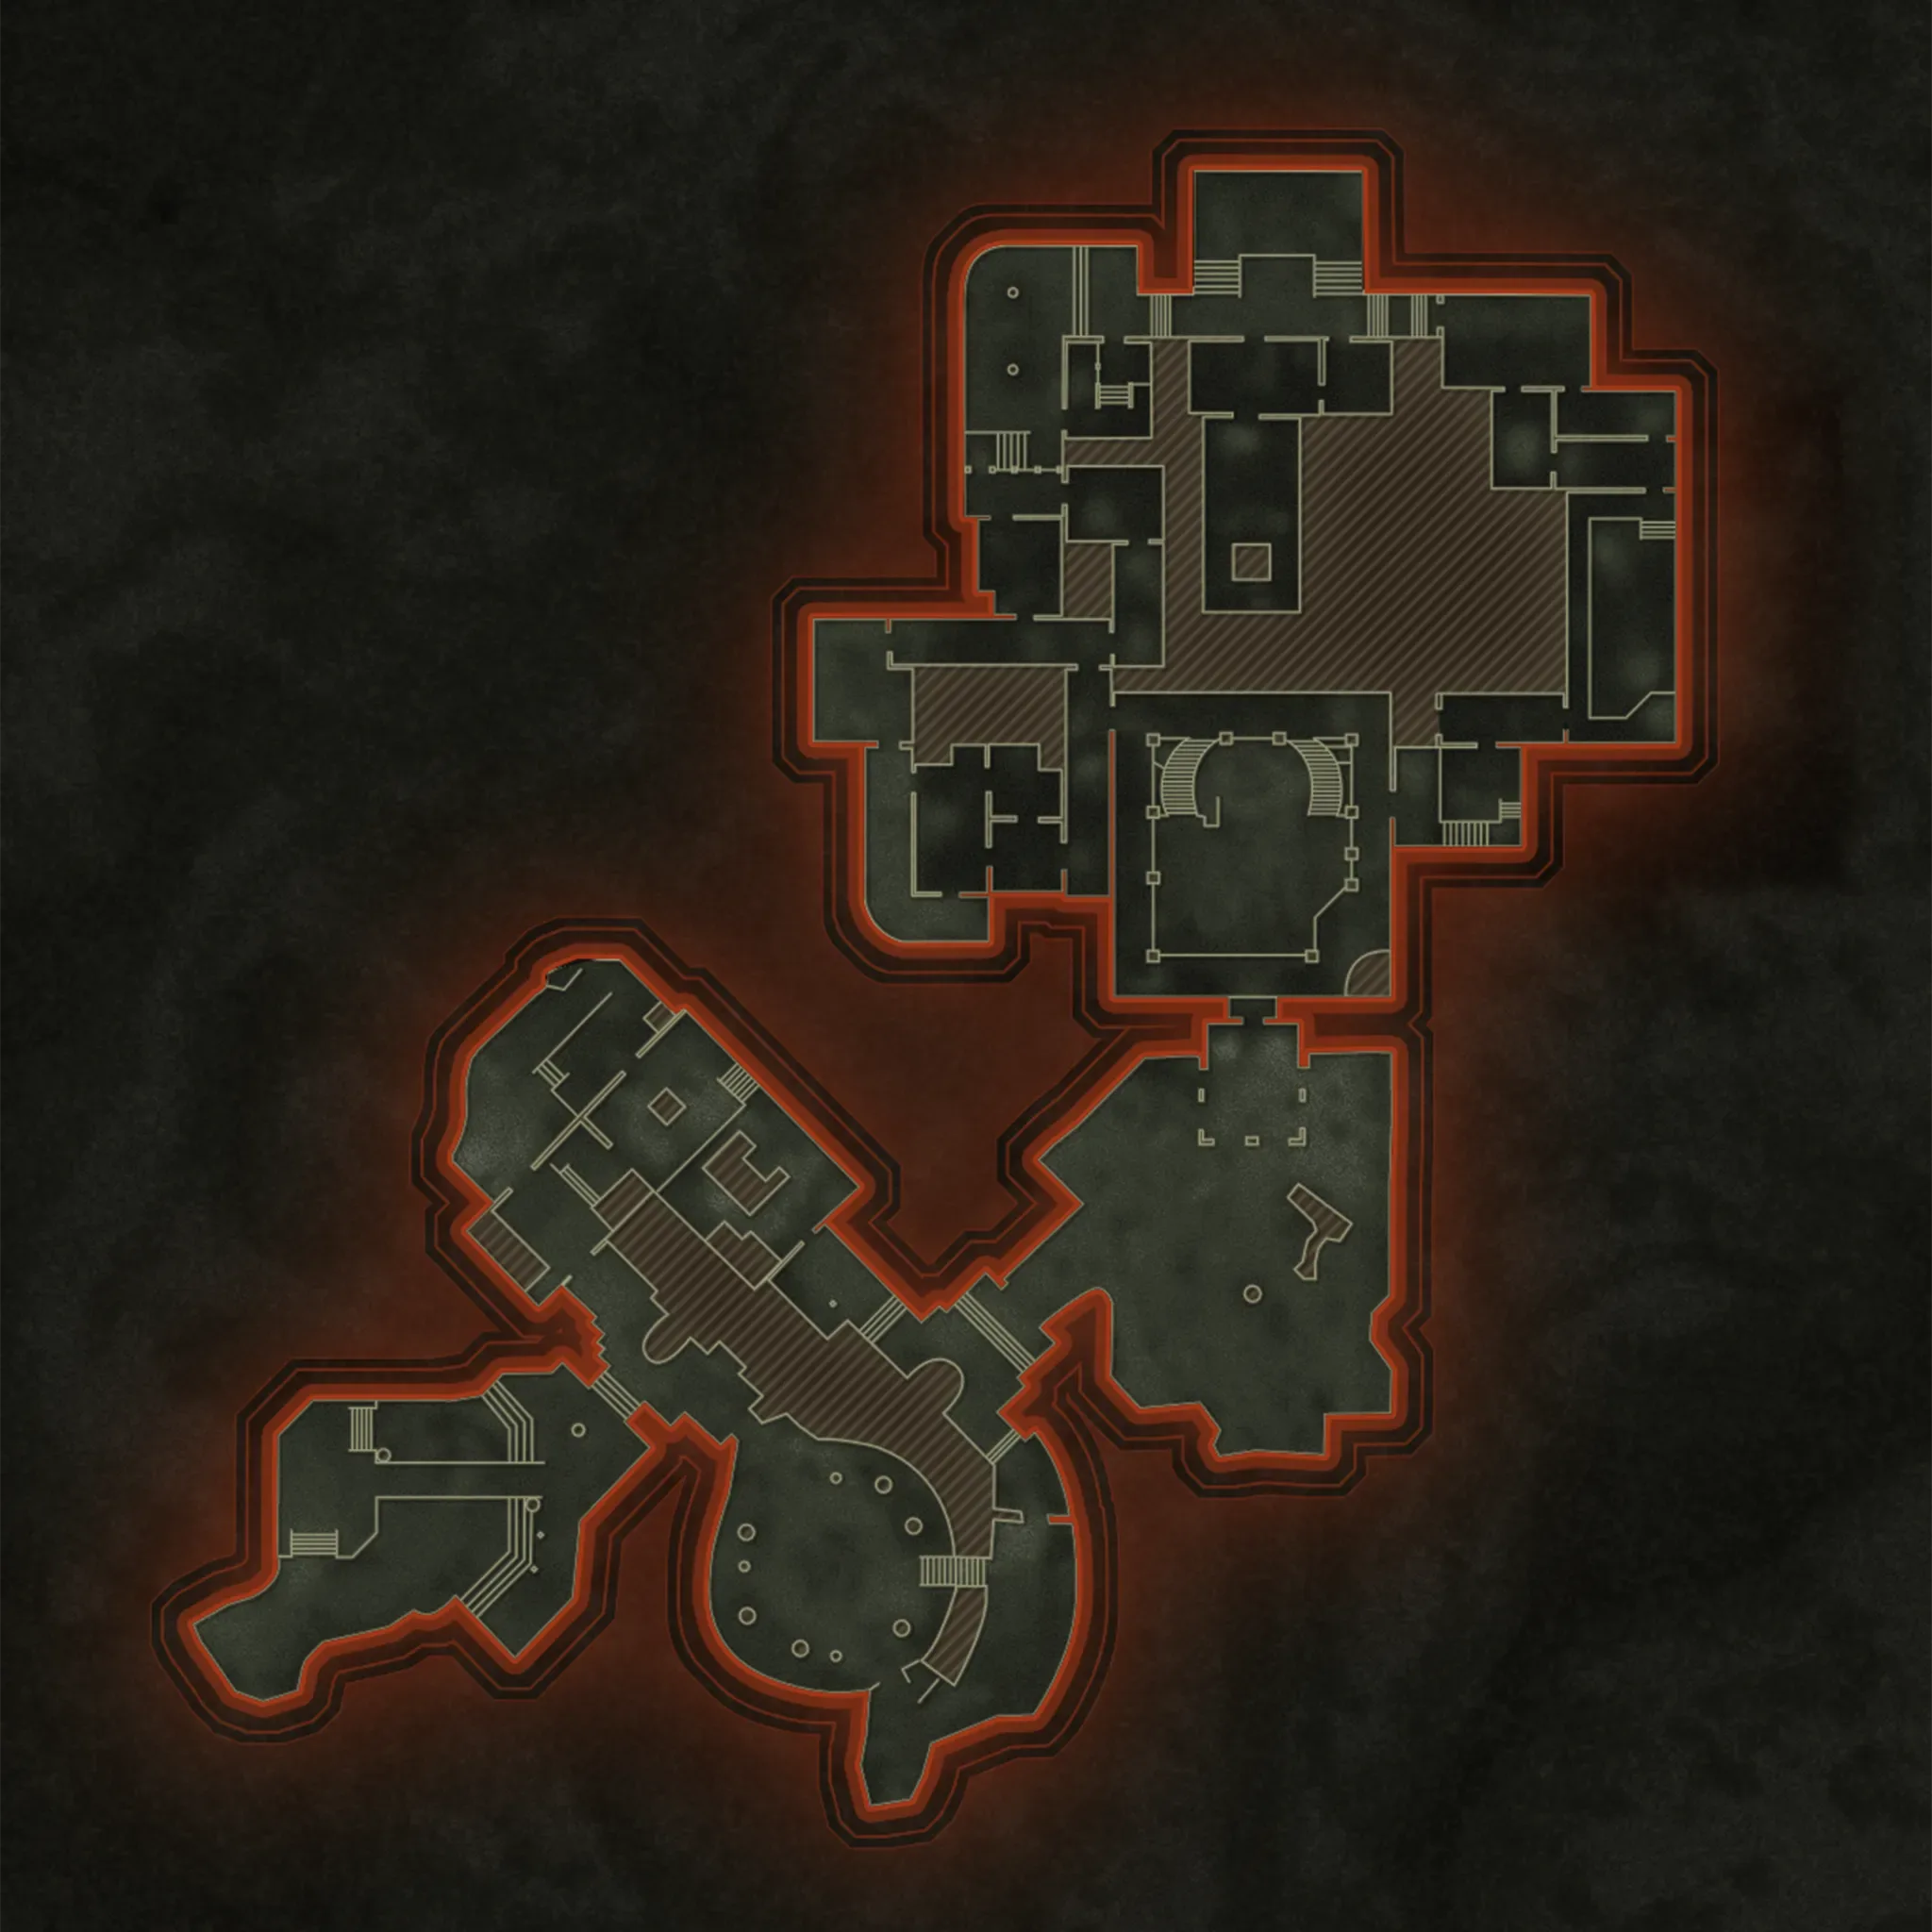
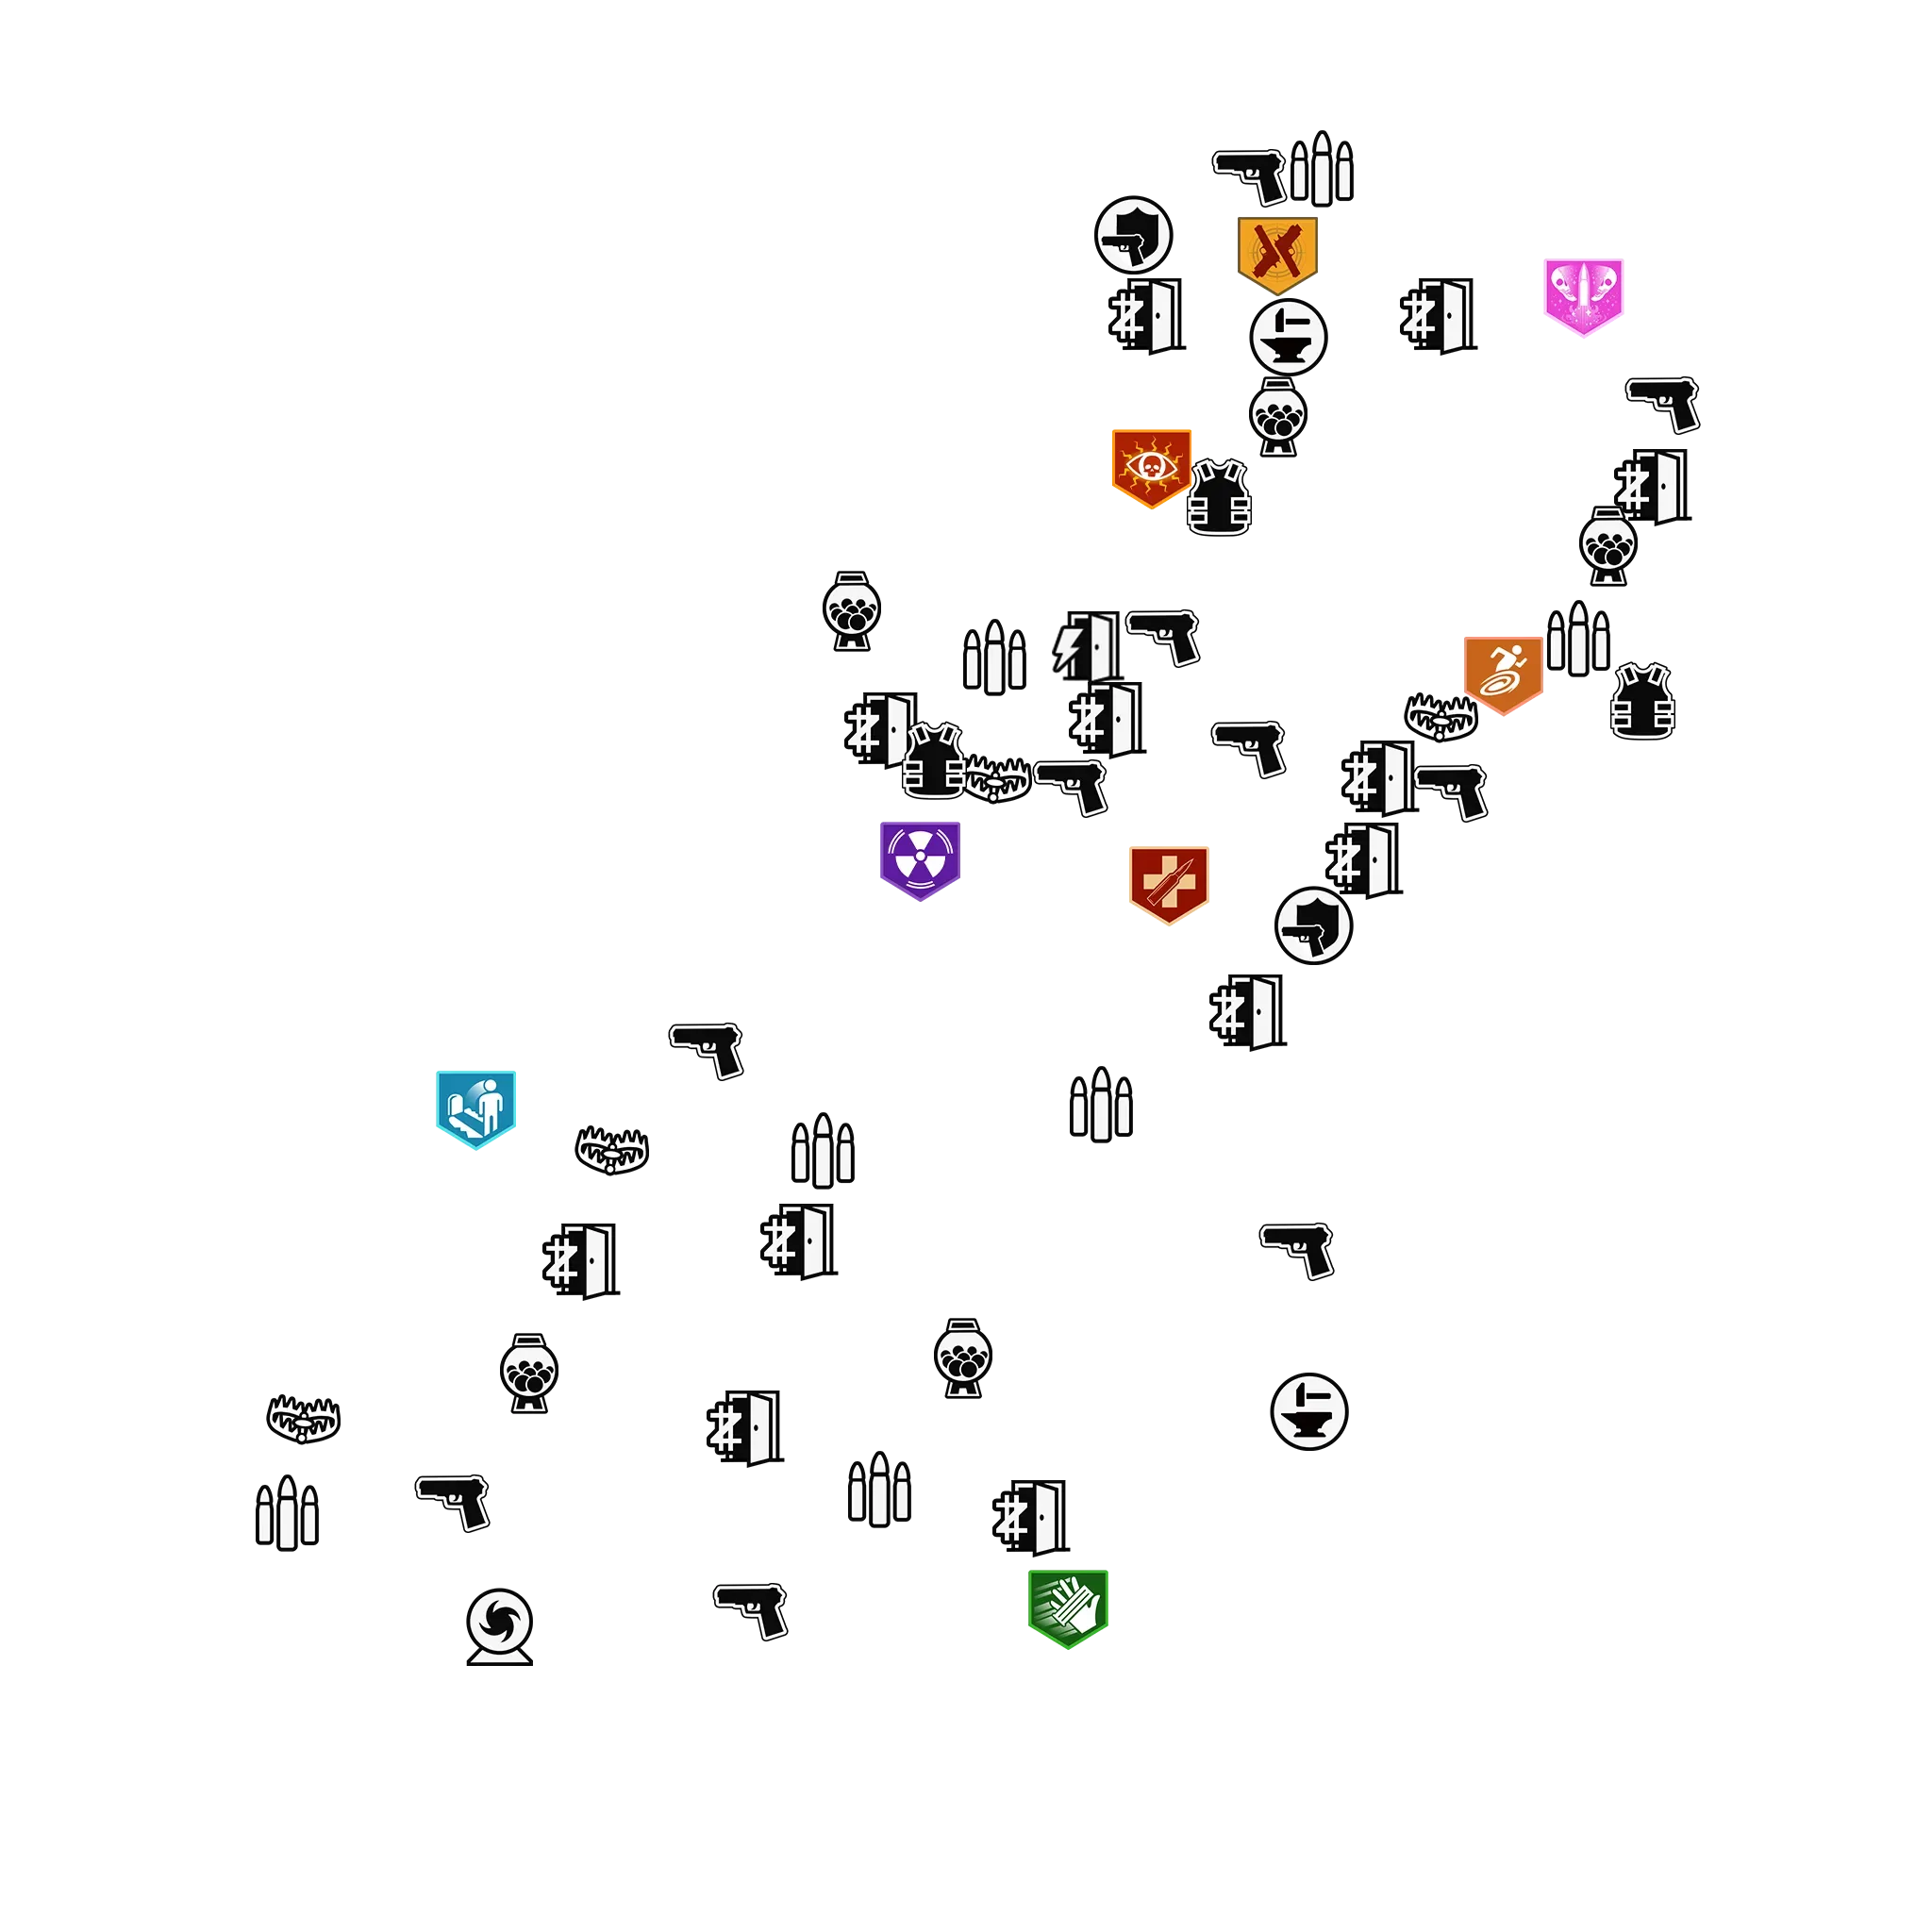
Tap Show labels for the point-of-interest names. Pinch or double-tap to zoom in.
Mansion / Banquet Hall
Repaired elevator, Preservation Liminal portal & computer, the per-match safe-number sets, boss-route access.
Library / East Foyer / Nursery
Fuse, Floppy-Disk fax computer, Rot Blight portal, the Nursery protocol chalkboard, Aether-Shroud documents.
Director's Quarters / West Hall
Circuit Board, Preservation workbench, the Antler safe right of Death Perception.
Service Tunnel / Supply Depot
Protocol keypad cell, HVT arm, Armory Ray Gun case, A/B gas valves, Wraith Fire workbench, Serpent Mound.
Conservatory / Garden Pond
Blue crystal, Rot Blight machine + four seed propagators, lion-fountain Reflector, Rot workbench.
Shem's Henge / Distillery / Mainframe Chamber
Wraith rock-siphon; Distillery Wraith portal & the Bell bar step; Pack-a-Punch, Lab Technician, free Shroud charge, Z-Rex console.
Steps at a glance
- Library fuse + Director's Quarters circuit board → repair the elevator
- Rappel down to the Mainframe Chamber → Pack-a-Punch
- Round 10+: lab-technician zombie drops a floppy disk
- Fax the Project Janus paper → decode the word on the Nursery chalkboard
- Keypad the 4-digit code → kill the Doppelghast → take the severed arm
- Scan the arm at the Armory for a free Ray Gun Mark 2
- Collect 3 empty canisters: Kazimir window, blue crystals, gas tube
- Charge them into MKII-R (seeds), MKII-P (Serpent Mound), MKII-W (Shem's Henge)
- Trial 1 — sconce Simon Says, the bell and the Nightcap flask
- Trial 2 — three chalices → six-digit safe code → antler carving
- Trial 3 — liminal library, Aether Shroud parts and the three books
- Boss: the Z-Rex — eyes, mouth, and the glowing rib cage
Full walkthrough
Open the map and reach Pack-a-Punch
Follow the orange waypoints and open the doors toward the mansion elevator, collecting two repair parts on the way. Then go around the back of the elevator and hold interact to repair it, and call it from the front — it rises and opens with a horde inside.
Hold interact again to open the rappel cord in the shaft and descend into the Mainframe Chamber with the S.A.M. AI. Pack-a-Punch is up the stairs in that chamber.
Aether Shroud is effectively mandatory on this map — the liminal-library parts in step 10 can only be seen and picked up during or just after a shroud. Take Extra Charge, and Supercharged on Speed Cola to build charges faster.
Loadout: MrDalekJD runs the ASG shotgun, MrRoflWaffles a low-recoil AR with the crossbow launcher, Semtex or tomahawks. You will need explosive damage and tomahawks later, though both can be crafted in-match.
- Fuse — in the Library, shoot the dead maintenance-worker zombie body and take what it drops
- Circuit board — in Director's Quarters, shoot Richtofen's computer and it pops out
Earn the free Ray Gun Mark 2
Everything downstream needs a Ray Gun Mark 2. From round 10, a lab-technician zombie spawns in the Mainframe Chamber or service tunnels and drops a gold-glowing floppy disk. If you do not see it, play a few more rounds — a nuke can kill it silently, so sweep the underground floors for the disk on the ground.
Take the disk to the East Foyer — the right-hand room facing the T-Rex skeleton. Insert it into the computer in the corner, clear the wave it triggers, then read the fax machine just left of the computer and defend while it prints the Project Janus paper.
Interact with the printed paper. It contains one four-letter word in capitals — MOTH, CRAB, YETI or WORM, random every game.
The chalkboard cipher: go to the Nursery chalkboard. For each letter of your word in order, count how many letters are in the cluster containing that letter — that count is the digit. CRAB gave 9-7-2-9 in one game, YETI gave 5-4-8-2 in another. That is your four-digit code.
In the service tunnels a Doppelghast is sealed behind a glass door. Enter the code on the keypad, kill it, and take the severed arm. Carry it to the Armory and use it on the fingerprint scanner right of the Ray Gun Mk2 wall display to claim the weapon.
Shortcut: a Wonderbar! gum gives roughly a one-in-three Mk2 from the box, and box odds improve later in the game. In co-op several players can each hold one.
Shattered Veil Protocol Code Solver
Shattered Veil — Nursery chalkboardType the four-letter protocol the fax printed (CRAB / WORM / MOTH / YETI) and the six chalkboard letter-groups. The solver finds which group holds each protocol letter and reads that whole group's length — the four counts, in protocol order, are your Service Tunnel keypad code.
Collect the three empty canisters
You need three empty canisters, each later charged into a different elemental variant at a different station.
Do not overthink which is which: the empty canisters appear interchangeable — it is the charging station that decides the variant. The two creators pair them to opposite variants, which is the giveaway.
The other guide: MrDalekJD states no weapon requirement for the blue crystals at all.
Gas valves: beside the glass tube in the Mainframe Chamber, a letter — A or B, random per game — is written on the wall. In the service-tunnel pipe area, throw tomahawks at the red valve wheels so gas flows leftmost, then middle, then your letter’s valve, with the other letter’s valve off. A voice quote plays and the tube visibly fills with gas; blow it open with any explosive.
- Kazimir pull — get a Kazimir (craft one, or take the free one off the dead body in the service tunnel opposite the armour wall), then throw it directly in front of the zombie window barrier on the Rear Patio behind Double Tap. It sucks a canister out of the window
- Blue crystals — four water-pouch growths sit high up and one of the four drops a canister, purely at random, so shoot them all. Spawns: service-tunnel ceiling high on the left, Conservatory roof near Quick Revive, the mansion's left exterior wall by the Southwest Balcony roof, and the East Foyer ceiling up the right-hand staircase
- Gas tube — you need about three tomahawks (bench-crafted, or free from the tree stump in spawn, beside the Nursery bed, and right of Pack-a-Punch)
Charge the MKII-R — seeds and planters
Destroy four small orange plants with explosive damage or the base Ray Gun Mk2 to collect four seeds. Elemental variants do not work, and other guns simply pop the plant, leaving you waiting for regrowth. Grenades, Semtex and Molotovs all work. Only four of the many spawn points are active per game — they grow near grassy areas: the Conservatory at base and top level, the mansion’s left entrance, the Garden Pond by the staircase and both sides of the bridge, the West Balcony by a tree, the Southwest Balcony inside and out, the hidden corner behind Double Tap, Shem’s Henge, and the fountain sides near Quick Revive.
In the Conservatory, place an empty canister in the charging device at the top of the staircase, then plant a seed in each of the four rectangular planters.
Interact with a planted seed to start the harvest defence — infinite purple-eyed zombies attack that planter. Kill them near it until the bar gains a quarter, then move to the next. Four defences, 25% each.
Fail state: if a planter takes too much damage the seed pops out the front. Grab it fast and replant, next round if you must. Lose it entirely and you need to destroy another plant for a fresh seed.
Finish: collect the Toxic Canister, take it to the workbench near spawn, insert it, then hold interact while holding the base Mk2 to craft the MKII-R.
Charge the MKII-P — the Serpent Mound
Break the white Project Janus boxes around the map until one drops the essence-bomb part — pure luck. They are everywhere: the Armory’s left side, opposite the camper van and in the side-room corner of the service tunnel, the Southwest Balcony, West Hallway, outside the West Balcony, the T-Rex room shelf and floor, both sides of the Motor Court, Shem’s Henge, and the Conservatory.
Then pull two purple refractors — one from the Conservatory fountain near Quick Revive, one from the matching fountain on the Southwest Balcony. In the service tunnels near the tier-3 armour wall, hold interact on the rubble wall to place the essence bomb and blow open the Serpent Mound.
Inside, place the canister in the holder on the right to activate the ceiling lasers, then put one refractor on the pole opposite and the second on the lower pole left of the canister. Now bounce the beam onto three statues in turn:
Soul 1: melee the source crystal — the beam runs through to a Doppelghast statue and spawns one. Kill it.
Soul 2: melee the first refractor once so the beam rebounds into the cavern above. Carry the second refractor up the slope on the left, place it on the new laser position, melee it so it hits the second statue, then melee the source crystal and kill the Doppelghast.
Soul 3: melee the first refractor again, bring the upper refractor back to its original ground-floor pole, then melee the first refractor a couple more times until the beam goes up and bounces across the ceiling beams without touching the second refractor, landing on the third statue. Melee the source crystal — an Elite Doppelghast spawns this time.
Finish: take the Light Canister to the Director’s Quarters workbench, insert it, then hold interact with any Mk2 to craft the MKII-P.
Charge the MKII-W — Shem's Henge
Place an empty canister in the yellow device in front of Speed Cola. One or two Abominations spawn in the henge below the steps.
Do not kill them yet — you need them alive to charge the stones, and killing them early just costs you the setup.
Bait each Abomination’s beam attack onto the three small rocks around the outside of the circle — not the big stones. A zapped rock glows blue. Then bait its charge attack right next to each glowing rock, and the electrical discharge levitates it. Repeat until all three rocks are glowing and floating.
Confirmation cue: with all three floating the Abominations die and a lockdown starts — protect the central power siphon from zombies, parasites and vermin until the meter hits 100%.
Finish: take the Explosive Canister to the Supply Depot workbench underground, insert it, then hold interact with the Mk2 to craft the MKII-W.
Trial 1 — the bell and the Nightcap
Pick up the sconce part at the entrance to the elevator room and place it in the wall gap in the T-Rex room to complete an unlit lamp pair. Then Simon Says: one lamp flashes a pattern and you hold interact on the lamps to repeat it exactly — holding lights a lamp, stepping away submits. Three rounds, each adding one to the previous sequence, random every game and sometimes all one side. Finishing round three opens a hidden wall into the Distillery.
Charge the portal. While holding the MKII-W, interact with the device next to the portrait, then kill zombies with that weapon until the bar hits 100% — souls visibly fly into the painting. There is an ammo box nearby, and the step is timed: if it lapses, restart it. Walk through the painting; the ghost inside asks for a Nightcap.
The bell. Its spawn is randomised across the Study — behind the various glass cases, near the table, the statue, the tarpaulin. Smash all the glass and sweep the room holding interact; solo, a save-and-quit rerolls it. Get Brain Rot on any weapon from an Arsenal machine. At the Overlook bar upstairs in the T-Rex room, place the bell on its ghostly outline, brain-rot a zombie next to the bar, then tap the bell — the zombie hops the bar, pours a drink, and the Nightcap flask appears.
Return through the portal and place the flask on the plinth. Everyone is teleported in for a lockdown against an elite with a shield bubble that only the MKII-W can break. Break, dump damage, repeat four or five cycles. Then hold interact on the Sentinel Artifact.
Co-op gotcha: someone must still be holding the MKII-W or the step cannot start or progress.
The other guide: MrDalekJD instead finds the sconce part in a box outside the Banquet Hall and slots it next to Juggernog in the Grand Foyer.
Trial 2 — chalices and the safe
Holding the MKII-P, interact with the computer next to the portrait in the Banquet Hall, charge the portal to 100% with MKII-P kills, and step through. Inside, note the three portraits with symbols and pick up the red Ritual Elixir bottle at the end of the dining table.
Now find three blood chalices around the map. Interacting with each spawns an Elder Disciple plus adds — kill everything, and a red symbol appears above the cup while a two-digit number appears back in the Banquet Hall.
The code: back in the Banquet Hall, read the three two-digit numbers off the left, back and right walls, left to right for a six-digit code, random every game. The safe is in the West Hallways in the Director’s Quarters wing — enter it left to right and take the Antler Carving.
Return to the liminal banquet hall and place the part. Lockdown against a shielded elite whose bubble only the MKII-P breaks. Kill it, then hold interact on the Sentinel Artifact.
The other guide: MrDalekJD reads the two-digit numbers off the portraits themselves rather than the walls.
- Cup 1 — the wine-barrel room, on the side
- Cup 2 — the Overlook sofa opposite the T-Rex skeleton, up the stairs
- Cup 3 — on the bench in Garden Pond; its Disciple spawns on the bridge
Trial 3 — the liminal library
Holding the MKII-R, interact with the computer left of the Library portrait and charge the portal to 100% with MKII-R kills, then enter. The ghost inside gives audio clues to three items — the spawns are randomised per game, so actually listen to him.
The catch that defines this step: all three parts exist in the real world and can only be seen and picked up while in, or just after, Aether Shroud. Pop shroud and sweep several candidate spots per charge; Power Keg and Arsenal Accelerator help enormously. Solo, a save-and-quit rerolls the spawns if a part will not appear.
With all three parts, three books glow white on the real-world Library bookshelf. Activate them in the correct order until each glows blue.
Worth trying first: MrRoflWaffles’ symbol order — sideways six, then the circle with a line through it, then three dots. If that fails, let the books reset after about thirty seconds and try another order. Wrong or slow input only resets them; there is no other penalty.
The bookshelf opens a secret door — take the part inside. All players then enter the liminal library and place it, with at least one player holding the MKII-R. Kill the shielded elite, whose bubble only the MKII-R breaks, and hold interact on the Sentinel Artifact. It is now fully charged.
- Fireplace part — one of the East Foyer, Study, or Banquet Hall fireplace left of the elevator
- Audio recorder — the Overlook bar area or the desk left of it, on the briefcase just outside the Library portal, or in front of the portrait on the sofas
- Ledger — the desk at the top of the East Foyer staircase next to a briefcase, or the Study desk and table by the fireplace
Boss fight — the Z-Rex
Prep: weapons at tier-3 Pack-a-Punch and gold rarity, a Chopper Gunner crafted, Kazimirs or decoys, self-revives, and tens of thousands of points spare — there are no regular Max Ammo drops in the arena, so you buy from the ammo boxes. Perkaholic, Raindrops, Near-Death Experience and Shields Up all earn their slot. The Wunderwaffe DG-2 from the box is superb crowd control.
Interact with the panel in front of the S.A.M. AI in the Mainframe Chamber — team vote in co-op — for the cutscene and teleport.
Crit spots: the glowing eyes, the mouth when it opens to vomit acid, and above all the rib cage. When it eats a glowing zombie or sits to spawn adds, the ribs glow green and a Ray Gun Mk2 hit there does around 24–25k damage. Do not dawdle on that window — leave it too long and it spews green goo that permanently shrinks the arena.
Movement: never stand near it — the tail swipe will catch you. Rotate the arena continuously in one direction, dodging acid pools. If it chain-lunges at you, move backwards — strafing will not dodge it. If it flings you forward it halves your health, so back off immediately.
Phase transitions at 75%, 50% and 25%: the boss retreats to the cliff face and add-waves spawn for about 45 seconds each. MrRoflWaffles notes it stays damageable for a few seconds at the start of each retreat — sneak extra shots in. Each phase brings more and larger acid pools, faster movement and better tracking.
Chopper Gunner: solo, save it for the final phase — it trivialises it. Co-op, one per phase from phase 2 or 3 onward. The Wunderwaffe handles the add waves.
Side Easter Eggs & extras
Everything beyond the main quest. Tap any entry to open the full how-and-where breakdown.
Mister Peeks headphones music EE
Activate the three Mister Peeks headphones around the estate — one is under the Conservatory stairs/box area — to trigger the map's musical Easter egg. Exact pins and the track title vary/were not confirmed in-source; verify against a live interactive map.
Wunderwaffe DG-2 — smoke-restoration quest
After completing at least one full Liminal ritual, follow the visible smoke/cloud route, rotate the required interactions counter-clockwise, and shoot the final cloud for a free Wunderwaffe DG-2. Only one player can claim it.
115 Bell
After opening the Distillery and obtaining the Bell, ring it 115 times for the free-perk reward event.
Mister Peeks bodyguard
Collect the six bodyguard parts — Garden Pond, Conservatory, Shem's Henge, Bottlery, Rear Patio, Library — then repair the figure at its assembly point. The friendly Vermin assists with damage and revives and can evolve via its Donut/feeding progression. Parts are tiny — use a live map for exact pins.
Aether Shroud canister
The Mainframe Chamber table provides one free single-charge Aether Shroud — grab it for the Ritual 3 documents if Shroud is not your Field Upgrade.
S.A.M. trap · Round 100 Z-Rex · free power-ups
Complete the S.A.M. target/trap chain to add the map trap. A separate high-round interaction can summon a challenge Round-100 Z-Rex (not required — do not attempt during setup). Shoot the hidden map props for free Nuke, Max Ammo, Full Power, Double/Bonus Points.
Interactive solvers
Every solver for Shattered Veil, in the order you meet them. Each also appears inside its step in the walkthrough above — use whichever is handier. Browse every Zombies solver →
Shattered Veil Protocol Code Solver
Shattered Veil — Nursery chalkboardType the four-letter protocol the fax printed (CRAB / WORM / MOTH / YETI) and the six chalkboard letter-groups. The solver finds which group holds each protocol letter and reads that whole group's length — the four counts, in protocol order, are your Service Tunnel keypad code.
Recommended loadouts
Three strong picks for this map — the map's Wonder Weapon plus reliable box/wall options. Each weapon lists a full recommended attachment build and the perks to pair with it, every perk shown with its Major and Minor augment. Push weapons to Legendary rarity and Pack-a-Punch; augment/attachment metas shift with balance patches, so treat these as a strong current baseline.
Ray Gun Mark II-W — Wraith Fire (PaP III)
Boss & shielded HVT damage+The strongest general Z-Rex damage choice and the SMG-pattern variant: fastest fire rate, lays persistent fire pools on rapid kills. Mandatory to break the Ritual-2 Mangler shield. Keep it fed and topped for the final phases.
Attachments
- —Wonder Weapon — no Gunsmith attachments
Perks & augments
- Jugger-NogMajorReactive Armor — plate breaks stun nearby zombiesMinorDurable Plates — tougher armour
- Speed ColaMajorClassic Formula — even faster reloadsMinorQuick Swap — faster weapon swaps
- Deadshot DaiquiriMajorDead Again — crits can add a bullet to the magMinorDead Break — extra armour damage
- Stamin-UpMajorStalker — faster movement while aimingMinorHot Foot — speed burst on equipment kills
- PhD FlopperMajorPhD Slider — slide into a group to detonateMinorTribologist — longer, faster slides
- Death PerceptionMajorDeath Stare — chance to instantly drop wounded specialsMinorBird's-Eye View — faster minimap scan
Ray Gun Mark II-R / II-P (PaP III)
Ritual-locked utility+Rot Blight (marksman-pattern, penetrating toxic rounds) breaks the Ritual-3 Amalgam shield; Preservation (Light) breaks the Ritual-1 Elder Disciple shield. Build all three — each is required — but swap to Wraith Fire once its ritual registers.
Attachments
- —Wonder Weapon — no Gunsmith attachments
Perks & augments
- Jugger-NogMajorReactive Armor — plate breaks stun nearby zombiesMinorDurable Plates — tougher armour
- Speed ColaMajorClassic Formula — even faster reloadsMinorQuick Swap — faster weapon swaps
- Stamin-UpMajorDasher — longer tactical sprintMinorHot Foot — speed burst on equipment kills
- Elemental PopMajorElectric Cherry — shock burst on reloadMinorChill Berry — faster Ammo-Mod cooldowns
- PhD FlopperMajorPhD Slider — slide into a group to detonateMinorTribologist — longer, faster slides
- Quick ReviveMajorDying Wish — brief invulnerability on lethal hitsMinorSlow Death — longer last-stand timer
XMG (Legendary · PaP III)
Add-clear & arena ammo farming+Keep a dependable anchor LMG at Tier III rarity: it clears zombies between Z-Rex damage windows and farms the ammo drops the arena needs (there are no Max Ammo rounds). A high-rarity Tier III gun outlasts a low-rarity Wonder Weapon.
Attachments
- OpticKepler Microflex
- MuzzleSuppressor
- BarrelCHF Barrel
- UnderbarrelRanger Foregrip
- MagazineExtended Mag II
- Fire ModsRapid Fire
- Rear GripCQB Grip
- StockInfiltrator Stock
Perks & augments
- Jugger-NogMajorReactive Armor — plate breaks stun nearby zombiesMinorDurable Plates — tougher armour
- Speed ColaMajorClassic Formula — even faster reloadsMinorQuick Swap — faster weapon swaps
- Deadshot DaiquiriMajorDead Again — crits can add a bullet to the magMinorDead Break — extra armour damage
- Stamin-UpMajorDasher — longer tactical sprintMinorHot Foot — speed burst on equipment kills
- PhD FlopperMajorPhD Slider — slide into a group to detonateMinorTribologist — longer, faster slides
- Quick ReviveMajorDying Wish — brief invulnerability on lethal hitsMinorSlow Death — longer last-stand timer
Recommended kit & gum picks
Aether Shroud is effectively mandatory here — Ritual 3 (Nuclear Plant Report) needs it — so build the kit around it. Weapons and the Ray Gun Mark II variants are in Recommended loadouts above.

Aether Shroud
Needed for the Nuclear Plant Report ritual, and the safest cover for the Ray-Gun-variant builds and Z-Rex.

Dead Wire
Stuns and strips the Lab Technicians and Manglers during the build steps.

Napalm Burst
Burning area damage for the ritual holds.

Shatter Blast
Explosive shrapnel chews Z-Rex and its packed adds across the four phases.

Frag Grenade
Reliable clear for the canister and ritual defences.

Monkey Bomb
Distraction bait during the three rituals and the boss.

Kazimir Grenade
Needed for the canister pull at the Double Tap window; a free one sits on a corpse in the service tunnel. Tomahawks and Semtex also have quest uses, so spawn with explosive damage of some kind.

Perkaholic
UltraEvery perk at once.

Phoenix Up
LegendaryRevive with all perks kept.

Wall Power
LegendaryNext wall-buy comes Pack-a-Punched.

Dead Drop
EpicMore salvage and equipment for ~5 min.

Free Fire
EpicNo ammo for 60s on Z-Rex.

Shields Up
RareRefills armour at 2× strength for 3 min — the gum both creators bring on every map, and blue rarity so you will actually have it.

Wonderbar!
UltraYour next box spin is a Wonder Weapon — both creators use it to skip the Wonder Weapon quest gate.

Power Keg
RareFeeds Aether Shroud charges — and Shroud is what gates the hidden liminal-library parts.

Arsenal Accelerator
RareThe other Shroud-charge gum. MrRoflWaffles pairs both specifically for the shroud-only part hunts.
Perkaholic
UltraFull perks for whoever pops it.

Nowhere But There
EpicTeleport to a downed team-mate and revive nearby.
Free Fire
EpicNo ammo for 60s on the boss.

Temporal Gift
RareExtends your next timed power-up.
Dead Drop
EpicSalvage and equipment for the squad.
Per-map augments
The Major + Minor augment to run on each core perk for this quest. BO6 gives 3 Major and 3 Minor options per perk — pick one of each; these are tuned to this map's boss and steps. Augments unlock at Level 11; metas shift with patches, so treat as a strong baseline. Per-map augment recs are ground no competitor covers.
 Reactive ArmorMinor
 Durable Plates
 Phantom ReloadMinor
 Quick Swap
 Dead AgainMinor
 Dead Break
 DasherMinor
 Hot Foot
 PhD SliderMinor
 Tribologist
 Dying WishMinor
 Slow Death
Calling cards on this map
Cosmetic calling cards you can earn on this map. ⏳ marks time-limited main-Easter-Egg cards — miss the window and they're gone for good. Global Dark Ops challenge cards are in the reference section below.

Main-quest completion card
Main EEComplete the Shattered Veil main quest.
Exact card name not yet confirmed.
⏳ Time-limited — only awarded if you finish before Directed Mode is added for this map; permanently missable afterwards.
GobbleGum reference — Black Ops 6
All 41 Black Ops 6 GobbleGums by rarity — Rare, Epic, Legendary, Ultra and the cosmetic Whimsicals. They drop at end-of-round and you hold up to three. Filter by rarity.

Kill Joy
RareDrops an Insta-Kill.

Cache Back
RareDrops a Max Ammo.
Temporal Gift
RareYour next timed power-up lasts longer.

Stock Option
RareAmmo drawn from your stockpile for 60s.

Anywhere But Here
RareRandom teleport plus a concussive blast.
Arsenal Accelerator
RareFaster Field-Upgrade charge for 5 min.
Shields Up
RareRefill armour at 2× strength for 3 min.
Power Keg
RareDrops a Full Power power-up. (Season 1)

Tactical Diffusion
RareNext Nuke is disabled and pays +2,000 Essence. (Season 3)

Respin Cycle
EpicRespin the Mystery Box to an equal or higher rarity.

Who's Keeping Score?
EpicDrops Double Points.
Free Fire
EpicNo ammo consumed for 60s.

Exit Strategy
EpicInstant exfil vote with fewer spawns.

Profit Sharing
EpicShare Essence with nearby players for 2 min.

Soda Fountain
EpicYour next perk buy grants +1 random perk.
Nowhere But There
EpicTeleport to a downed player and revive nearby.
Dead Drop
EpicIncreased salvage and equipment drops for 5 min. (Season 2)

Explosive Flourish
EpicEach reload triggers an explosion for 2 min. (Season 4)

Idle Eyes
LegendaryZombies idle for 30s.
Wall Power
LegendaryYour next wall-buy comes Pack-a-Punched.

Immolation Liquidation
LegendaryDrops a Fire Sale.
Phoenix Up
LegendaryRevive all downed players, perks kept.

On the House
LegendaryDrops a Random Perk power-up.

Wall To Wall Clearance
LegendaryWall-buys cost 10 Essence for 30s.

Crate Power
LegendaryYour next box gun comes Pack-a-Punched.

Modified Chaos
LegendaryReduced Ammo-Mod cooldowns for 2 min. (Season 2)

Support Group
LegendaryGrants an ARC-XD, Mangler Cannon, Sentry and Mutant Injection. (Season 3)

Flavor Hex
LegendaryGrants a random Ultra gum. (Season 4)
Perkaholic
UltraEvery perk on the map at once.
Wonderbar!
UltraYour next box spin is a Wonder Weapon.

Near Death Experience
UltraProximity revive with perks for 3 min.

Reign Drops
UltraDrops all core power-ups at once.

Hidden Power
UltraYour held weapon becomes Legendary rarity.

Time Out
UltraClear all enemies and end the round for 3 min. (Season 1)
Newtonian Negation · Indiegestion · Holiday Cheer · Quacknarok · Die Pitched · Rainburps · Jacked Lanterns
Whimsical7 cosmetic seasonal gums — flair only, no gameplay effect.
Field Upgrade reference (Black Ops 6)
Black Ops 6's 6 Field Upgrades — charged by kills. Each has 3 Major + 3 Minor augments (unlocked at Level 11); you equip one of each. All augment options are listed. Source: CoD Wiki + GameLeap/GameRant cross-check.

Energy Mine
A proximity energy explosion.

Healing Aura
Instant heal beams (also revives teammates in BO6/BO7).
Aether Shroud
Phase out of enemy detection.

Tesla Storm
Lightning links players, stunning and damaging enemies.

Frenzied Guard
Repair armour and taunt enemies; kills repair your armour.
Dark Flare
A penetrating shadow beam.
Dark Ops & mastery cards (Black Ops 6)
Global ‘Dark Ops’ challenge cards — hidden until completed, earnable on any map. Filter by category.

Another Round?
Dark OpsReach Round 100.

Reaper of the Undead
Dark OpsKill 1,000,000 zombies (lifetime cumulative).

Invincible
Dark OpsReach Round 30 without going down.

Social Distancing
Dark OpsReach Round 20 without taking damage.
Good Enough
Dark OpsReach Round 20 with your starting loadout only — no augments, perks, ammo mods or Field Upgrade.
Box Addict
Dark OpsBuy every Mystery Box weapon in a single game.

Gummed Up
Dark OpsConsume 25 GobbleGums in a single match.

Well That Was a Waste
Dark OpsGet downed within 10s of consuming Perkaholic.
Armed to the Teeth
Dark OpsHold 3 Pack-a-Punch-III Legendary weapons with ammo mods and 8 active perks.
Harbinger of Doom
Dark OpsKill 100 enemies with a single Scorestreak.
Sticks N' Stones
Dark OpsReach Round 25 solo using only melee / Combat Axes / Melee Macchiato.
Fatale
Dark OpsKill two Amalgams with a single shot.

Light 'Em Up
Dark OpsKill 10 ignited Elites using the Napalm Burst ‘Big Game’ augment.

Kunoichi
Dark OpsIn one Aether Shroud (Void Sheath), kill 3 standard + 2 Special + 1 Elite.

Zombies Dark Ops 100%
MasteryComplete 15 Dark Ops challenges.
Intel
24 collectibles, tracked under Barracks → Zombies Intel — 12 Audio Logs, 3 Documents and 9 Artifacts. The audio logs and two documents are fixed map pickups; the rest come from Easter eggs, the Ray Gun Mk II Liminal Trials and the main quest. Story/lore only, no gameplay reward.
Audio Logs 12
Bodily Harm
Nursery — on the piano along the wall, across from the PhD Flopper machine.
Prime Time
Security Overlook — on a terminal on the south wall, across from Pack-a-Punch.
Specter
Kitchen (east of the Banquet Hall) — on the counter in the SE corner.
Particulars
Service Tunnel — on the blue barrels at the west/back end.
Obstacles
Conservatory — on a computer desk right of Quick Revive, outside the NW greenhouse door.
A Way In
Shem's Henge — on the bench opposite the Speed Cola machine.
Within Reach
Grand Foyer — top of the right staircase, by a knocked-over lamp in the NE corner.
Cracking Eggheads
Motor Court (outside) — SW corner, on a wooden crate by a toppled truck.
Shadow Benefactor
Garden Pond (spawn) — underneath the stone bridge.
Shem's Folly
Library — top of the stairs in the north corner, before the Study.
Thesis Statement
West Balcony (right of the Rear Patio) — by the northern planted tree.
Serpent Mound
Armory (Supply Depot) — on a bench by the helmet rack, east wall.
Documents 3
Regretfully Yours
Study/Library — on top of a bookshelf on the south wall, through the Library–Study door.
My Warheads
Garden Pond — grab the tomahawk from the tree stump, then throw it at the split log leaning on the stump.
A Monstrous Proposal
Sleepwalking Easter egg — use the Study grandfather clock on round 11, go prone in the Director's Quarters bed, then follow the footprints on round 12 and kill the special zombie for the key.
Artifacts 9
Rentals
Director's Quarters — between the two pillows on the bed.
Family Portrait
Nursery — interact with the drawings on the shelf right of the PhD Flopper room.
Unwelcome Guests
Service Tunnel — throw an explosive into the back of the crashed cargo truck at the west end.
Ray Gun Mark II
The map's Wonder Weapon — multi-step quest (Floppy Disk from a Lab Technician, fax code, puzzle, Doppelghast door).
Z-Rex Tooth
Complete the main quest Easter egg (defeat the Z-Rex boss).
Hip Flask
Fats Malloy Liminal Trial — after a Brain-Rot zombie rings the Overlook bar bell, take it from a plate on the bar.
Nuclear Plant Inspection
Sam Colton Liminal Trial — interact with three ghostly books in the Library, then pick it up from a table.
Antler Carving
Josiah Shem Banquet Hall Trial — defeat three Elder Disciples, gather the red bottle & chalice numbers, then enter the code into the West Hallways safe.
Deed of Sale
Jumpscare Easter egg (round 13+) — spot the ghostly figure in windows five times with a Thermal Scope, then check the Nursery mirror.
Common Shattered Veil questions
Direct answers to the specific things players look up mid-game — part locations, puzzle steps and more.
How do you get the free Ray Gun Mark 2 on Shattered Veil?
From round 10 a lab-technician zombie drops a gold floppy disk. Take it to the East Foyer computer, read the fax for the Project Janus paper's four-letter word, decode it on the Nursery chalkboard into a four-digit code, keypad the sealed Doppelghast in the service tunnels, kill it for the severed arm, and scan the arm at the Armory.
How do you decode the Nursery chalkboard on Shattered Veil?
The fax prints one four-letter word in capitals — MOTH, CRAB, YETI or WORM, random every game. At the Nursery chalkboard, for each letter of your word in order, count how many letters are in the cluster containing that letter; that count is the digit. CRAB gave 9-7-2-9 in one game.
How do you build the three Ray Gun variants on Shattered Veil?
Collect three empty canisters — a Kazimir pull on the Rear Patio, one of the four blue crystals, and the gas tube — then charge each at its own station: the MKII-R at the Conservatory seed planters, the MKII-P at the Serpent Mound laser puzzle, and the MKII-W at Shem's Henge with the Abominations.
How do the three Liminal rituals work on Shattered Veil?
Hold the matching Ray Gun variant, charge that ritual's portal to 100% with kills, and step through for its part — the Nightcap flask, the Antler safe carving, or the three library books. Place the part and break a shielded elite whose bubble only that variant can break, then hold interact on the Sentinel Artifact.
What is the safe code on Shattered Veil?
Interact with three blood chalices around the map — each spawns an Elder Disciple and reveals a two-digit number on the Banquet Hall's left, back and right walls. Read them left to right for the six-digit code, then open the safe in the West Hallways for the Antler Carving. The numbers change every game.
How do you build the Mister Peeks companion on Shattered Veil?
Collect six bodyguard parts — from the Garden Pond, Conservatory, Shem's Henge, Bottlery, Rear Patio and Library — then repair the figure at its assembly point. The friendly Vermin assists with damage and revives and can evolve through its feeding progression.
How do you get the free Wunderwaffe DG-2 on Shattered Veil?
After completing at least one full Liminal ritual, follow the visible smoke route, rotate the required interactions counter-clockwise, and shoot the final cloud for a free Wunderwaffe DG-2 — only one player can claim it. There is also a 115 Bell perk reward: ring the Distillery bell 115 times.
Visual guides & sources
Screenshots and exact part locations live in these — open one on a second screen.