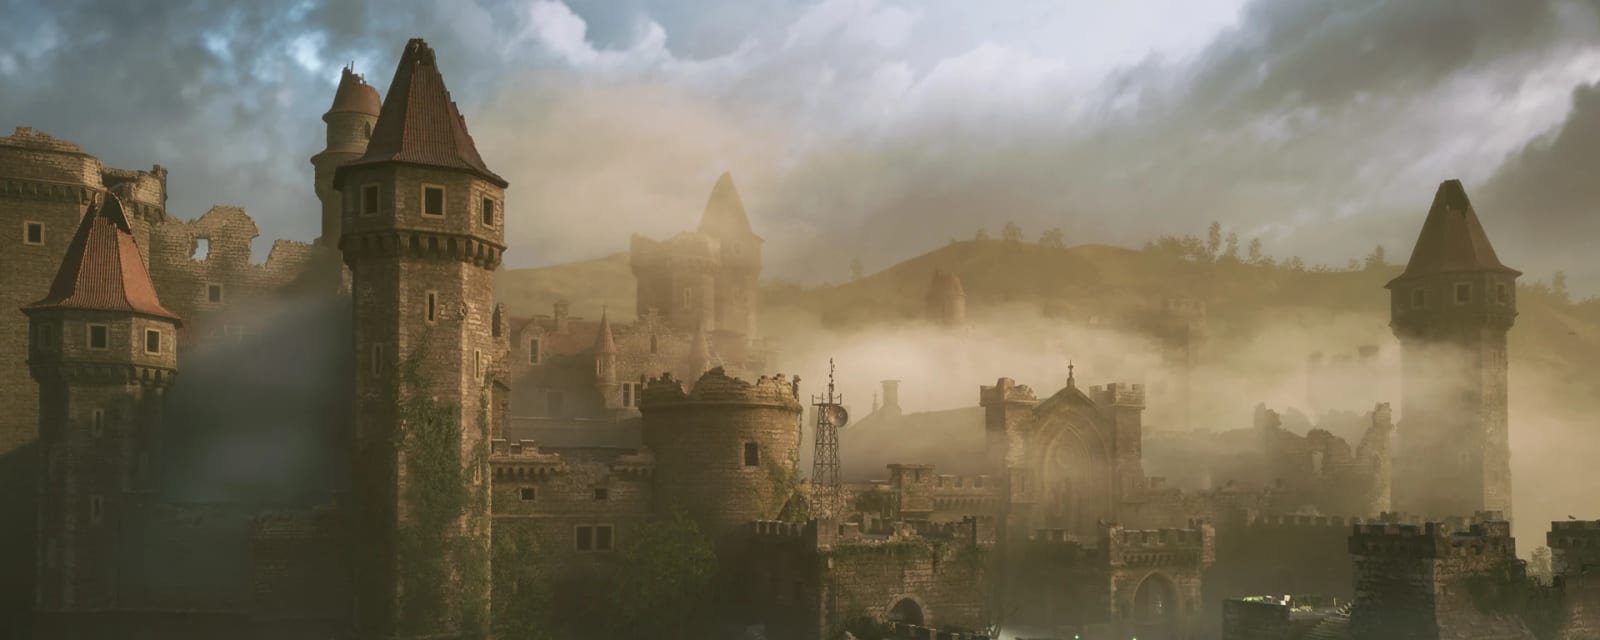

Citadelle des Morts
A ruined medieval castle in the French countryside. Free the alchemist Gabriel Krafft, claim four Bastard Swords from the Dining Hall knights and forge them into the four Elemental Swords — Fire, Lightning, Shadow and Light — then work the Tavern, Points of Power and Mystic Orb puzzles to earn the Guardian Key and defeat The Guardian. Fully solo-capable, but you must build every sword and every matching Incantation regardless of player count.
Quick answers
Citadelle des Morts is a Black Ops 6 Zombies map set in a ruined medieval French castle. Its 12-step main quest has you free the alchemist Gabriel Krafft, forge four Elemental Swords — Fire, Lightning, Shadow and Light — and their Incantations, earn the Guardian Key, then defeat The Guardian. Rated Hard; 50–80 minutes, solo-capable.
Where is Pack-a-Punch on Citadelle des Morts?
Pack-a-Punch is in the Undercroft. There is no power switch — crank the Courtyard cannon to breach the blocked door, drop into the Undercroft, shoot the three locks off the box, kill the Doppelghast for a Blood Ethereum Crystal, then insert it into the portal to raise Pack-a-Punch.
What are the Wonder Weapons on Citadelle des Morts?
The Wonder Weapons are four Elemental Swords — Fire, Lightning, Shadow and Light. Claim four basic Bastard Swords from the Dining Hall knight statues (from round 10, using helmet-zombie stamps), then upgrade each through its own lion, dragon, stag or raven ritual.
Who is the boss of Citadelle des Morts?
The boss is The Guardian, a stone Golem. Shoot its back to break the seal, then work the glowing crit spots — torso, wrists, shoulders and face. It periodically becomes an immune statue while you clear the horde, and the arena shrinks with lava in the final phase. Bring a bullet weapon, not just swords.
Do you need Melee Macchiato on Citadelle des Morts?
Yes — Melee Macchiato is mandatory. You need it to punch the cracked wall in the Undercroft water room that reveals the six-symbol panel, and there is no way around that step. Buy it from the machine on the castle battlements.
How many steps is the Citadelle des Morts Easter egg?
The Citadelle des Morts main quest is 12 steps and takes roughly 50–80 minutes, rated Hard and solo-capable for 1–4 players. Every sword and its matching Incantation must be built regardless of player count, even in solo.
Map & Key areas
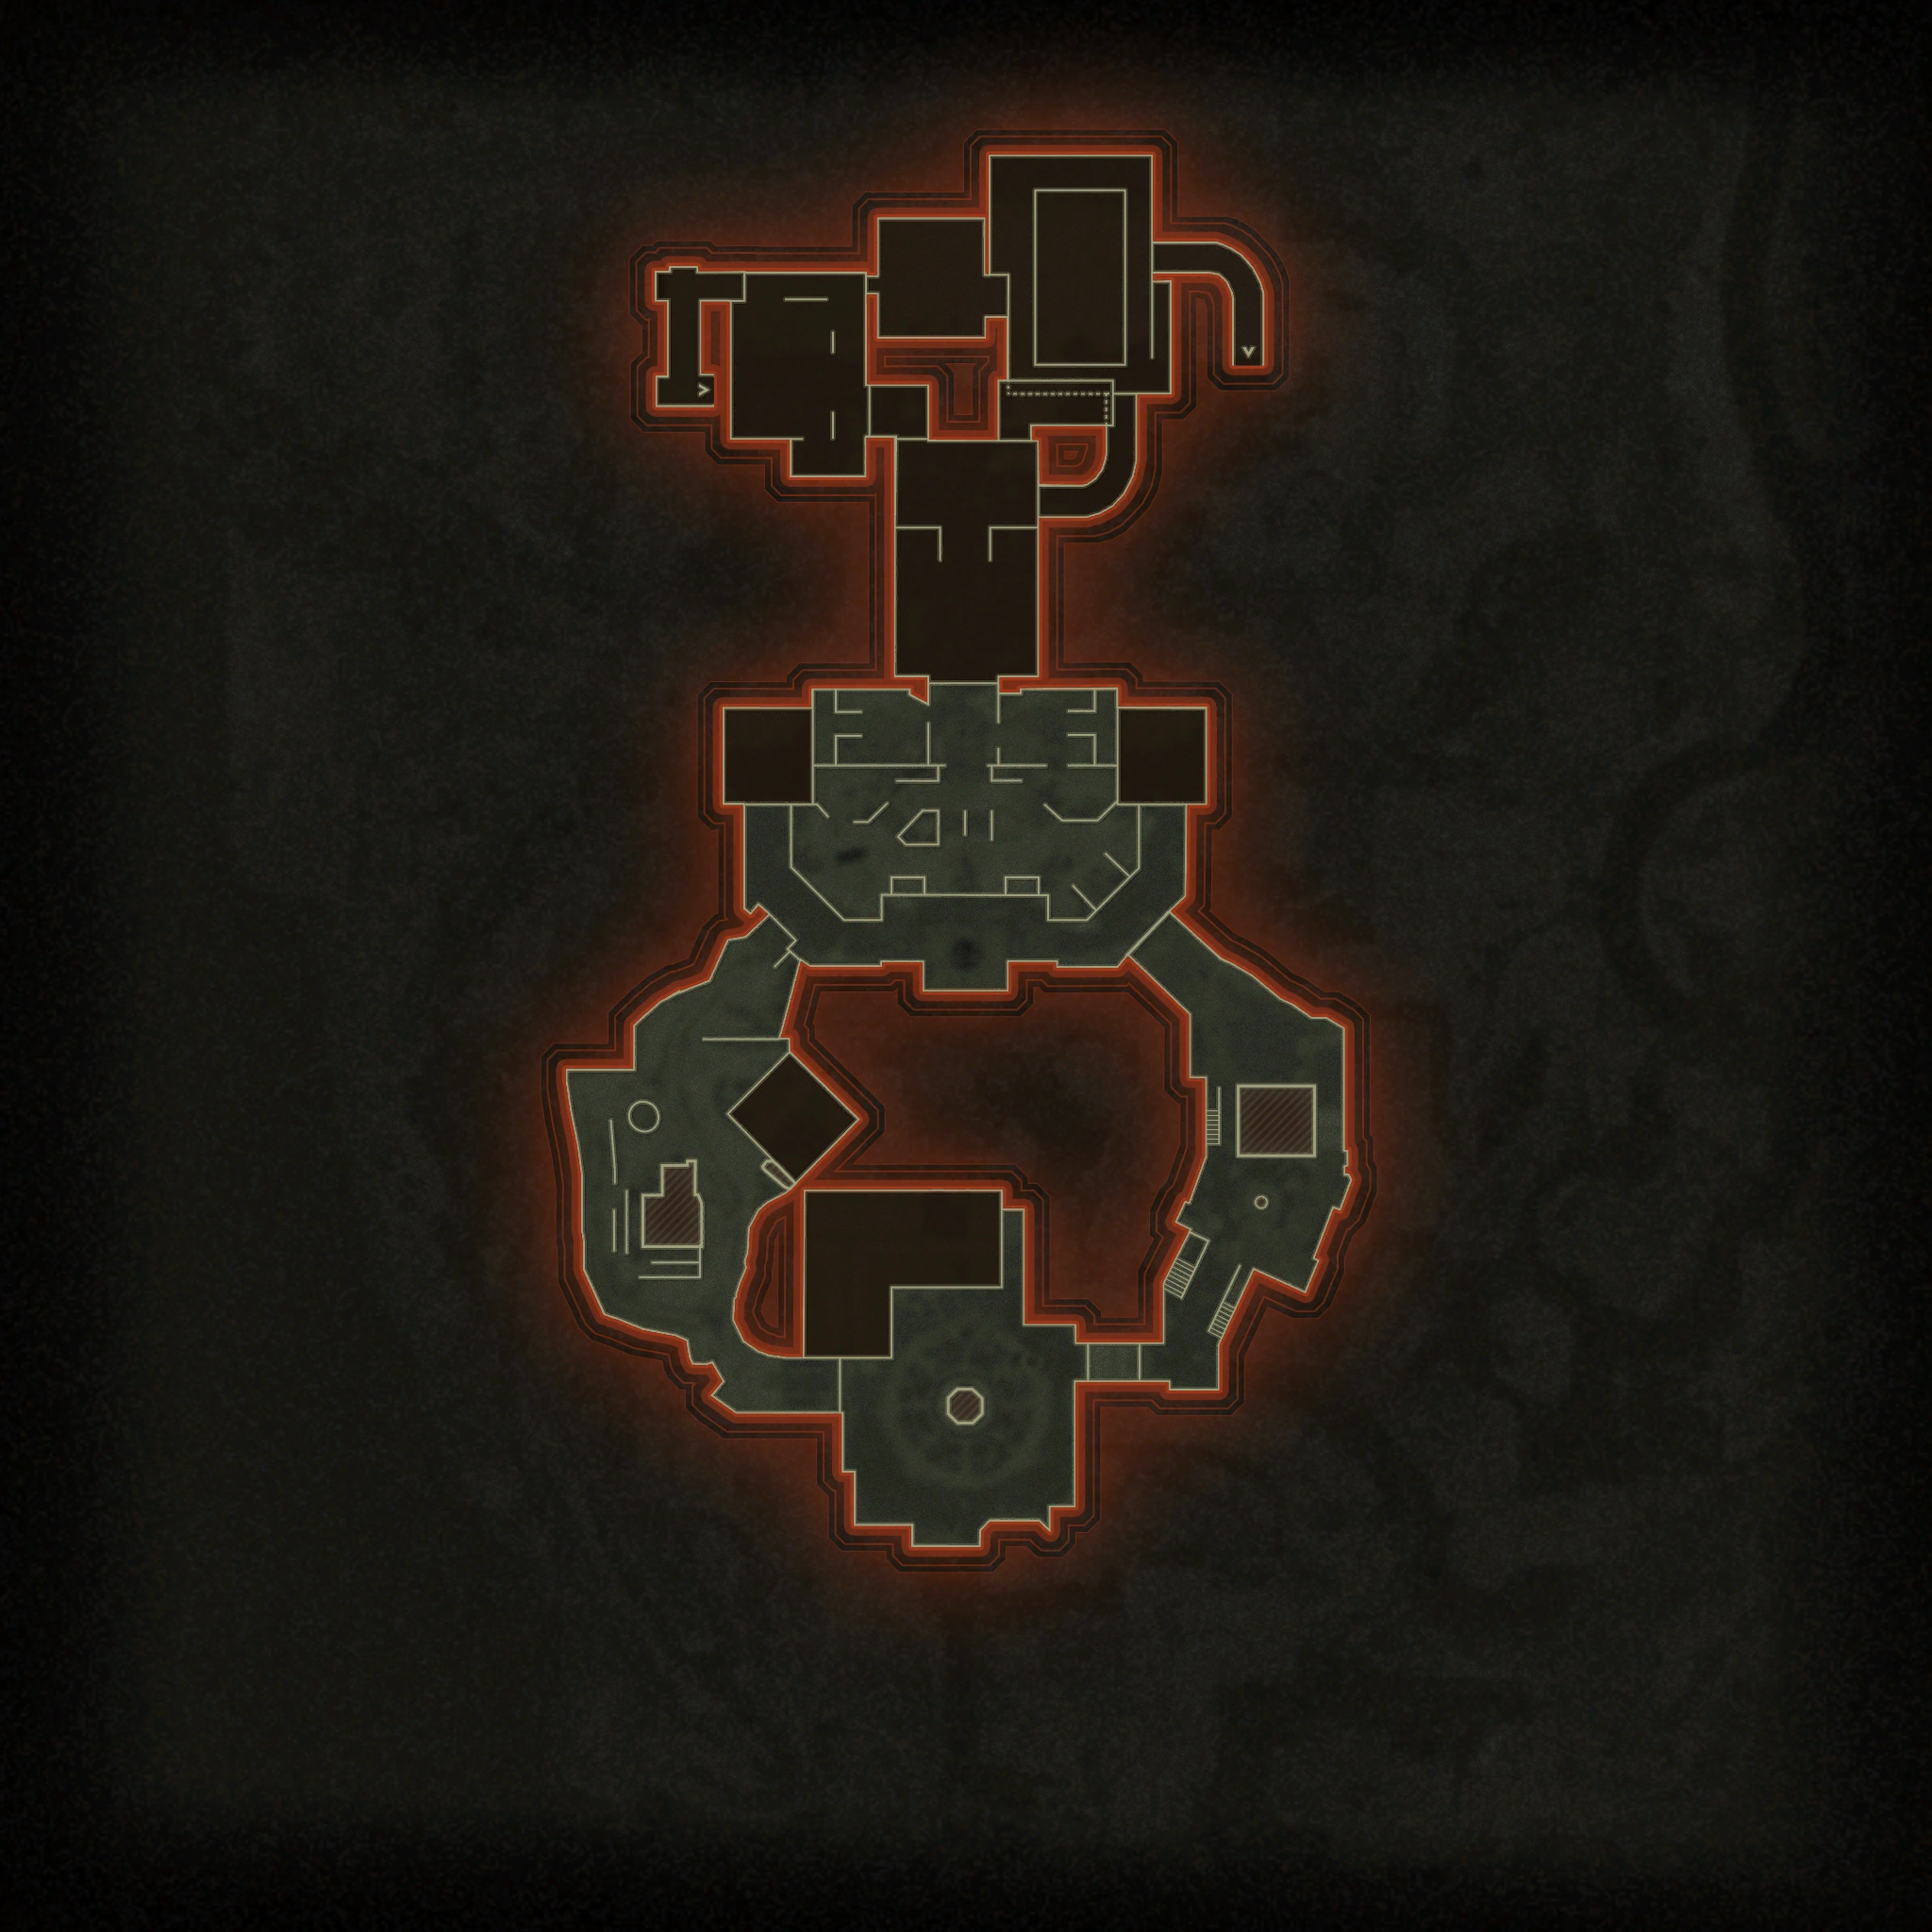
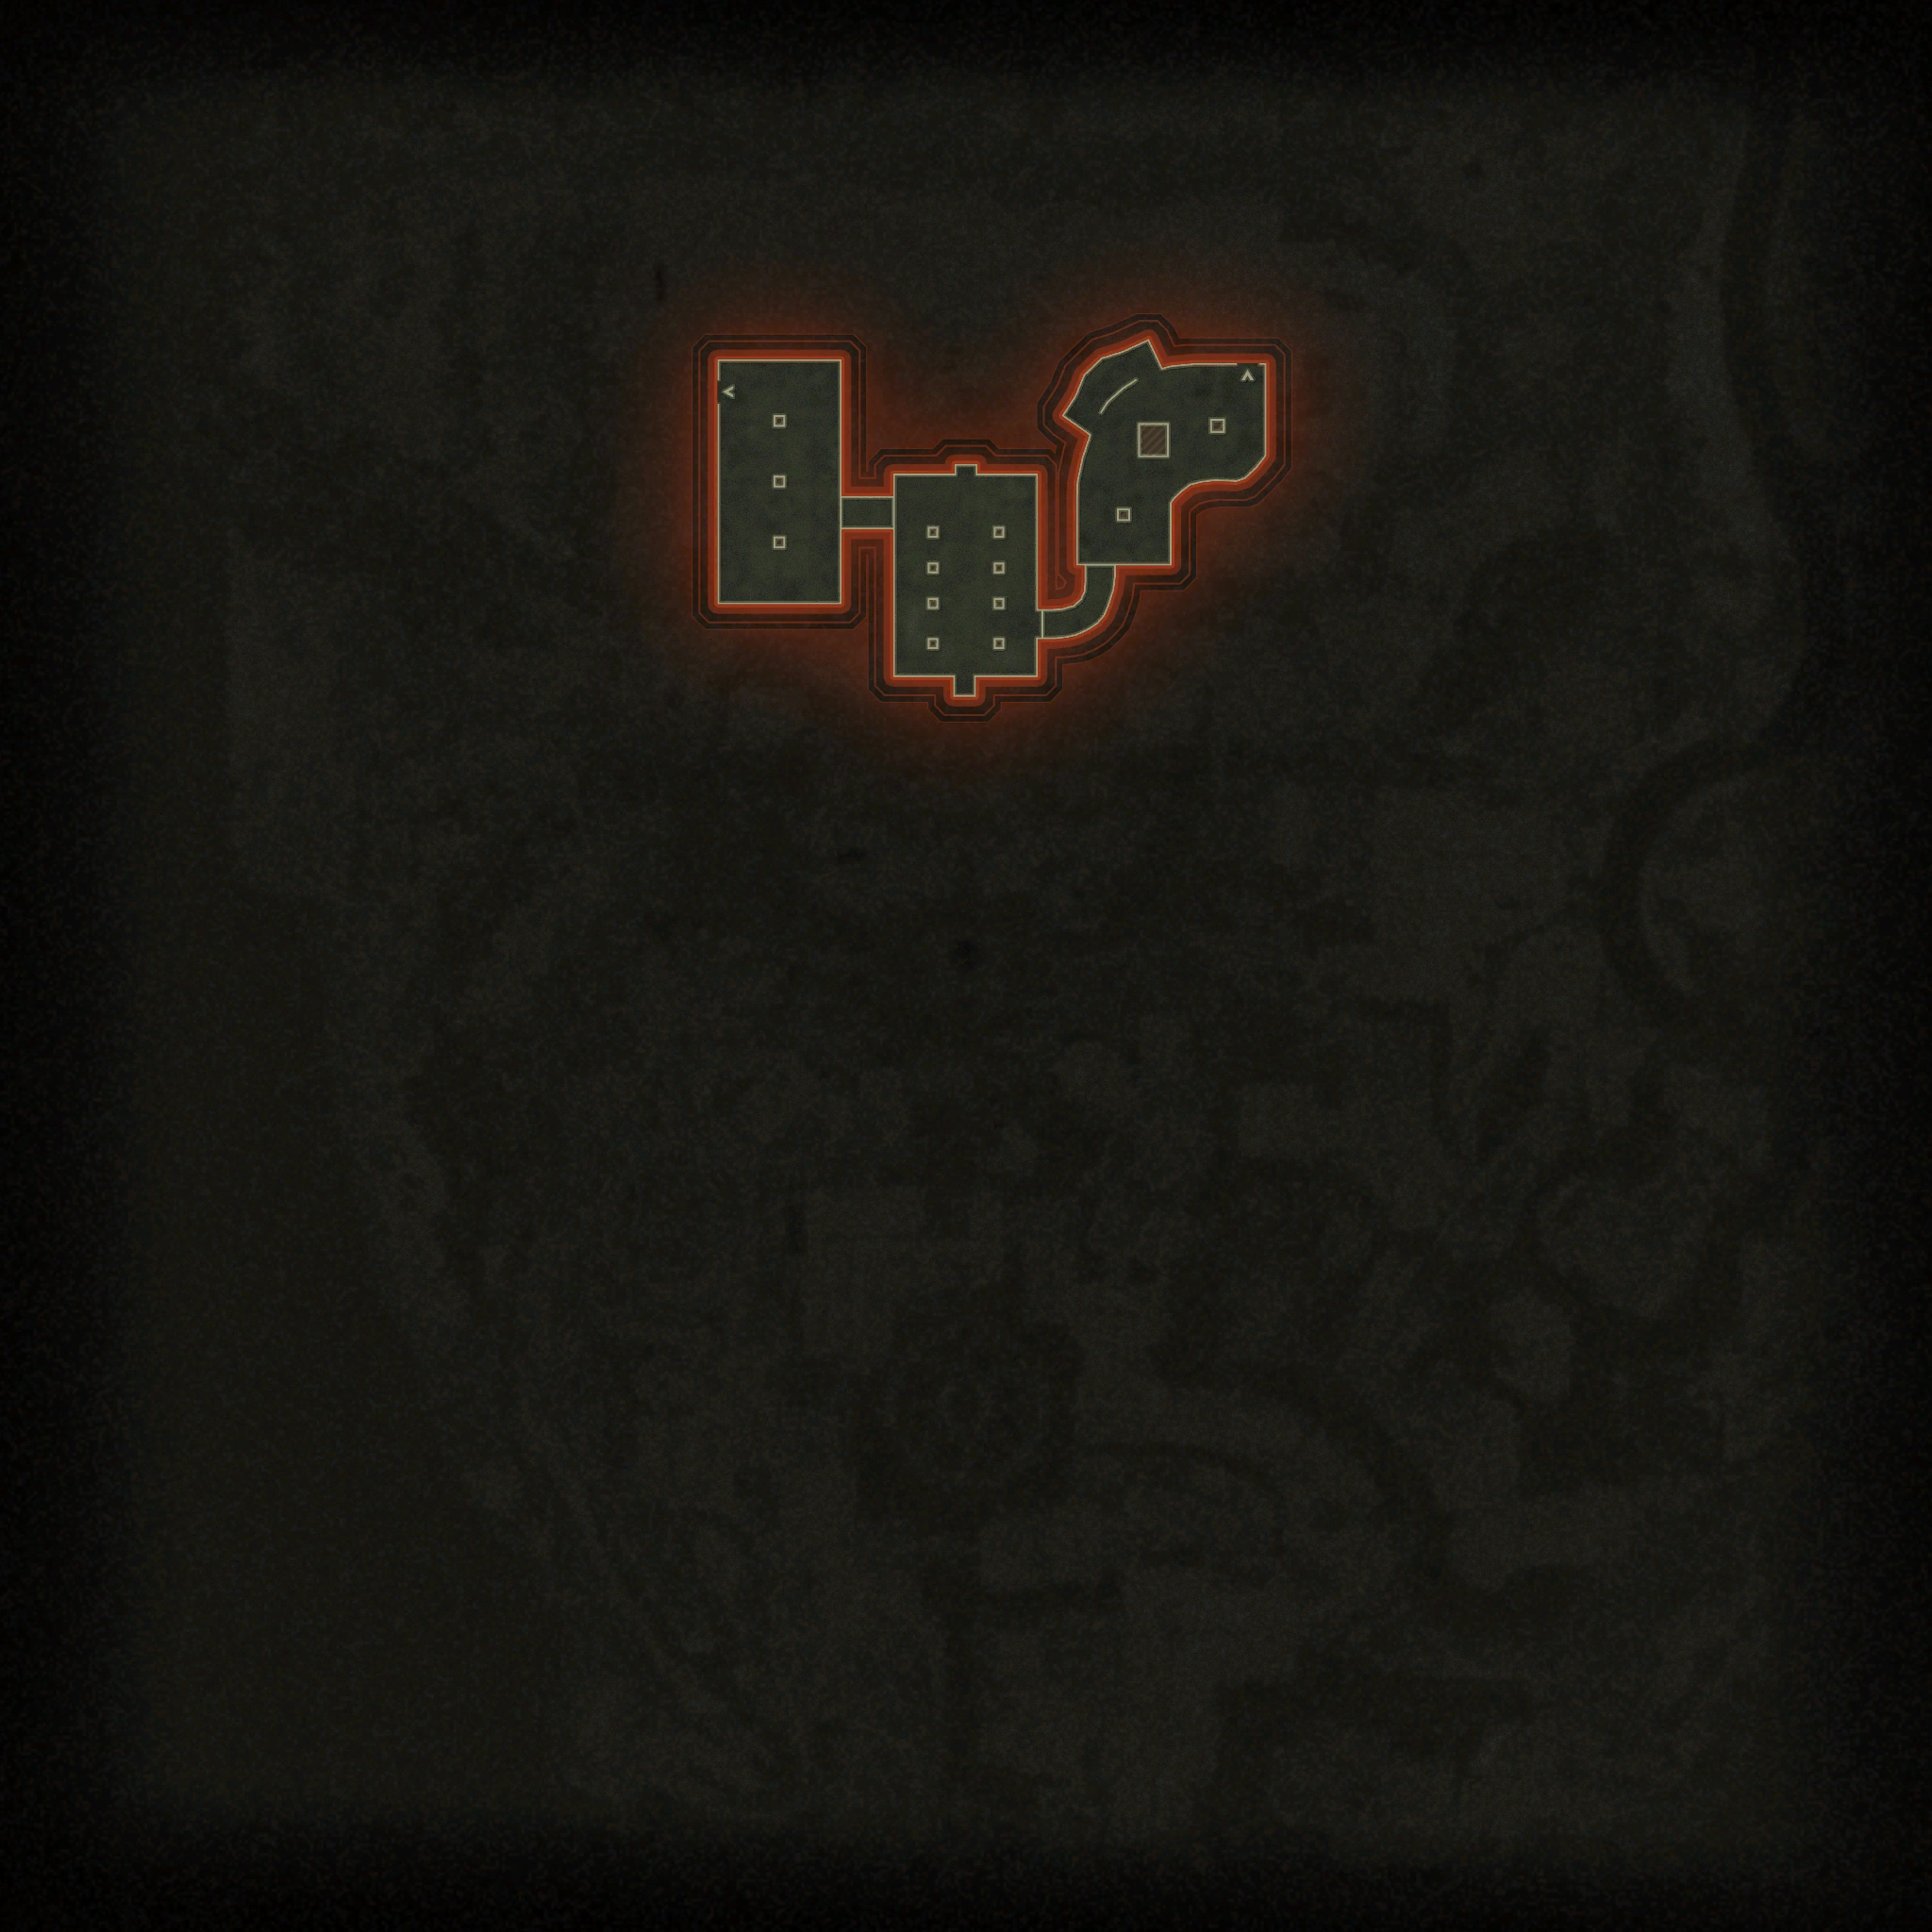
The map layout first, then the areas worth knowing by name. Map imagery © Activision, self-hosted.
Surface
Underground
Pinch or double-tap to zoom in — the full map is a single image.
Town Square / Tavern
Spawn hub. Tavern vase symbols and the Raven rune-wheel cellar, the Electric orb pedestal, and the fountain statue where the Guardian fight begins.
Village / Ramparts
Lion Cannon (breach), three Dragon braziers, the Stag lightning vase on Hillside Ramparts, Deadshot, the first Lightning Rod and the Lion Door by Speed Cola.
Entrance / Dining Hall
Dragon statue, the four knight statues, Vulture Aid, and the Alchemical Lab entrance behind the Stag knight. Light ritual and Light orb trial upstairs.
Dungeon / Small Passage
Pack-a-Punch, Krafft's cell door, the Cave Slide raven route, third Stag-rod kills, and one Points of Power trap.
Undercroft / Sitting Rooms
Melee Macchiato cracked wall, the six-symbol board, the four page fragments, the restored book, the Dark ritual and the Shadow orb trial.
Courtyard / Arsenal / Alchemical Lab
Fire ritual circle and Fire orb trial, the final light-beam crystal and a trap; the Lab holds the random Raven trophy and the Light-beam chain.
Steps at a glance
- Cannon the blocked door → Undercroft → shoot the three locks
- Kill the Doppelghast for the Blood Ethereum Crystal → Pack-a-Punch
- Open the small wooden door and speak to Gabriel Krafft
- Collect 4 torn book pages in the sitting rooms (any time)
- From round 10, kill helmet zombies for stamps → 4 basic swords
- Upgrade all four swords: lion, dragon, stag, raven
- Collect the 4 ritual items → soul circles → 4 incantations
- Melee the symbol wall with Melee Macchiato → note vases I–VI
- Shoot the wall symbols in numerical order → reveals the book
- Place the 4 pages → clear the 4 Point of Power traps in book order
- Read the animal order → cast incantation + inspect sword at each knight
- Mystic Orb → four elemental challenges → Guardian Key
- Boss: the Golem — break the seal, hit the crit spots, survive the statue phases
Full walkthrough
Open the map, raise Pack-a-Punch and meet Krafft
Follow the objective markers from spawn, buying doors until you reach the Courtyard in front of the castle. Head to the cannon, crank it to face the blocked door, then get behind it and fire.
Follow the markers down into the Undercroft. In the oubliette room, shoot the three locks off the box. A Doppelghast spawns — kill it for a Blood Ethereum Crystal, then insert the crystal into the portal to raise Pack-a-Punch.
Confirmation cue: follow the next objective into the dungeon and find the small wooden door in the cubby off the adjacent room. Let the Easter-egg dialogue finish, then hold interact to open the window flap and talk to Gabriel Krafft.
Bring for later: the Dead Wire ammo mod (stag sword), Melee Macchiato (symbol wall) and three crafted Molotovs (Ra’s Ankh — or use the fire sword’s charged attack instead).
Collect the four torn book pages
In the sitting rooms near Stamin-Up, find four torn pages marked with glowing red eye symbols. There are around nine possible spawn points and you need four — this can be done at any point once the rooms are open, so sweep it early while the rounds are cheap.
Confirmation cue: each pickup flashes a marker top-right, and your menu shows torn page fragments IV once you have all four.
- On the wall right of Stamin-Up, just left of that, and behind you as you face Stamin-Up
- On or beside the sofa, and against the TV
- By the fireplace near the bunk beds, and on the table by the bunks
- Behind the boxes and on the floor beneath them, plus along the outer walls
Claim the four basic swords
From round 10 onward, zombies wearing knight helmets spawn. Killing one drops a glowing orange stamp. Carry each stamp to one of the four knight statues in the Dining Hall to receive that basic sword — any order, roughly one stamp per round, so push rounds if you want them faster.
Identifying the statues: read the insignia on the chest plate — except the Raven knight, which is marked by a raven on its shoulder instead. Stow and redraw a sword to re-display its name.
Needs confirming: the canonical sword-name to animal mapping. The transcripts give Caliburn for the dragon/fire sword and Durendal for the stag/lightning sword, with the lion name garbled and the upgraded raven sword called the Shadow sword — worth checking Solais and Balmung in-game before treating those names as fact.
Upgrade the Lion sword (light)
Crystal lasers. Shoot the red crystal above Vulture Aid in the Dining Hall, then repeatedly stand where the beam points and shoot the next crystal to chain it: upstairs crystal, back down in front of Vulture Aid, slightly left of Vulture Aid, into the Alchemical Lab, then the crystal above the Arsenal machine shot from in front of the table. When every beam aligns, hold interact on the little statue to take the Paladin’s Brooch.
Deposit it in the yellow circle that spawns nearby and feed it souls — roughly 15 to 20 kills — until a chest appears and glows gold.
Parasite door. Past Speed Cola in the Upper Village, take a left; under a ceiling is a door with a lion statue. Melee it with the lion sword to light a symbol. Four yellow-glowing parasites spawn — melee one to make the sword glow yellow, then melee the door to deposit a symbol. Repeat until four symbols are lit; if you run out of parasites, take the next round.
Sanctuary. Interact with the finished door to be teleported into a chamber. Place the sword on the podium, then shoot the matching symbol on the ceiling each time one lights beneath it, four times over. The targets drift, so expect to need more than one shot. Take the glowing sword back, then melee the gold chest from earlier to unlock the Light Incantation.
The other guide: MrDalekJD places the matching symbols on the wall rather than the ceiling.
Upgrade the Dragon sword (fire)
Place the basic Dragon sword in the dragon statue up the stairs from Juggernog. Three fire braziers light up — on the castle battlements, on the left side of the spawn area, and inside the spawn area along the right.
You burn while carrying fire: interacting with a brazier sets you alight and drains roughly 15 HP per second. Sprint straight back to the dragon statue and deposit before you hit zero.
The heal trick: melee the zombies that spawn in front of you to claw health back. MrRoflWaffles specifies the purple-eyed ones, which die instantly and restore you to full — worth prioritising if you see one.
After the third deposit the statue breathes fire; wait a few seconds, then take the upgraded fire sword.
Ra’s Ankh. Light three bonfires around the Hillside ramparts by the cannon, using Molotovs or the fire sword’s charged attack (both triggers): the debris pile just under the pylon, the balcony directly above the castle entrance, and just left of the acid trap toward Speed Cola. Each ignition spews zombies out of fireballs — that is your cue it took. The third spawns a Doppelghast; kill it and once it finishes exploding it drops Ra’s Ankh. Deposit it in the yellow circle in front of the castle, fill with souls, then melee the chest with the fire sword for the Fire Incantation.
The other guide: MrDalekJD gives the trio as the spawn corner, the nature path and left of the cannon — probably the same three braziers seen from different angles.
Upgrade the Stag sword (lightning)
Collect three lightning rods, then place all three in the vase on the right side of the Hillside ramparts. A thunderstorm starts there with continuously spawning zombies.
Kill storm zombies with the stag sword — around six or seven of the purple-eyed ones — until the sword is visibly crackling with electricity, then melee the vase. The charge jumps across and electrifies one rod, and you get visibly shocked.
Fail state: no shock animation means the charge did not register. It is genuinely unreliable — MrRoflWaffles had three of five attempts land. Keep killing and try again.
Confirmation cue: with all three rods charged the vase stops spinning. Place the sword in it, wait, and retrieve the upgraded lightning sword.
Pegasus Horseshoe. Shoot it down from the roof by Deadshot Daiquiri and pick it up. Then take the cannon on the Hillside ramparts and fire yourself toward spawn. Lightning flickers and a small storm cloud forms somewhere on the map — hunt it down and collect the charged horseshoe from the ground beneath it. Deposit at the yellow insignia inside the spawn room, fill the soul box, and melee the chest with the lightning sword for the Lightning Incantation.
The other guide: MrDalekJD instead shoots the horseshoe down from above the doorway inside the barn on the nature path.
- Rod A — always leaning against the boxes left of the Deadshot Daiquiri machine
- Rod B — equip Dead Wire and shoot the electrical fuse box on the wall in the Upper Village near Speed Cola; a spark runs to an aerial and drops the rod
- Rod C — carried on the body of a random zombie; kill it and pick the rod off the ground. Often an armoured zombie near Quick Revive once Pack-a-Punch is up and you have spoken to Krafft
Upgrade the Raven sword (void)
The hardest of the four. In the Alchemical Lab, search the shelves and tables for an Antiquity — an animal relic. Only one spawns per game, and each maps to a zodiac sign: two skulls for Gemini, a scorpion in rock for Scorpio, a fish fossil for Pisces, and so on. Other known spawns are a horn at head height, a jawbone opposite, and a pair of bird heads on a shelf.
Take it to the Tavern Cellar under the bar in spawn — the room with the metal rings on the wall. Insert the Antiquity in the centre, then insert the Raven sword into the slot.
The ring puzzle. Identify your item’s zodiac sign and its element (Gemini is Air, for instance). A green arrow sits above where the sword went in: rotate the inner ring so your sign’s element symbol aligns there, then rotate the outer ring to your zodiac symbol.
Fail state: solve it wrong or too slowly and you wait for the next round to retry.
Orb herding. Success opens a purple portal in the floor with purple orbs streaming from the rings. Lead three or four orbs into each portal by standing near it and moving slowly. The portal then relocates twice — cellar, then the main tavern floor, then upstairs by the pool table. Patience is the whole skill here: walk, do not run, and loop outside or up the stairs to bunch them together.
After the third portal closes, follow the orbs back to the rings and hold interact — the sword drops into the ground and returns upgraded.
Raven’s Talon. Take the cave slide behind Pack-a-Punch holding a bullet weapon and, near the end on a corner piece to the right, shoot the perched raven (a Krafft quote confirms it). Outside, the raven flies around the castle outskirts toward spawn — you can hear it. Shoot it down; it bursts in purple smoke and drops the Talon. Deposit at the yellow symbol in the Undercroft water room, fill with roughly twenty souls, and melee the chest with the Raven sword for the Dark Incantation.
The other guide: MrDalekJD reports the orbs damaging you on contact and resetting your stage if botched — MrRoflWaffles does not, so treat contact as risky but not necessarily fatal to the attempt.
Raven Rune Wheel
Tavern Cellar — rune wheelAfter forging the Raven Bastard Sword, exactly one animal-bone trophy spawns in the Alchemical Lab. Pick which trophy you found — the inner zodiac and outer element to line up at the bottom of the wheel (under the green arrow) update live. The pairing is fixed; always read the real glyphs on your own wheel before locking it in.
The symbol wall and the tavern vases
Buy Melee Macchiato from the machine on the castle battlements and melee the wall in the Undercroft water room to reveal a panel of blue symbols.
Then, in and around the Tavern, interact with six vases marked with Roman numerals I to VI and note each one’s symbol in numerical order. Screenshot them — you will not remember six.
Return to the wall and shoot the symbols in that order. The wall reshuffles after each correct shot, and gets faster the further you get.
Easy to misread: several of the spike symbols differ only by having a circle outline around them. Match outline against no-outline exactly.
Confirmation cue: a character quote, then a red orb flies from the wall into the section beside it, revealing a book.
- I — always on the bar
- II — on the desk table
- III — above the cellar staircase
- IV — upstairs by the pool table
- V — on a table in the corner booth area
- VI — by one of the front doors
The book and the four Points of Power
Place all four pages on the book. It shows four symbols, randomised each game, matching four of the Point of Power traps around the map — visible on your Tac-Map.
Work through them in book order: top-left, bottom-left, top-right, bottom-right. Find the trap whose floor emblem matches the current symbol (a white outline confirms it), activate it for 1,600 points, and kill roughly ten to fifteen zombies inside it. The trap ends early when you have done enough, and Krafft quotes to confirm.
Confirmation cue: recheck the book — completed symbols go dark. If a trap times out, wait for it to reset next round and retry.
Confirmation cue: after the fourth, the pages in the water room stop glowing and four animal symbols appear on the staircase wall just past the Alchemical Lab, numbered one to four. That diagram is the order you need for the next step.
Give the swords to the knights
Read the four-animal order off the staircase wall past the Alchemical Lab. If you have not already, melee each element’s golden chest with its matching sword to take that incantation — light by the dining hall, fire at the castle front, lightning in the spawn room, dark in the Undercroft.
Then for each animal in wall order: hold the matching sword and its incantation, stand before that knight statue in the Dining Hall, cast the incantation, then immediately weapon-inspect the sword while the statue glows.
Fail state, and it is a subtle one: moving to the next statue before the previous one has finished lighting up yellow means the next will not activate. Wait for the full glow every time.
Confirmation cue: after all four, the knights spawn a Mystic Orb that drops from above — pick it up.
Needs confirming: how to read the wall. MrDalekJD says the diagram is numbered 1 to 4; MrRoflWaffles describes a positional read instead. His order came out Raven, Lion, Stag, Dragon.
The four Mystic Orb challenges
Place the orb in a holder and hold interact to start. It takes on an element and you feed it matching souls. Pick the orb back up after each success — a Krafft quote confirms.
Fail state: if the holder offers to start the elemental challenge again when you return, you were too slow and it needs restarting.
- Light — second floor of the Dining Hall opposite Vulture Aid. Big green orbs spawn around the area; just stand inside each until it dissolves. Zombies spawn but kills are not required
- Sword element — in spawn, just right of the incantation table. Kill only with the matching element, using that sword's trigger abilities and its incantation
- Fire — the Courtyard opposite the Max Ammo wallbuy. Roughly 20 to 30 kills with the fire sword's charged attack, the fire incantation or Molotovs; regular kills recharge the sword ability
- Void — Undercroft water room, just left of the dark-incantation chest. Only kills where zombies are sucked up and dropped from the sky count
Guardian Key and the Golem
Prep fully first: as many perks as you can hold, a Mutant Injection crafted from spare salvage, gums brought in, and a solid bullet weapon at tier-3 Pack-a-Punch. MrRoflWaffles specifically advises against the Ray Gun for this boss.
Place the charged Mystic Orb into the wall on the Undercroft stairway — the one bearing the four animals. The wall recedes; take the Guardian Key from the table. Then interact with the front of the statue in the spawn room to slot the cylinder in. In co-op the team votes to start.
Use the arena: all four incantations sit around the middle as pickups. Use them on the zombie waves — those zombies drop armour plates and ammo, and there are ammo buys in the room.
Opening: get behind the Golem and shoot its back to break the seal, after which it takes increased damage. Then work the glowing crit spots — torso first, later wrists and gauntlets, shoulders and knees, then chest and face near the end. Spots vanish periodically; deal generic damage until new ones open.
Statue phases: at roughly each 20% chunk of health the Golem becomes an immune statue in the centre and you simply survive and clear the horde, first Doppelghast included. Swords and incantations shine here — also scavenge armour and recharge your sword. A Max Ammo drops as it re-enters.
Phase 2: it gets more mobile and gains a homing slam telegraphed by a red circle in your vision — sprint out of it. It also spreads lava pools that last fifteen to twenty seconds and are near-lethal to cross.
Phase 3: the arena shrinks to the middle and is ringed by constant lava, so stay off the edges. This is where the Mutant Injection goes — you are immune to zombies inside it and its cannon does serious damage to the face. Idle Eyes helps enormously. Enough chest and face damage kills it; pick up the amulet it drops to trigger the ending cutscene.
Side Easter Eggs & extras
Everything beyond the main quest. Tap any entry to open the full how-and-where breakdown.
“Slave” (ft. Vicky Psarakis)
Kevin Sherwood track. Interact with three Mr. Peeks headsets to play it: Tavern opposite the Tier II Armour; Courtyard near the Speed Cola route; Undercroft / Oubliette in the corner behind the table/sofa area. The third headset starts the song.
Serve-the-drinks quest — free PHD Flopper
Collect the hidden liquor bottles in the Dining Hall, Sitting Rooms, Undercroft and Tavern, then serve the correct drinks to the Tavern zombies. Record the bottle labels rather than guessing.
Raven interaction — bonus perk
During the Dark Incantation raven step, follow the optional raven interaction route before killing the flying raven to claim a free perk reward.
Bell Tower
Collect the cannon wheel from the banana crate in Town Square and the blowtorch/welder in the Dining Hall lower-rear area, then repair and fire the cannon repeatedly; the bell sequence rewards loot.
Rat King
Locate and shoot/feed the ten hidden rats around the castle route, then follow the crown/cheese reward sequence. Rat visibility can vary with graphics settings.
Hidden power-ups & traps
Eight one-use power-up targets are spread around the exterior and castle — save Max Ammo / Full Power for ritual or boss prep. The Oil and Points of Power traps double as crowd control; confirm the correct eye symbol before paying for a quest trap.
Interactive solvers
Every solver for Citadelle des Morts, in the order you meet them. Each also appears inside its step in the walkthrough above — use whichever is handier. Browse every Zombies solver →
Raven Rune Wheel
Tavern Cellar — rune wheelAfter forging the Raven Bastard Sword, exactly one animal-bone trophy spawns in the Alchemical Lab. Pick which trophy you found — the inner zodiac and outer element to line up at the bottom of the wheel (under the green arrow) update live. The pairing is fixed; always read the real glyphs on your own wheel before locking it in.
Recommended loadouts
Three strong picks for this map — the map's Wonder Weapon plus reliable box/wall options. Each weapon lists a full recommended attachment build and the perks to pair with it, every perk shown with its Major and Minor augment. Push weapons to Legendary rarity and Pack-a-Punch; augment/attachment metas shift with balance patches, so treat these as a strong current baseline.
Solais — Lion of Light (Elemental Sword)
Safest boss melee+The last sword you forge and the best boss tool: fully-charged Light kills restore Armour, so it doubles as healing between Guardian phases. Keep the other three swords available until every Incantation, knight and Orb step registers.
Attachments
- —Wonder Weapon — no Gunsmith attachments
Perks & augments
- Jugger-NogMajorProbiotic — more maximum healthMinorHardened Plates — more plate damage-block
- Melee MacchiatoMajorVampiric Extraction — melee attacks heal youMinorStick 'N Move — faster backpedal after a melee
- Stamin-UpMajorDasher — longer tactical sprintMinorHot Foot — speed burst on equipment kills
- Speed ColaMajorClassic Formula — even faster reloadsMinorQuick Swap — faster weapon swaps
- Elemental PopMajorElectric Cherry — shock burst on reloadMinorChill Berry — faster Ammo-Mod cooldowns
- Quick ReviveMajorDying Wish — brief invulnerability on lethal hitsMinorSlow Death — longer last-stand timer
GPR 91 (Legendary · PaP III)
Boss armour & critical points+A real bullet weapon is mandatory for The Guardian — swords cannot break its stone armour or hit ranged critical points. Rarity-max to Legendary and Pack-a-Punch III, stack a good ammo mod, and budget Essence/Salvage for ammo.
Attachments
- OpticVolzhskiy Reflex
- MuzzleSuppressor
- BarrelCHF Barrel
- UnderbarrelVertical Foregrip
- MagazineExtended Mag I
- Fire ModsRapid Fire
- Rear GripQuickdraw Grip
- StockInfiltrator Stock
Perks & augments
- Jugger-NogMajorReactive Armor — plate breaks stun nearby zombiesMinorDurable Plates — tougher armour
- Speed ColaMajorClassic Formula — even faster reloadsMinorQuick Swap — faster weapon swaps
- Deadshot DaiquiriMajorDead Again — crits can add a bullet to the magMinorDead Break — extra armour damage
- Stamin-UpMajorStalker — faster movement while aimingMinorHot Foot — speed burst on equipment kills
- PhD FlopperMajorPhD Slider — slide into a group to detonateMinorTribologist — longer, faster slides
- Death PerceptionMajorDeath Stare — chance to instantly drop wounded specialsMinorBird's-Eye View — faster minimap scan
ASG-89 (Pack-a-Punch'd)
Crowd control for ritual holds+Wall-buy or box, then Pack-a-Punch: a low-spread auto shotgun clears the ritual-circle and Orb-trial defends without over-killing, and catches Doppelghasts safely. Dead Wire also feeds the Electric Incantation.
Attachments
- OpticKepler Microflex (or iron sights)
- MuzzleSuppressor
- BarrelCHF Barrel
- UnderbarrelRanger Foregrip
- MagazineExtended Mag II
- Fire ModsRapid Fire
- StockLight Stock
Perks & augments
- Jugger-NogMajorReactive Armor — plate breaks stun nearby zombiesMinorDurable Plates — tougher armour
- Speed ColaMajorClassic Formula — even faster reloadsMinorQuick Swap — faster weapon swaps
- Deadshot DaiquiriMajorDead Again — crits can add a bullet to the magMinorDead Break — extra armour damage
- Stamin-UpMajorDasher — longer tactical sprintMinorHot Foot — speed burst on equipment kills
- PhD FlopperMajorPhD Slider — slide into a group to detonateMinorTribologist — longer, faster slides
- Quick ReviveMajorDying Wish — brief invulnerability on lethal hitsMinorSlow Death — longer last-stand timer
Recommended kit & gum picks
The recommended kit for this quest — Field Upgrade, Ammo Mods, equipment and the GobbleGums to bring, split by solo and co-op. Weapons are in Recommended loadouts above. Metas shift with balance patches, so treat these as a strong current baseline.

Aether Shroud
Cover for the four elemental-sword forges and the Guardian arena.

Energy Mine
Lane control for the Incantation rituals and Points-of-Power traps.

Napalm Burst
Burning area damage for the ritual holds and the tight tavern lanes.

Dead Wire
Stuns and strips the Doppelghasts and Manglers during the sword steps.

Shatter Blast
Explosive shrapnel chews armour and groups across the three Guardian phases.
Molotov
A fire pool for the brazier carries and chokepoint holds.

Monkey Bomb
Distraction bait during the knight-enchant and Mystic-Orb trials.

Perkaholic
UltraEvery perk at once.

Phoenix Up
LegendaryRevive with all perks kept.

Wall Power
LegendaryNext wall-buy comes Pack-a-Punched.

Dead Drop
EpicMore salvage and equipment for ~5 min.

Free Fire
EpicNo ammo for 60s during a Guardian phase.

Shields Up
RareRefills armour at 2× strength for 3 min — the gum both creators bring on every map, and blue rarity so you will actually have it.

Idle Eyes
LegendaryZombies idle for 30s — the creators’ standard boss-fight reset when the room gets away from you.
Perkaholic
UltraFull perks for whoever pops it.

Nowhere But There
EpicTeleport to a downed team-mate and revive nearby.
Free Fire
EpicNo ammo for 60s on the boss.

Temporal Gift
RareExtends your next timed power-up.
Dead Drop
EpicSalvage and equipment for the squad.
Per-map augments
The Major + Minor augment to run on each core perk for this quest. BO6 gives 3 Major and 3 Minor options per perk — pick one of each; these are tuned to this map's boss and steps. Augments unlock at Level 11; metas shift with patches, so treat as a strong baseline. Per-map augment recs are ground no competitor covers.
 Reactive ArmorMinor
 Durable Plates
 Phantom ReloadMinor
 Quick Swap
 Electric CherryMinor
 Chill Berry
 DasherMinor
 Hot Foot
 PhD SliderMinor
 Tribologist
 Dead AgainMinor
 Dead Break
Calling cards on this map
Cosmetic calling cards you can earn on this map. ⏳ marks time-limited main-Easter-Egg cards — miss the window and they're gone for good. Global Dark Ops challenge cards are in the reference section below.
Main-quest completion card
Main EEComplete the Citadelle des Morts main quest (also unlocks the Weaver Jackknife skin + 5,000 XP).
Exact card name not yet confirmed.
⏳ Time-limited — only awarded if you finish before Directed Mode is added for this map; permanently missable afterwards.
GobbleGum reference — Black Ops 6
All 41 Black Ops 6 GobbleGums by rarity — Rare, Epic, Legendary, Ultra and the cosmetic Whimsicals. They drop at end-of-round and you hold up to three. Filter by rarity.

Kill Joy
RareDrops an Insta-Kill.

Cache Back
RareDrops a Max Ammo.
Temporal Gift
RareYour next timed power-up lasts longer.

Stock Option
RareAmmo drawn from your stockpile for 60s.

Anywhere But Here
RareRandom teleport plus a concussive blast.

Arsenal Accelerator
RareFaster Field-Upgrade charge for 5 min.
Shields Up
RareRefill armour at 2× strength for 3 min.

Power Keg
RareDrops a Full Power power-up. (Season 1)

Tactical Diffusion
RareNext Nuke is disabled and pays +2,000 Essence. (Season 3)

Respin Cycle
EpicRespin the Mystery Box to an equal or higher rarity.
Who's Keeping Score?
EpicDrops Double Points.
Free Fire
EpicNo ammo consumed for 60s.

Exit Strategy
EpicInstant exfil vote with fewer spawns.

Profit Sharing
EpicShare Essence with nearby players for 2 min.

Soda Fountain
EpicYour next perk buy grants +1 random perk.
Nowhere But There
EpicTeleport to a downed player and revive nearby.
Dead Drop
EpicIncreased salvage and equipment drops for 5 min. (Season 2)

Explosive Flourish
EpicEach reload triggers an explosion for 2 min. (Season 4)
Idle Eyes
LegendaryZombies idle for 30s.
Wall Power
LegendaryYour next wall-buy comes Pack-a-Punched.

Immolation Liquidation
LegendaryDrops a Fire Sale.
Phoenix Up
LegendaryRevive all downed players, perks kept.

On the House
LegendaryDrops a Random Perk power-up.
Wall To Wall Clearance
LegendaryWall-buys cost 10 Essence for 30s.

Crate Power
LegendaryYour next box gun comes Pack-a-Punched.

Modified Chaos
LegendaryReduced Ammo-Mod cooldowns for 2 min. (Season 2)

Support Group
LegendaryGrants an ARC-XD, Mangler Cannon, Sentry and Mutant Injection. (Season 3)

Flavor Hex
LegendaryGrants a random Ultra gum. (Season 4)
Perkaholic
UltraEvery perk on the map at once.

Wonderbar!
UltraYour next box spin is a Wonder Weapon.
Near Death Experience
UltraProximity revive with perks for 3 min.

Reign Drops
UltraDrops all core power-ups at once.

Hidden Power
UltraYour held weapon becomes Legendary rarity.

Time Out
UltraClear all enemies and end the round for 3 min. (Season 1)
Newtonian Negation · Indiegestion · Holiday Cheer · Quacknarok · Die Pitched · Rainburps · Jacked Lanterns
Whimsical7 cosmetic seasonal gums — flair only, no gameplay effect.
Field Upgrade reference (Black Ops 6)
Black Ops 6's 6 Field Upgrades — charged by kills. Each has 3 Major + 3 Minor augments (unlocked at Level 11); you equip one of each. All augment options are listed. Source: CoD Wiki + GameLeap/GameRant cross-check.
Energy Mine
A proximity energy explosion.
Healing Aura
Instant heal beams (also revives teammates in BO6/BO7).
Aether Shroud
Phase out of enemy detection.
Tesla Storm
Lightning links players, stunning and damaging enemies.

Frenzied Guard
Repair armour and taunt enemies; kills repair your armour.
Dark Flare
A penetrating shadow beam.
Dark Ops & mastery cards (Black Ops 6)
Global ‘Dark Ops’ challenge cards — hidden until completed, earnable on any map. Filter by category.
Another Round?
Dark OpsReach Round 100.
Reaper of the Undead
Dark OpsKill 1,000,000 zombies (lifetime cumulative).
Invincible
Dark OpsReach Round 30 without going down.
Social Distancing
Dark OpsReach Round 20 without taking damage.
Good Enough
Dark OpsReach Round 20 with your starting loadout only — no augments, perks, ammo mods or Field Upgrade.
Box Addict
Dark OpsBuy every Mystery Box weapon in a single game.

Gummed Up
Dark OpsConsume 25 GobbleGums in a single match.
Well That Was a Waste
Dark OpsGet downed within 10s of consuming Perkaholic.
Armed to the Teeth
Dark OpsHold 3 Pack-a-Punch-III Legendary weapons with ammo mods and 8 active perks.
Harbinger of Doom
Dark OpsKill 100 enemies with a single Scorestreak.
Sticks N' Stones
Dark OpsReach Round 25 solo using only melee / Combat Axes / Melee Macchiato.
Fatale
Dark OpsKill two Amalgams with a single shot.
Light 'Em Up
Dark OpsKill 10 ignited Elites using the Napalm Burst ‘Big Game’ augment.
Kunoichi
Dark OpsIn one Aether Shroud (Void Sheath), kill 3 standard + 2 Special + 1 Elite.

Zombies Dark Ops 100%
MasteryComplete 15 Dark Ops challenges.
Intel
21 collectibles, tracked under Barracks → Zombies Intel — 10 Audio Logs, 4 Documents and 7 Artifacts. The audio logs and documents are found in the map (a few documents need a trigger to reach); the artifacts are all earned from the sword quests, the main Easter egg and the Bartender side quest. Story/lore only, no gameplay reward.
Audio Logs 10
Historically Speaking
Tavern (spawn) — up the left-hand stairs, on the table by the broken railings.
Good Afternoon Mr. Richtofen
Courtyard — on the crates by the east wall (SE side), before the Upper Village.
You Would've Done the Same
Hillside Ramparts — NW wall, on top of the metal cupboard near the Elemental Pop / castle entrance.
Survival of the Fittest
Village Ascent — east wall, on the floor by the ammo crate at the spawning door.
The Foundling
Nature Path / Hilltop — on a stone wall ledge by the wooden barricade, north before the Hilltop crossing.
Do Your Damn Job
Entrance Hall — west wall, on the pile of wooden boxes left of the castle opening (after the cannon breaks the gate).
Get It Done
Undercroft (Main Hall) — on the SW-corner desk around the corner, before the Oubliette Room.
Fair Enough
Dungeon — on a shelf in the middle, opposite the Bouillotte Room door (near Krafft).
The Four Bastards
Dining Hall — second floor, on a shelf on the south wall opposite Vulture Aid.
New Horizons
Sitting Rooms — south/SW wall, right next to the wall-buy.
Documents 4
Family Book
Hilltop barn (near Deadshot Daiquiri) — up on the beam; shoot or grenade it down.
Some Context
Ride the cannon (500 Essence) up onto the Tavern roof and spam interact while sliding.
Intake Form
Village Ascent well — during a Max Ammo round with Parasites, interact then throw a grenade into the well.
Statuesque
Alchemical Lab — only accessible after activating Pack-a-Punch; on the desk inside.
Artifacts 7
Bastard Sword
From round ~10, kill the special zombie that drops a Stamp and take it to the suit of armour in the Dining Hall.
Caliburn (Fire / Dragon)
Upgrade the Bastard Sword — light it from three braziers, then the dragon statue in the Entrance Hall.
Durendal (Electric / Stag)
Upgrade path — gather three Lightning Rods and charge them at the Hillside Rampart.
Solais (Light / Lion)
Upgrade path — kill four glowing Parasites for light, melee the lion door, then the symbol-shooting puzzle.
Balmung (Dark / Raven)
Upgrade path — take the antiquity from the Alchemical Lab, solve the Tavern Cellar symbol puzzle, then guide the orbs through the rifts.
Obscurus Altilium
Complete the main Easter egg and defeat The Guardian boss.
Space Race
Complete the Bartender side Easter egg (collect three bottles and serve drinks at the Tavern bar).
Common Citadelle des Morts questions
Direct answers to the specific things players look up mid-game — part locations, puzzle steps and more.
How do you upgrade the Lion (Light) sword on Citadelle des Morts?
Chain the crystal lasers in the Dining Hall — shoot the red crystal above Vulture Aid and follow the beam through the five crystals — to take the Paladin's Brooch, fill its yellow soul circle, then do the parasite door past Speed Cola and the sanctuary ceiling-symbol trial. Melee the gold chest with the Lion sword for the Light Incantation.
How do you upgrade the Dragon (Fire) sword on Citadelle des Morts?
Place the basic sword in the dragon statue up the stairs from Juggernog, then light three fire braziers — you burn while carrying fire, so sprint back and deposit before you die. Then light three Hillside bonfires for Ra's Ankh, fill its soul circle, and melee the gold chest with the Fire sword for the Fire Incantation.
How do you upgrade the Stag (Lightning) sword on Citadelle des Morts?
Collect three lightning rods and place them in the vase on the Hillside ramparts, then kill storm zombies with the Stag sword until it crackles and melee the vase to charge each rod. Then shoot down the Pegasus Horseshoe by Deadshot, cannon yourself toward spawn to form a storm cloud, and collect the charged horseshoe for the Lightning Incantation.
How do you solve the Raven sword ring puzzle on Citadelle des Morts?
Find the one Antiquity relic in the Alchemical Lab and take it, with the Raven sword, to the Tavern Cellar rings. Identify the relic's zodiac sign and element, rotate the inner ring to the element and the outer ring to the sign, then herd the purple orbs into three relocating portals. Use the raven-rune-wheel solver for the alignment.
How do the tavern vases and symbol wall work on Citadelle des Morts?
Buy Melee Macchiato and punch the Undercroft water-room wall to reveal blue symbols. Then note the six Tavern vases marked I to VI and their symbols in numerical order — screenshot them — and shoot the wall symbols back in that order. Watch for spike symbols that differ only by a circle outline.
How do the four Points of Power work on Citadelle des Morts?
Place the four torn pages on the book to reveal four symbols, then clear the matching Point of Power traps in book order — top-left, bottom-left, top-right, bottom-right. Activate each trap for 1,600 points and kill ten to fifteen zombies inside it; a white outline confirms the right trap for the current symbol.
What is the Citadelle des Morts song?
The song is 'Slave' featuring Vicky Psarakis, a Kevin Sherwood track. Interact with three Mr. Peeks headsets — in the Tavern opposite the Tier II Armour, in the Courtyard near the Speed Cola route, and in the Undercroft/Oubliette corner. The third headset starts the song.
Visual guides & sources
Screenshots and exact part locations live in these — open one on a second screen.