
Rex Infernus
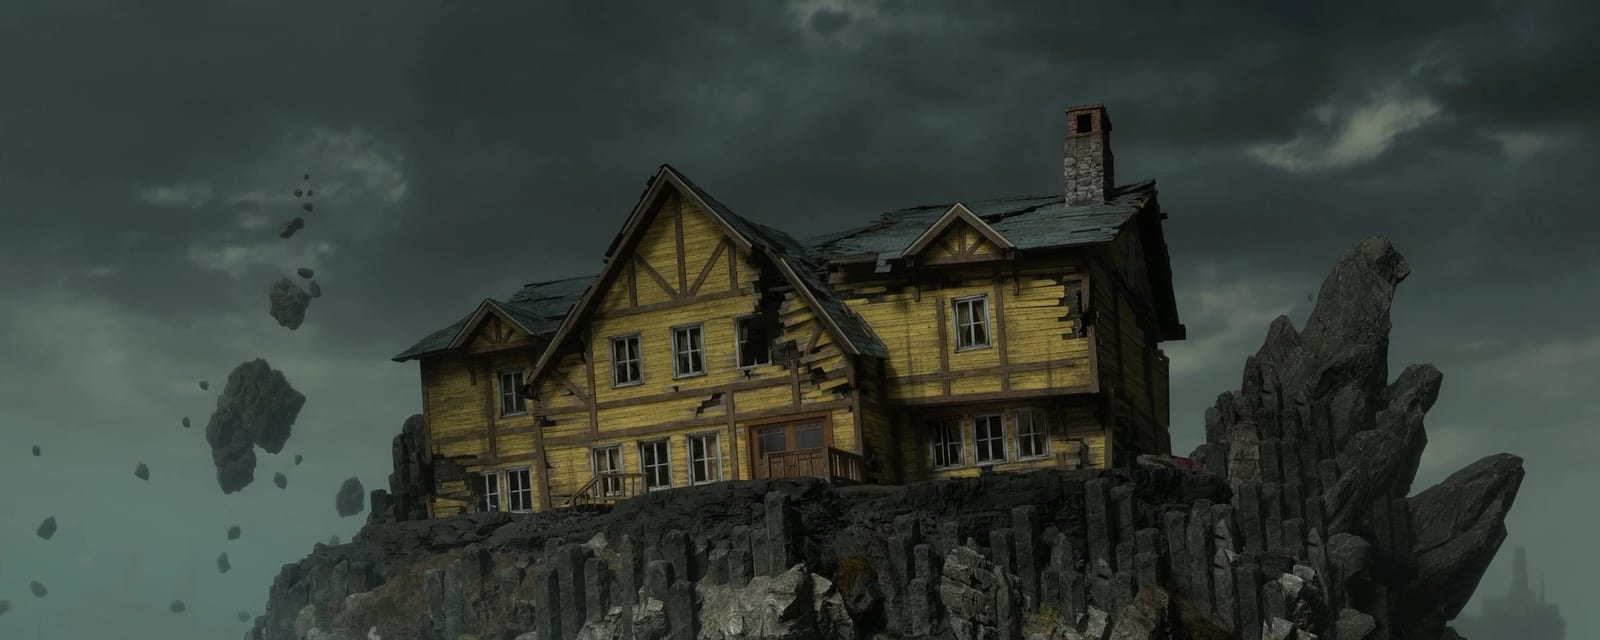
Her House — Samantha's house from Revelations — rocketed into the Dark Aether above four Shadowsmith temples. Answer the phone, forge Pack-a-Punch at the Nexus Forge, craft the Warden's Blight crossbows at Dravakar's anvil, upgrade your grapple, then cleanse the four Corruptions and end the Warden. Beaten on Day 2 — the full walkthrough, boss fight included, is below.
Quick answers
Rex Infernus is Black Ops 7's sixth and final round-based Zombies map, released 20 August 2026. Its main quest, Warden's Blight, runs from Her House through the Nexus Forge to Pack-a-Punch, the Void Claw grapple, the Warden's Blight crossbows crafted at Dravakar's anvil, a grapple upgrade, and four temple Corruptions. The quest was completed legitimately on 21 August 2026 and the full walkthrough is published, boss fight included: the arena is entered by standing on the blue portals at the bottom of the Nexus generator, and the Warden is fought by shooting the floating skulls to stun him and criting the top of his tail.
What is the Wonder Weapon on Rex Infernus?
The Warden's Blight — dual crossbows firing green venom bolts, crafted at the anvil in Dravakar's Inner Sanctum after you collect three parts from the Forest and solve the pillar riddle. Pack-a-Punch it to unlock the alt-fire. The Void Claw is not the Wonder Weapon — it is the grapple tactical you pick up from the green lanterns, and it only lasts about 30–60 seconds per grab. Bloodthorn is the skin awarded for completing the quest.
How do you unlock Pack-a-Punch on Rex Infernus?
Hold out in Her House until the phone rings downstairs and answer it, then take the cliff-edge portal to the Nexus Forge and place the World Seed on the central pedestal. A red Dread Skull flies to a randomly chosen temple — follow it, shoot it down, and carry the Usurped Flame from that temple's brazier back to a Forge brazier. Repeat for the second skull, then rotate both crank wheels. The platform lowers to reveal Pack-a-Punch, which on this map is a pool of ether energy rather than a machine.
What order do the four cubes go in on Rex Infernus?
There are two halves to it. Loading the device: the order varies per game, which is why published guides disagree. There are four valid loads — Water/Earth/Air/Fire, Earth/Water/Air/Fire, Fire/Air/Water/Earth and Fire/Air/Earth/Water — so read the marked slots in your own game and match one. Then comes the part most guides skip: a transfer mini-game, a real river-crossing puzzle where you shuttle the blocks across the wall by shooting the central orb, never leaving fire alone with water or earth (air is safe with everything). The wall opens on a portal, a Mystery Perk machine and a random perk — and you must then interact with the portal, because it is a required main-quest stage and re-interacting with it fixes the stuck-generator bug later.
How do you beat the Warden on Rex Infernus?
First the gate: the entry circles only appear once all four temples are fully cleansed — four LIGHTNING STRIKES, not four broken shackles. Then head under Pack-a-Punch into the Nexus Core, stand on one of the four blue circles and choose DESCEND. The Warden is a fast spider/scorpion form that knocks you off the map, so the survival core is constantly re-grabbing grapple hooks from the two fountains either side of the arena. The damage loop is the same in every phase: shoot the floating skulls beside him with the Warden's Blight to stun him, which exposes the big crit spot at the top of his tail. At the end of phase 1 he returns to his throne to drain aether — shoot the ghosts around the arena edge to force him back. In phase 2, if the skulls will not spawn, kill the ghosts first because they act as armour for them. The fight has four damage phases, and the loop is the same in each: destroy the Dread Skull he summons — the Warden's Blight's shots home in on them — which stuns him for about five seconds and exposes his scorpion tail as the crit spot. Phase 2 adds four shadow souls, ground stingers, and a portal attack you must shoot down. If enough stingers live at once they connect and charge a wipe — but killing them cancels it, so switch the team onto stingers rather than running. Phase 3 teleports you to a private room for one of two trials: kill an elite for +speed, or survive the elemental zombies 30 seconds for +health. Then he goes down and gets back up — the fourth phase — with all the Shadowsmith blessings on the floor. With no armour plates he one-shots you below 250HP, so keep plates up and stay mobile. Go in with ~50,000 essence, a PaP-3 Warden's Blight and Aether Shroud.
What is the piano code on Rex Infernus?
8-6-7-5-6-5-3-5-4, which in note letters is A · F · G · E · F · E · C · E · D — the Paradox Junction melody with one extra note, played on the piano in Her House. You can play it before you even answer the phone. It pays 300 essence and awards both the Blurprint document and the A Game of Cat and Strauss audio log. They land in different Intel tabs, which is why some players think only one dropped — check Documents and Audio Logs. Play it before you leave spawn, because the front door seals behind you; otherwise you need the exfil trick to get back inside.
Key areas
Her House (spawn)
Samantha Maxis's house from Revelations, rocketed onto the map in the intro — and the “Her” is now confirmed to be Samantha herself. GobbleGum machine by the door, Quick Revive, the piano, the bed, the paintings, the gramophone — and the basketball at the top of the broken window, up in the roof rafters, which starts the grapple upgrade — shoot it from the Nexus Forge side. The front door is sealed until the quest opens it, so do the house Intel early or come back with the exfil trick in the grapple-upgrade step.
Nexus Forge · Nexus Core
The central platform and the hub of everything: the World Seed pedestal, the two braziers, the crank wheels, Pack-a-Punch (revealed by the quest), the green grapple lanterns, and the Forge itself with its ring monoliths and eye panels. Nexus Core is its own named area beneath and around the Forge — it has the MK.78 wall-buy, and its side walls carry the six eye symbols each that the generator step needs.
Nyxara
Kowakujō's Shadowsmith. Its rooms are Nyxara Entrance, Nyxara Passage, Nyxara Main Chamber, Nyxara Sanctuary and the Inner Sanctum — worth knowing, because most steps name the room, not the temple. Dragon-head entrance, a fiery cauldron, the eye statue in the Sanctuary that starts the laser puzzle, the wall crystals, the Arsenal machine, and the vines behind the Inner Sanctum door.
Veytharion
Ashes of the Damned's Shadowsmith. Its rooms are Veytharion Passage, Veytharion Main Chamber and Veytharion Sanctuary. Goo jars, the four-pillars area, Mule Kick, the Rain Pool — and the four-cube wall, which turns out to be quest-critical: solving it is what unlocks rain, and rain is what spawns this temple's Corruption item.
Dravakar
Totenreich's ice-giant Shadowsmith. Its rooms are Dravakar Entrance, Dravakar Passage, Dravakar Main Chamber, Dravakar Sanctuary and the Inner Sanctum. Snowing chamber, the workbench, PhD Flopper nearby, the platform above the Entrance that hides the Fracture of Nyxara, the rotating pillars and their riddle in the Sanctuary, and the anvil in the Inner Sanctum where the Warden's Blight is crafted.
Caltheris
Astra Malorum's Shadowsmith. Its rooms are Caltheris Entrance, Caltheris Passage and Caltheris Main Chamber. A multi-floor crystal chamber with the floor tiles and light targets puzzle and the armour buy. Its Corruption item is the Shimmering Thread, which the tile puzzle leads to — not a random orb drop.
The Forest (Astral Plane)
Reached by feeding the vines in Nyxara's Inner Sanctum and eating the fruit. Three charred bodies hold the Wonder Weapon parts, and Shadow Rift kills in here drop Nyxara's Corruption scroll. Samantha's music box and a Paradox Junction toy box are here too. Re-enterable roughly each round.
Spira · Aranea · Ruinas Insula
The floating-rock islands. Juggernog and an Intel document on Spira Insula; the Mystery Box, the dance-Easter-egg tape recorder and a dig site on Aranea Insula; a Mr Peeks headphone at a window on Ruinas Insula. PhD Flopper sits on its own grapple-reach island.
The Titan Traps
They pull zombies in and slam them — and the symbols on each Titan's arm shackles are quest-relevant, not decoration: they tell you which arm has to kill the essence-marked zombie when you break a temple's shackle.
The Warden's Temple
The boss arena beneath the map, reached once all four Corruptions are cleansed. Its layout resembles the Revelations boss room. It has been reached and the Warden has been beaten — it is documented end to end — the way in and the fight itself.
Steps at a glance
- Quest COMPLETE: beaten legitimately on 21 August after a 26-hour marathon — the walkthrough below runs end to end, boss fight included
- Hold out in Her House, answer the ringing phone — the Twins are on the line — and take the cliff-edge portal to the Nexus Forge
- Place the World Seed, chase both Dread Skulls to their temples, carry each Usurped Flame back to a brazier, then turn both crank wheels for Pack-a-Punch
- Take the Void Claw grapple from the green lanterns — it is a temporary tactical, not the Wonder Weapon
- PhD-dive the wall above Dravakar's entrance for the Fracture of Nyxara
- Grapple an orb into Pack-a-Punch, Surge the Nexus, and carry the Astral Flame to Nyxara's eye statue
- Redirect the laser through the crystals, install the Fracture, and open the Inner Sanctum
- Feed the vines, eat the fruit, and take all three Wonder Weapon parts from the charred bodies in the Forest
- Solve the Dravakar pillar riddle — randomised per match — and craft the Warden's Blight at the anvil
- Shoot the basketball in Her House's broken window, learn the four blue symbols, exfil back inside and claim the Eye of the Forge to upgrade your grapple
- Solve the four-cube wall and interact with the portal, then rip the panels off the Nexus, clear the timed webs, supercharge and overdrive the generator, and line the three monoliths up in front of a temple
- Cleanse all four Corruptions — acquire the item, burn it, break the right Titan's shackle, then plate, reflector and wall statue, and finish with an orb, rain and a flame to the statue's forehead
- Prep hard — 50,000 essence, PaP-3 Wonder Weapon, Aether Shroud — then all players stand on the blue portals under the Nexus generator
- Boss fight — the Warden. Shoot the floating skulls to stun him and crit the top of his tail, survive the prison phase, break or dodge the phase-3 lightning wipe
Full walkthrough
Her House — the spawn checklist, the phone and the Intel
⏱ Before you leave spawn — the five-minute checklist. Each of these costs you a return trip if you skip it:
- Play the piano: 8-6-7-5-6-5-3-5-4 — in notes, A·F·G·E·F·E·C·E·D. Two Intel and 300 essence, and it works before you answer the phone.
- Bounce on the bed — the Squish document.
- Solve the four-cube wall early (Veytharion, below). It opens the Well/Portal and the Mystery Perk machine — and it is the prerequisite for rain, which the Veytharion temple item needs. Death Perception + Hidden Gems highlights the cubes through walls.
- Slot Shatter Blast and Shadow Rift before the match — the temple chain needs both. PhD Flopper helps with the Fracture of Nyxara, or just carry Semtex/C4 instead.
- Shoot the basketball out of the roof rafters — from inside the house before you leave, or from the Forge afterwards (both work).
- The moment Pack-a-Punch opens, start the grapple-upgrade symbols. They appear one per round flip and you need four, so get them running while you craft the Wonder Weapon rather than after.
- ⏱ Know the two round gates — they set your whole route. The Forest only opens from ROUND 8, and the exfil the grapple upgrade needs only comes on rounds 11, 16, 21…. The optimised route from the team that finished the quest first is to get all four temple setup puzzles done before round 8 — the Nyxara beam and vine, the cube wall, the Dravakar riddle and the Caltheris plates. None of those need the Wonder Weapon, so they are pure dead time later if you leave them.
You start inside Her House — Samantha's house from Revelations, rocketed onto the map in the intro — and the front door is sealed. Hold out, clear rounds and bank Essence.
Do the house Easter eggs before you leave. The door seals behind you and getting back in needs the exfil trick in step 11. While you are in here: play the piano code 8-6-7-5-6-5-3-5-4 for two Intel and 300 essence, bounce on the bed for a third, and HOLD INTERACT on the painting LEFT of the telephone to SLIDE it aside — behind it is the map's first Power-Up Statue (Max Ammo), not a one-off pickup. It slides, it does not break: meleeing it does something else entirely (see the repeatable painting Easter egg below). The gramophone is here too, and the basketball that starts the grapple upgrade is in the broken window — you shoot that one from the Nexus Forge side in step 11.
A phone rings on the lower floor. Answer it: the Twins from Paradox Junction are on the line. Confirmed in-game since launch: the Twins are the two timeline versions of Samantha Maxis — spelled out in dialogue between Grey and Caltheris — which is why this is her house. The call ends, the front door opens, and the portal at the cliff edge takes you to the Nexus Forge.
- Piano code played (2 Intel)
- Bed bounced (1 Intel)
- Max Ammo painting
- Phone answered
- Portal taken to the Nexus Forge
The World Seed, the Dread Skulls and Pack-a-Punch
At the Forge, place the World Seed on the central pedestal. The Warden speaks, and a red Dread Skull — one of the Twins, in their other form — flies off to one of the temples. Both skulls are Samantha Maxis, split across two timelines.
Which temples the skulls visit is randomised each game. Do not follow a guide that names them; follow the skull.
- Chase the first Dread Skull. Clear the debris on its route, follow it inside and shoot it down.
- In that temple's main chamber, interact with the brazier holding the Usurped Flame. You catch fire and carry it — run it back and light one of the two Nexus Forge braziers.
- A second Dread Skull flies to a different temple. Destroy it, take its Usurped Flame, and light the second brazier.
- Rotate the two crank wheels beside the platform. It lowers to reveal Pack-a-Punch — on this map a pool of ether energy, not a machine.
Carrying a flame is a committed run — you cannot bank it and you are lit up while holding it. Clear the route back before you pick one up, and finish the first flame before starting the second skull.
- World Seed placed
- Dread Skull 1 down, flame in a brazier
- Dread Skull 2 down, flame in the second brazier
- Both crank wheels turned — Pack-a-Punch open
Pick up the Void Claw grapple
Once Pack-a-Punch opens, green lanterns — small pillars with a glowing green orb — light up around the Nexus Forge. Interact with one to take the Void Claw.
The Void Claw is a temporary tactical, not the Wonder Weapon. Each pickup lasts roughly 30–60 seconds and then it is gone — but the lanterns are re-usable indefinitely, so grab a fresh one whenever you need it. Plan grapple sequences around a single charge rather than expecting to keep it. Reports differ on the exact timer (30s vs 60s), so treat it as "about a minute at best".
You need it constantly from here: traversal across the gaps, grappling purple orbs, grappling dig piles, and repositioning the wall crystals in step 6.
- Void Claw taken from a green lantern
The Fracture of Nyxara
Steps 4 to 10 all build one thing — the Warden's Blight. Three parts from the Forest, a crystal, a beam puzzle and a riddle, then the anvil. It is the longest single stretch of the quest, so it helps to know you are inside one job rather than six unrelated ones.
Buy PhD Flopper first — this step does not work without it.
Go to the Dravakar Entrance and get onto the platform above the inside of the entrance — wall-jump or grapple up. From up there, PhD-dive into the right-side wall (the structure hanging from the central wall). The wall opens, and inside is the Fracture of Nyxara. No PhD? Use an explosive lethal. A Semtex, C4 or similar thrown at that breakable wall opens it just as well as the dive — both routes are confirmed, and we verified the lethal one ourselves in-game — a crystal with clock-hand pointers.
- PhD Flopper bought
- Fracture of Nyxara collected
Surge the Nexus — make the Astral Flame (purple fire)
Learn this once — you will make purple fire many times. The generator and the temples ask for it over and over, and it is always the same recipe: grab a Void Claw or Talon → grapple a purple orb (Spatial Rift) into Pack-a-Punch so it orbits → crank the Nexus → the orb splits into the two cauldrons by PaP → interact with a cauldron to carry the flame. It is one-use and on a carry timer, so repeat the orb delivery every time a later step calls for it.
Find a purple orb (a Spatial Rift) floating around the Nexus Forge and grapple it into the Pack-a-Punch so that it orbits.
Then interact with the wheels either side of Pack-a-Punch to "Surge the Nexus". The orb is thrown up into the two cauldrons at the top of the stairs. Interact with a cauldron to pick up the Astral Flame — the purple fire.
One report has the interact glitching in solo play. If the prompt does not appear, back off and re-approach, or try again the following round.
- Orb grappled into Pack-a-Punch
- Nexus surged
- Astral Flame carried
Nyxara's eye and the crystal redirect
Move quickly — carry the Astral Flame to Nyxara Sanctuary and shoot the eye statue across the gap with it. A purple orb/laser starts bouncing around the room.
Using the Void Claw, reposition the wall crystals to route the bounce through toward Nyxara Main Chamber. You will reach a point where a crystal mount is empty — wall-jump or grapple up to it and install the Fracture of Nyxara.
Keep adjusting the crystals until the orb strikes the marked door to Nyxara's Inner Sanctum, which opens it.
Grab a fresh Void Claw before you start. The routing takes more than one charge if you are learning it.
- Eye statue hit with the Astral Flame
- Fracture installed in the empty mount
- Inner Sanctum door opened
Feed the vines and reach the Forest (opens at round 8)
⏱ The Forest cannot be entered before ROUND 8, however early you finish the vine. Start the vine early anyway — it is one of the four setup puzzles worth clearing before round 8 — then come back and go in.
Inside the Inner Sanctum, stand at the central vines until the progression bar fills. It drains your health the whole time, so arrive healthy and be ready to break off.
Then wait a round, come back, interact with the vines and eat the fruit — you teleport to the Forest, the Astral Plane.
The Forest is re-enterable roughly once a round, so you do not have to do everything in there on the first visit.
- Vine bar filled
- Waited a round
- Ate the fruit — arrived in the Forest
Three charred bodies — the Warden's Blight parts
Three charred bodies in the Forest hold the Wonder Weapon parts:
- Against a rock in the middle of the area — a short animation plays, then you get the part.
- At the broken house (the cabin) — melee the FLOOR just to the LEFT of the body to release the part. We confirmed this one in-game: the floorboard interaction is on the body's left, which is the detail most write-ups leave out.
- Opposite the spawn side, near the cavern entrance — the dead Warden figure.
Only the third trigger is still open: one account describes it as meleeing a smoky wisp near the cabin rather than the body by the cavern. Check both if one does not give you a part.
Lore worth the detour: Samantha's music box is in here and plays the Paradox Junction piano theme, along with a Paradox Junction toy box. Neither has a known quest use.
- Part 1 — body against the rock
- Part 2 — cabin floorboard
- Part 3 — near the cavern entrance
The Dravakar pillar riddle
The riddle is randomised every match. There is no answer to copy — so we built you a solver: set each symbol to the direction your riddle gives it and it returns the shortest lever sequence. Open the Dravakar Pillar Riddle Solver
Hear your riddle: melee the blue writing on the wall in Dravakar Sanctuary — the rotating-pillar room, not the Entrance. A quote plays naming four symbols — Moon, Star, Galaxy and Runner (the comet, sometimes called the traveler).
The levers. Three levers rotate the pillars and the central-pillar lever confirms:
- Middle lever — in the blue-writing room, on the wall opposite the writing.
- Left lever — left side of the pillar room, near the stairs.
- Right lever — right side of the pillar room, inside a wall.
How they move. Each lever rotates a fixed pair of pillars in opposite directions — e.g. the left lever turns Galaxy clockwise and Runner counter-clockwise; the right turns Moon counter-clockwise and Star clockwise. Pillar layout is Galaxy top-left, Moon top-right, Runner bottom-left, Star bottom-right.
Worked examples from the community pool — read for the pattern, then match your own riddle:
- "I drift to the runner that travels moons, who borrow from galaxies when stars stay true." → Left ×3, Middle ×2, Right ×1
- "I remember the runner that travels to stars, while moons and galaxies stay true." → Middle ×2, Right ×3
- "I drift to stars that remember moons, who borrow the runner that travels galaxies." → Left ×1, Middle ×2, Right ×2
- "I remember galaxies that drift to moons, who borrow the runner that travels the stars." → Left ×2, Right ×2
Confirm with the central lever — the pillar lowers and reveals an opening.
Why we now trust this enough to automate. We held off building a solver for two days while two competing lever models were circulating. The community's open-source interactive map settled the mechanics, and we validated the model against every pooled riddle that publishes its target directions — all three reproduce exactly. The solver runs that same model. The worked examples below are the raw data it was checked against, so you can verify it yourself.
- Riddle heard
- Pillars aligned
- Central lever confirmed — opening revealed
Dravakar Pillar Riddle Solver
Dravakar Sanctuary — the four rotating pillarsMelee the blue writing in Dravakar Sanctuary to hear your riddle, then pick the line you heard. The riddle is randomised per match, so which one you get changes — the answer for each is fixed.
Craft the Warden's Blight at the anvil
Grapple into Dravakar's Inner Sanctum through the secret passage the pillars opened, and interact with the anvil to craft the WARDEN'S BLIGHT — the map's Wonder Weapon. Dual crossbows firing green venom bolt volleys.
Pack-a-Punch it to unlock the alt-fire.
The anvil also UNCRAFTS — this is the best economy trick on the map. Once the Warden's Blight is built, hold interact at the anvil with any weapon equipped and it consumes that weapon, handing back its upgrades as items: a Legendary Pack-a-Punch III gun returns a PaP-3 crystal and a Legendary rarity wrench, which you can then apply to a different weapon. It is an upgrade transfer, not a refund into thin air. This is what the earlier “sacrifice altar” reports were describing. Community-reported, confirmation pending — and obviously, do not feed it anything you want to keep.
Possible exploit, flagged because it may not last: players think combining uncrafting with Mule Kick's multipack could duplicate Pack-a-Punch tiers in Cursed mode. Unconfirmed, and the sort of thing that gets patched.
Naming, one more time: this is the Wonder Weapon. The Void Claw is the temporary grapple tactical from step 3. Bloodthorn is the skin for finishing the quest, and Golden Claw is the store blueprint.
- Warden's Blight crafted at the anvil
- Pack-a-Punched for the alt-fire
Upgrade the grapple — the Void Talon (start this EARLY)
Start the first two sub-steps as soon as Pack-a-Punch is open — do not wait until the Wonder Weapon is finished. The four blue symbols need four round flips to appear, so get them cooking while you craft the Wonder Weapon. Only the bathroom shot later in this chain needs the Warden's Blight built and Pack-a-Punched. The payoff is the Void Talon — the upgraded grapple, which lasts significantly longer than the Void Claw's ~30–60 seconds and is required for the Forge and temple work that follows.
- Shoot the basketball out. It sits at the TOP of the broken window, up in the roof rafters.
Safest play: do it from INSIDE the house, through the broken window, before you leave through the portal. That is what the written guide recommends, and it removes any doubt.
Missed it? You have not lost the run. We confirmed first-hand that it can also be shot from outside after you teleport out — stand at the Nexus Forge, look back at Her House and keep shooting until it falls out of the map. Guides that say this must happen before you leave are wrong; the outside shot is your recovery route. You also do not need to wait for Pack-a-Punch.
- Then wait for the symbols. The four blue symbols do not start spawning until Pack-a-Punch is open — they begin appearing the round after it unlocks, then land on Her House one per round flip — four in total. Note the first, then flip the round three more times. Memorise the order they appear in, and do NOT shoot them yet. (First-hand: shooting the ball early loses you nothing, because the symbols are gated on PaP, not on the ball.)
- On an Exfil round — those are rounds 11, 16, 21 and so on — shoot the symbols in spawn order, oldest first.
⚠ Get the order wrong and you lose four rounds. A fail tone plays and all four symbols are wiped, so you wait for them to respawn one per round all over again. Screenshot them as they appear. Get it right and the Twins dance in the window — that is your confirmation.
- Answer the Exfil telephone at the Nexus Forge — it will not end your game — then kill the Exfil HVT.
Pack-a-Punch the Warden's Blight NOW, before you take the portal. The next step needs a charged shot and you do not want to discover that on the other side.
Take the portal to Her House; the Twins drop the “Raw Aether Crystal”. - From the upstairs bedroom corner, fire a charged Warden's Blight shot into the bathroom barricade window — towards the end of the shot the “Eye of the Forge” lifts out of the barrier. Pick it up.
⚠ Picking it up starts a LOCKDOWN. Ravagers and Doppelghasts spawn — stay in the house and survive until the phone rings, then answer it and the portal returns you to the map. Do not grab the Eye with no ammo left.
- At the Forge, place the Eye of the Forge at any ONE green-orb station to empower it → that station now dispenses the VOID TALON, the upgraded grapple with a far longer duration, which you need for everything that follows.
Choose that station carefully — only the one you pick is upgraded. Every other lantern on the map still hands out the basic Void Claw. Pick something central that you will actually be passing.
This is also your second chance at the house Intel — if you left spawn without the piano code or the bed intel, get them while you are inside.
- Basketball shot out of the map (do this early)
- Four symbols observed across four round flips — order noted
- Warden's Blight built and Pack-a-Punched
- Symbols shot in order, Exfil HVT killed, exfil taken
- Raw Aether Crystal from the Twins
- Eye of the Forge collected — lockdown cleared
- One green-orb station empowered — Void Talon collected
Reveal the Portal, then reconstruct the Nexus Generator
You need the Void Talon for this. Do the grapple upgrade first — the Void Claw's ~30–60 second timer will not carry you through it.
D0 · Reveal the Portal — the four-cube wall
⚠ This is a required main-quest stage, not a side Easter egg — it is how you make it RAIN, and the temple chain needs rain five or more times. Do it before the temples.
We documented this wall and its four symbols first — Chris found them in-game on launch night, hours ahead of every public source, when every other guide still had it as decoration.
- Collect the four stone cubes hidden around Veytharion — Fire, Water, Air (the “hand”) and Earth (the “plant”/leaf). Same four blocks every game, spots vary; Death Perception outlines them. Reference spots: Water under the Sanctuary green lantern · Fire by the GobbleGum machine (wall-jump) · Plant in the Mule Kick room past the wall-buy (wall-jump) · Hand on the Mule Kick room's bottom floor by the spawn window.
Set them down near the wall device but not so close they get sucked in before you are ready to load in order.
- Load the device — the order varies per game, so read your own marked slots. The four valid loads are Water·Earth·Air·Fire · Earth·Water·Air·Fire · Fire·Air·Water·Earth · Fire·Air·Earth·Water. All four blocks shine YELLOW when loaded correctly. Get it wrong and you collect the blocks again next round.
- The transfer mini-game. Move all four blocks to the far side by placing them in the rectangles and sending them across with the wheel/dial — melee it once the Air block sits on the middle bridge.
The rule, so you can recover from any state: Fire must never be left alone with Water or Earth. Air is safe with everything — it is your ferry.
The working sequence is fixed and identical every game: Fire + Air across → leave Fire, ferry Air back → bring Water over → stack Air on Fire, Water on Air → ferry Fire + Air back for the Plant → Plant onto Water → final pass, Air onto Plant and Fire on top. Use the step-by-step sequencer below if you lose your place.
- The wall opens on a random Perk and the pool/portal. Interact with the portal — an audio quote plays. This is what activates the Rain Pool: from now on, one interact with the pool guarantees rain the next round.
Generator refusing to charge later? Come back and interact with this portal again. It is the known fix and the single most common stall on the quest.
D1–D5 · Reconstruct the generator
- Break every seal — 15 plates. With the Void Talon: 3 around the top of the Nexus Forge, one each on the inner, middle and outer ring; then 12 in the Nexus Core — six on each side of the room, two on each door. The Talon's duration covers the lot in one or two grabs.
This count is ours, first-hand — and the canonical guide matches it exactly. If you are one short it is almost always a high one near the ceiling. When the last plate drops, a wave of spiders attacks — clear it.
- Burn the webs on the three openings on each side. A cauldron flame works and Molotovs are confirmed; Wonder Weapon shots and explosives also work, and the most stubborn web yields to a thrown purple fire.
- Surge the Nexus — deliver another orb into Pack-a-Punch and crank.
- Engage the gears — the window is very short. Straight after cranking, run down and interact with the floor lever a few times until the gears fully engage. Miss it and you must wait out the crank cooldown and go again. You know it worked when all three sections of the Forge are spinning.
- Aim the monolith beam. Crank the handle on the back of a pillar: that pillar moves the SMALLEST amount, the other two move MORE — and all three move in the SAME direction. They usually start one space apart, with the laggards catching up to whichever you crank.
The direction switch is the handle UNDERNEATH Pack-a-Punch: oriented left-to-right → the pillars travel anticlockwise; up-to-down → clockwise. Interact to flip it. Most people who cannot make the alignment work are fighting the wrong rotation.
How to play it: crank a pillar so a mover catches up and pairs with it. If the third is still behind, flip the direction downstairs and crank so the pair catches the third.
Aligned but pointing at nothing? Interact inner → middle → outer, one crank each, and the whole aligned set shifts one spot. Repeat until it faces a temple — this is also the fast way to hop temple to temple later.
⚠ Aligned on a temple but no beam? That Shadowsmith's corruption item is not in their brazier yet. Place it and the beam fires.
- Four cubes collected and loaded — all shining yellow
- Transfer solved; wall open; PORTAL INTERACTED with
- 15 plates removed (3 rings + 12 in the Core); spider wave cleared
- Webs burned, both sides
- Nexus surged, gears engaged — all three sections spinning
- Three pillars aligned on your first temple
Cube Wall — guided move sequencer
Veytharion — the four-cube wall (a required quest stage)The transfer is a river-crossing puzzle, and the working sequence is the same in every game — what people lose is their place in it, halfway through, with no way to tell what they have already done. Step through it here. The rule stays on screen so you can recover from any state instead of starting over.
Cleanse the four temples — one chain, run four times
Every temple uses the same ten-step chain. Only four things change per temple — the item, the plate trigger, the beam target and a couple of quirks. Learn the chain once, then read the four variables.
Order: any works, but do Veytharion last — its item needs rain. Bring: decoys, Aether Shroud, or Wisp Tea's Zombie Sitter augment, which holds the last zombie docile while you stand on plates. Hit the Rain Pool every round during this phase — you will want rain repeatedly.
THE CHAIN — for each temple in turn:
- ALIGN the three monolith pillars on this temple (previous step). Re-do it every time; the beam must stay on the temple you are working.
- GET THE ITEM — per-temple, below.
- Place the item in the temple's CAULDRON, the fire pit in its main chamber.
- Throw purple fire into the cauldron. The item burns and a mist rises and attaches to a nearby zombie, marking it. If that zombie dies the mist transfers to the next closest, so you cannot easily lose it.
- Lead the marked zombie to the RIGHT Titan, bring it to the middle and activate the trap — it walks to the correct wrist by itself.
The rune map, confirmed — this is not guesswork:
- Veytharion and Nyxara runes → the Titan outside VEYTHARION. Veytharion uses the inner/left arm nearest the entrance; Nyxara the outer/right arm.
- Caltheris and Dravakar runes → the Titan outside CALTHERIS. Caltheris uses the inner/left arm by its entrance; Dravakar the outer/right arm.
- THE PLATE. Interact with it first to hear the quote — Dravakar gives two — then release it with that temple's trigger below. All four triggers are cumulative: you can step off, deal with zombies, and resume.
- Charged Warden's Blight shot at the revealed MIRROR. It rises and a light beams through it. Steer it by shooting the mirror: hit the OUTSIDE for large movements, the CENTRE for fine adjustment.
- Test the alignment before you spend kills on it. Kill one zombie so a soul enters the beam:
- Orange/gold cracks forming on the wall = aligned. Keep killing to fill the soulbox until the wall opens on a statue face.
- No cracks = adjust and retry.
- ⚠ A PURPLE RUNE lights up on the wall instead? Your Titan step was not completed for this temple. Go back and do it, then realign. This is the wall most stuck players hit, and nothing else on screen tells you.
- Shoot the statue → LOCKDOWN. You are locked in until you find and shoot four shadow souls — they show on the minimap and are audible, and they are weak to the Light Mend ammo mod. Then shoot the statue again until the screen flashes white.
- THE FINISH — needs a rain round, so hit the pool the round before. Grapple a purple orb to the temple's orb spot, then launch it up into the giant head with a charged shot (the eyes or mouths glow; if it misses, the orb was not in line). Then during the rain, grapple onto the little island facing the head and throw purple fire at the head's exact target. Lightning strikes the temple. Cleansed.
Count your lightning strikes. Four strikes is what unlocks the boss — not four broken shackles.
THE FOUR PER-TEMPLE VARIABLES:
DRAVAKAR
- Item — the Blacksmith's Hammer. Slot Shatter Blast, go up to the Wonder Weapon forge room: a shield in each of the four corners. Proc Shatter Blast on zombies beside each one — behind them is an ammo mod, a self-revive or the Hammer, and which is random.
- Plate — stand on it and RE-PLATE YOUR ARMOUR about five times. That is the actual mechanic. Every earlier method that seemed to work — frag kills on the tile, taking zombie damage, charged shots at your own feet — worked only because it forced you to re-plate. Just re-plate directly.
- Beam target — the back-right wall near the plate. Souls — one in the ceiling (genuinely hard to spot), one on the second floor above the entrance door, one up the parkour spot. Orb — under the temple entrance. Flame — just above his eye, from the little island in front.
NYXARA
- Item — the Ancient Scroll. Slot Shadow Rift, go to the Forest and train the biggest horde you can, then spray Shadow Rift into it — the more zombies it procs across the better your odds, and the scroll drops as they fall. Big hordes beat picking off singles.
- Plate — PRONE for a net 30 seconds, cumulative. Zombies bothering you? Spam charged Wonder Weapon shots at the ground while you lie there.
- Beam target — downwards to the bottom-left, threading the needle through the gap. The trickiest angle of the four — use centre-of-mirror taps and lean on the crack test. Souls — spread wide, including underground. Orb — onto the platform under her head. Flame — the small purple glow between her eyes, from that platform.
CALTHERIS
- Item — the Thread. Grapple purple orbs and interact until it drops — pure RNG, one orb or five. Speed it up by clearing the four-plate sharpshooter trial (plate 1 = wall in front · plate 2 = four more marked spots · plate 3 = behind you including the ceiling · plate 4 = the wall to your right; too slow and you sink through, resuming from the same plate next round). It opens a room of extra orbs, and interacting with the lantern in there spawns more.
- Plate — stand on it AIMING DOWN SIGHTS at the Mystery Box for a net 30 seconds. You can shoot, and you can step off and return.
- Beam target — the back left of the room. Souls — one up high, one hidden by the multiphasic injector. Orb — in front of the Caltheris entrance. Flame — the boil/purple mark on her head, from the platform facing her.
VEYTHARION — do this one last
- Item — the WOVEN SASH. It only spawns while it is RAINING, and it MOVES EVERY ROUND. A spot that was empty last round may hold it this one, so sweep all three every rain round and keep the pool rolling. A metallic sound at the round change hints it has spawned nearby; it shows as a small blue circle. All three spots are OFF the map — that is intended. Grapple out and hold or spam interact as you fall; you die-warp back but keep it.
- Spira Insula — the Juggernog island. Grapple up and spam interact as you fall.
- Between Caltheris and Dravakar — behind the Mystery Box location and PhD Flopper, around the back of that wall at its base.
- Aranea Insula — by Widow's Wine, behind the box location on the wall.
- Plate — JUMP on the boss-face stone about 30 times, in the very centre, cumulative. In co-op, everyone jumping together helps if it is being fussy.
- Beam target — behind the zombie barrier down the left hall (the left window, bottom). Titan — the trap right outside its entrance, inner arm closest to the door. Orb — directly under the entrance; his mouths glow. Flame — the shining light above the middle mouth, from the little island. Its lockdown can add an Abomination.
- Item — the WOVEN SASH. It only spawns while it is RAINING, and it MOVES EVERY ROUND. A spot that was empty last round may hold it this one, so sweep all three every rain round and keep the pool rolling. A metallic sound at the round change hints it has spawned nearby; it shows as a small blue circle. All three spots are OFF the map — that is intended. Grapple out and hold or spam interact as you fall; you die-warp back but keep it.
- Dravakar cleansed — lightning strike 1
- Nyxara cleansed — lightning strike 2
- Caltheris cleansed — lightning strike 3
- Veytharion cleansed — lightning strike 4
- Four lightning strikes counted — the boss is unlocked
Monolith Alignment Helper
Nexus Forge — the three rotating pillarsThe pillars start in random positions each match, so there is no fixed answer to copy. Tell it what you are looking at and it gives you the confirmed procedure for that situation. It deliberately does not print a crank count — the note at the bottom says why.
Boss prep and the way in
⚠ THE GATE: the entry circles only appear once all four temples are fully cleansed — meaning four LIGHTNING STRIKES, not four broken shackles. If the circles are not there, one temple's chain is unfinished. Count your strikes. A round flip, or re-interacting with the cube portal, clears stuck states.
Prep before you drop in:
- ~50,000 essence banked. Ammo runs out fast.
- As many perks as you can hold — and run the Ted trials through your game. With every perk owned, the boss's Veytharion blessings become persistent perks. That is the reason to bother.
- A bullet weapon at PaP-3, gold or legendary rarity. The meta pick is the SoCal LMG build in the loadout section — it one-phases the tail. Mammoth, Novaline or the backlash Echo-12 otherwise.
- The Warden's Blight at PaP-2 minimum, PaP-3 ideally. Never at 1.
- Wearables: the Space Helmet (+30s grapples) and the Goat Mask (stationary fire ring) both pull real weight in the arena.
- GobbleGums: Perkaholic, Raindrops, Power Keg and a revive gum. No-money-spent: Shields Up, Power Keg, Cashback.
- Kazimirs as lethals; Light Mend somewhere in the team (it heals, and it melts shadow souls); field upgrade Aether Shroud extended, or Frenzied Guard for armour economy.
⚠ THE RED-EYE TRICK — do this before you descend. Grapple the Eye of the Forge back OUT of the station you installed it in and carry it down with you. You can install it into the boss arena's grapple stations and run the upgraded Void Talon for the entire fight. In a fight decided by mobility, this is the single best piece of preparation available.
The way in: head under Pack-a-Punch into the Nexus Core. There is a circle per player on the floor. Stand on them and hold interact → a vote starts → DESCEND, into The Final Encounter.
- Four lightning strikes confirmed
- ~50,000 essence, perks maxed, Ted trials run
- PaP-3 bullet weapon; Warden's Blight at PaP-2 or better
- Space Helmet and Goat Mask equipped if you have them
- Eye of the Forge carried down for the arena grapples
- Stood on the circles, held interact, voted to descend
Boss fight — the Warden
✅ Fully documented and cross-checked across the three guides that cover the fight — MrRoflWaffles, MrDalekJD and MZC. Beaten legitimately by MrDalekJD and CodeNamePizza's team on 21 August after a 26-hour marathon, and by MrRoflWaffles' team on Day 3.
What you are fighting: a spider/scorpion hybrid form of the Warden — extremely aggressive and fast. His hits knock you back and can throw you off the map. Four damage phases — and the fourth begins after you think he is already dead.
Every phase runs the same three beats. Only the interference changes. Learn the loop once, then read what each phase adds — the same way the four temples worked.
YOUR TWO WEAPONS HAVE DIFFERENT JOBS. Getting this backwards is the most common reason a first attempt stalls:
- The Warden's Blight — skulls and stingers. Its shots home in on the skulls, so fire in their direction and they track. It also clears stingers fast and does solid non-crit damage to the Warden himself.
- Your bullet weapon — the tail, and only the tail. Low-recoil, high DPS, PaP-3 at gold or legendary. This is where the fight is actually won.
THE CORE LOOP:
- He summons a Dread Skull companion — grey-blue, orbiting him. Destroy it with the Warden's Blight. The backlash Echo-12 two-shots them, which is worth a Mule Kick slot.
- He is stunned for about five seconds. Kazimir down at his feet as the stun lands — that is the window.
- His scorpion tail is exposed as the crit spot — swap to the bullet weapon and dump everything into it. The SoCal LMG build in the loadout section one-phases him inside a single stun window.
⚠ THE ARMOUR RULE — the single thing that decides how long this fight takes. Between damage phases the Warden retreats to his throne to drain aether and goes immune, and shadow souls spawn out at the edges of the arena. Shoot the souls to bring him back — and if you leave them alive, he returns with hardened armour. The souls are not an optional side job; they are his armour. Light Mend melts them and heals you at the same time. If skulls seem to stop spawning, it is because there are souls you have not cleared.
Movement. Stay permanently mobile, orbiting the arena. Two fountains, one on either side, refresh your grapple — live on them, especially solo, where he hard-focuses you. If you carried the Eye of the Forge down, install it into an arena station and run the upgraded Void Talon for the whole fight. Do not be standing in zombies when he knocks you back — that combination is how most deaths actually happen.
His main attack is the CHARGE — grapple away from it. If it connects he follows with a swipe that makes you BLEED, and the bleed blocks your health regeneration. Plate up and disengage until it wears off.
WHAT EACH PHASE ADDS:
- Phase 1 — the loop, clean. Skull → stun → tail, with nothing else in the way. As the phase ends a Max Ammo and a Max Armor drop, often alongside Veytharion's blessing.
- Phase 2 — three new problems at once. Four shadow souls to clear. Stingers: plant-like shooters that rise out of the ground, fire at you and constantly knock you off the map — individually weak, but they respawn. And a portal attack, a projectile that travels toward you from the sky — shoot it down every time it appears.
- Phase 3 — the prison, at roughly two-thirds health. You are teleported into a closed room; in co-op every player gets their own. You draw one of two trials: kill an elite zombie (reward: +movement speed for 60s), or survive the elemental zombies for 30 seconds — Frost Zombies and Onis, which appear nowhere else on the map — (reward: +health for 60s). Back in the arena: four more shadow souls and more blessings. Two guides described this step differently and both were right — they simply drew different trials.
- The final phase — he gets back up. Phase three ends, the Warden goes down, and he is not dead. He returns enraged, with more Max Ammos and Max Armours and all four blessings on the floor. Souls → skull → tail a handful more times and he is finished for good.
⚠ THE STINGER WIPE — and it is cancellable. If enough stingers are alive at once they connect to each other and charge a wipe that clears the arena. Switch the whole team onto destroying stingers and the wipe aborts. Do not run — kill them. (If one does fire, jumping off the map as it lands still skips the blast. Emergency only.)
⚠ Armour economy. With no plates he can ONE-SHOT you below 250HP. Stop, kill a horde with your ammo mods, then run through the pile of corpses to hoover the plates. Frenzied Guard earns its slot here.
THE SHADOWSMITH BLESSINGS — pickups through the fight. The lore is that the Shadowsmiths are repaying you for the earlier maps' Easter eggs:
- Veytharion — two free random perks. With every perk already owned they become persistent perks, which is the whole reason for the Ted-trials prep.
- Caltheris — a free Full Power (field-upgrade regeneration, 60s).
- Dravakar — a free Max Armor: full health and armour replenished, 60s.
- Nyxara — invulnerability to the Warden's slam, 60s.
Pre-nerf difficulty. Around 30 downs for one of the completion teams. If you beat it now, you did it at its hardest.
⚠ ENDING SPOILER — skip this line if you want the cutscene cold. After the Warden falls the crew departs, on a “the cycle continues” note. Community reception of the ending has been mixed.
Rewards for finishing: the Bloodthorn skin for the Warden's Blight, a Calling Card and 10,000 XP — plus, if you finish before Directed Mode is added, a unique Calling Card variant that can never be earned afterwards. All 14 Intel adds another Calling Card and 10,000 XP, and the Mastery Challenge pays an animated card.
- Eye of the Forge installed in an arena grapple station
- Loop running: skull (Blight) → 5-second stun → tail (bullet weapon)
- Souls cleared between every phase — or he re-armours
- Plates kept up; never below 250HP unarmoured
- Charge grappled away from; bleed waited out before re-engaging
- Phase 2: stingers kept down, portal attack shot out of the sky
- Stinger wipe cancelled by switching everyone onto stingers
- Prison trial completed
- Final phase — he gets back up; finish him
Side Easter Eggs & extras
Everything beyond the main quest. Tap any entry to open the full how-and-where breakdown.
Best loadout — guns, augments and gums
Medium range rules this map. The three-gun core, from the definitive guide and corroborated by a second full guide:
- M34 Novaline — the primary. It is a wall-buy in Dravakar Sanctuary, so ammo stays cheap all game.
- Mammoth LMG — the heavy option.
- Echo-12 with the Backlash Launcher fire mod — turns it into a grenade launcher: elite horde clear, and it two-shots the boss's skulls. Worth a Mule Kick third slot.
Augments, in priority order: Light Mend + Booster Shot (healing overcharge, and Light Mend melts the shadow souls in the temple lockdowns) · Juggernog + Reactive Armor · Stamin-Up + Free Faller (you fall from height constantly) · Widow's Wine + Tangled Web + Sticky Grenade · Mule Kick + Free Throw · Double Tap + Double Impact · Death Perception + Death Stare (auto-finishes low-health enemies via their elemental weakness — much faster shadow-soul kills, and it helps at the boss) · Wisp Tea + Mask of Benevolence, and the minor that matters most on this map: ZOMBIE SITTER — it holds the last zombie docile at round end while you stand on plates. Set augment research to Widow's Wine and Wisp Tea before your first load.
GobbleGums. Budget lane: Shields Up and friends. Points-max opener: leave the house, then around round 5 pop Profit Sharing + Temporal + Double Points and burn hordes until Profit Sharing expires — it builds a huge essence lead. Boss: bring an armour gum, and in co-op Phoenix Up or Near-Death Experience. And the one worth the inventory: if there is any map to pop a Perkaholic in Black Ops 7, it is this one — every perk owned turns the boss's Veytharion blessings into persistent perks.
Masks & Helmets — all four, and what they do
Four wearable head items, each with a passive. They are interchangeable and you can hold all four in one game; once unlocked each returns to its own pedestal so you can swap.
① GOAT MASK — the house painting, round-gated. The painting downstairs in Her House, left of the phone, is meleed ONCE, and the reward depends on how many rounds you have survived in the house: rounds 5–6 = 600 essence or ammo · rounds 7–8 = a perk can or rare aether tool · round 9+ = the Goat Mask. Three ways to last that long in there: a start-of-game Wall Power gum with a PaP'd CODA-9; during the return-for-the-Eye stay; or post-quest, when every exfil offers “return to the house”. Ability: stand completely still and a purple ring of fire burns for ~5 seconds — zombies entering it die. ~60-second cooldown. Pedestal: Veytharion Sanctuary, middle room by the armour wall-buy, in the corner.
② TWINS MASK — the Forest minigames, hard modes. Full chain in the Forest Mask entry below. Ability: a rare proc where the Twins strike down like lightning, stun the horde and dance in a killing circle for ~3 seconds. Pedestal: back of Dravakar Sanctuary, left of the armour wall-buy.
③ SPACE HELMET — +30 seconds on the Void Claw/Talon timer, and no fall damage. Collect six Mr Peeks parts: the head is in Her House upstairs from the game start (corner, by the knocked-over lamp); the other five need the grapple, in any order — front of Caltheris Passage · Ruinas Insula (stand at the Mystery Box spawn, look off-map, grapple it) · Aranea Insula (back portion opposite the GobbleGum machine, low) · Spira Insula (above Juggernog — grapple up, then grapple the pillar in front) · the chasm between Dravakar/Veytharion and the Nexus Forge. With all six and every door on the map opened, the next round Mr Peeks spawns in Caltheris Main Chamber above the Mystery Box spot. Interact for a grapple parkour course through his rings toward Nyxara. Rewards by time: finishing = mystery perk + salvage · under 60s adds a free Ray Gun · under 50 seconds = the Space Helmet. Pedestal: Caltheris temple — enter, immediately right, wall-jump onto the platform.
④ WARDEN'S HAT — permanent immunity to web slows. Never slowed by Deathspinner or Web Mother webs and projectiles again. Needs the grapple and round 16+: grapple onto a Web Mother and ride her while she is next to Pack-a-Punch, killing zombies from her back — a hipfire explosive works best, and the kill count saves across rides. At the threshold you are dismounted, she leaps into the Pack-a-Punch, and the hat appears. Pedestal: back of Nyxara, in the Forest-entry room.
Boss synergy: the Space Helmet (longer grapples in a fight decided by mobility) and the Goat Mask (a stationary fire ring) both pull real weight against the Warden.
Corrupted Legacy Weapons — an Ultra from round 5
An Ultra-rarity legacy weapon as early as round 5. This is what the old “Corrupted Novaline” thread turned out to be — the Novaline is the trigger wall-buy, not the reward.
- Choose your reward by wall-buy: buy the M34 Novaline (Dravakar Sanctuary) for the TR2, or the M10 Breacher (left of Caltheris' front entrance, opposite Wisp Tea) for the Olympia.
- Pack-a-Punch three OTHER weapons. The trigger wall-buy itself does not count.
- On a rain round — force one at the Rain Pool — the wall-buy glows.
- Make purple fire at the Nexus Forge and throw it at the glowing wall-buy. An HVT Web Mother spawns — kill her — and the wall-buy now offers the Corrupted Ultra. Buy it.
Caltheris pads and targets — the purple-lantern door
Four floor tiles by the wall, worked one at a time rather than all at once. Reward: a Lantern and two purple orbs — the lantern behind the wall that launch-night reports spotted without knowing how to reach. Take too long on a tile and it drops open as a trapdoor. Full method in the steps.
- Find the four floor tiles by the wall in the Caltheris temple — the multi-floor crystal chamber.
- Stand on the furthest tile. Four targets spawn.
- Shoot all four targets, then move to the next tile and repeat. Work through all four tiles in sequence.
- Do not dawdle. Take too long on a tile and it opens beneath you as a trapdoor — you take the fall damage and have to climb back up.
- Reward: a Lantern and two purple orbs. The lantern is the one launch-night players kept spotting behind a wall without knowing how to reach — and the orbs are handy for the Caltheris temple item, which is collected off purple orbs.
- Unexplained, logged as an open lead: one player got a “NO ENTRY — DO NOT COME IN” message with a dark-blue badge at a floor plate in the Caltheris temple entrance. Nobody has reproduced the trigger and there was nothing interactable there. If you see it, note what you were running — that player had Napalm Burst, point turrets and Frenzied Guard up.
“All We Are” — three Mr Peeks headphones
The map's secret song is “All We Are” by Kevin Sherwood and Elena Siegman. Activate three Mr Peeks headphones; each plays audibly when you are near one. The three areas are fixed (micro-spots shift slightly per game, and the old “alternate spawn sets” worry is closed — every report describes these same three):
① Nyxara Main Chamber — the high ledge/pillar-top left of the wall-buy. Grapple to the top and tap interact as you fall past it.
② Ruinas Insula — the window ledge right of PhD Flopper.
③ Aranea Insula — on a skeleton wedged low behind the GobbleGum machine, opposite Widow's Wine.
- The song is “All We Are” by Kevin Sherwood and Elena Siegman. Activate three Mr Peeks headphones to trigger it.
- Each headset plays music when you are near it — follow the sound if you are hunting blind.
- Nyxara Main Chamber — on top of a pillar; wall-jump up to it.
- Ruinas Insula — at a window.
- Aranea Insula — by a skull tucked between a rock and a low wall. (The wiki spells the area "Arena Insula" — same place.)
- Alternate sightings, flagged: launch-hour reports put headphones on top of the PhD Flopper island and in a hole in a boulder near Widow's Wine. These may be alternate spawns rather than errors — if the three above come up short, check them.
- The soundtrack releases on 28 Aug 2026, which will confirm the credits independently.
Her House micro-Easter-eggs
Five things in the spawn house, and the door seals behind you: the piano code 8-6-7-5-6-5-3-5-4 (two Intel + 300 essence), bouncing on the bed (one Intel), the painting left of the telephone (hold interact to slide it aside — behind it is Power-Up Statue #1, Max Ammo), the gramophone (Black Ops 2 Nuketown Zombies music; hold the interact for an older game-over track), and the basketball in the broken window, which starts the grapple upgrade in step 11 — shot from the Nexus Forge side, not from the house.
- Do these before you answer the phone — the front door seals behind you, and getting back in needs the exfil trick in walkthrough step 11.
- Piano code — 8-6-7-5-6-5-3-5-4, or in notes A · F · G · E · F · E · C · E · D. The Paradox Junction melody plus one extra note, and it works before you answer the phone. One play awards BOTH Intel pieces — the Blurprint document and the A Game of Cat and Strauss audio log — plus 300 essence. The reason people think they only got one: the two rewards land in different Intel tabs (Documents and Audio Logs), so checking a single tab makes it look like one drop. We verified this first-hand. The digit-to-key mapping is how the community writes it; count the keys as numbered in game.
- Bounce on the bed — awards the Squish Intel document. No explosives needed, despite earlier reports.
- Melee the painting on the wall LEFT of the telephone — an opening appears, and Power-Up Statue #1 (Max Ammo) sits in the top-left corner of the hole: peek in and shoot it. This is statue 1 of the map's 7 rather than a one-off pickup, which is what the conflicting launch-night reports were actually describing.
- The gramophone plays the Black Ops 2 Nuketown Zombies loading music. Hold the interact instead and it reportedly plays an older game-over track.
- The basketball in the broken window — the first step of the grapple upgrade. You shoot it from the Nexus Forge side, looking back at the house, so this one does not need doing before you leave. Keep shooting until it falls out of the map.
The Forest Mask Easter egg — the Twins minigames, and a wearable Mask
The map's headline side quest. In the Forest, by a tree next to the house, find the tiny Samantha music box and interact — come back next round and the Paradox Junction toy box has appeared. Hold interact and three toys pop out: one minigame per round — hide-and-seek, jump rope and stuffed animals. Rewards scale (essence, salvage, self-revives, aether tools and crystals, wrenches). Then replay the harder versions, one per round, and the reward is THE MASK — a wearable head item, visible in third person, whose passive has the Twins periodically strike down in lightning and hurl the zombies around you. Full rules and tactics below.
- Reach the Forest through the Nyxara Inner Sanctum vines (the same route as the Wonder Weapon parts — and remember the Forest only opens from round 8).
- Start it properly: by a tree next to the Forest house, interact with the tiny Samantha music box. Come back the NEXT round and the Paradox Junction toy box will have appeared — hold interact and three toys pop out.
- You get one minigame per round, and a completed toy leaves the box until all three are done, at which point it resets.
- Teddy Bear — collect the glowing plushies. The catch: the enemies only move when you are not looking at them, so sweeping your view around is the defence.
- Mask — find the Twins roughly 15 times before the timer runs out.
- Ropes — a skipping-rope game. Three fails ends it.
- Rewards scale with how well you do — essence, salvage, self-revives, aether tools and crystals, wrenches. Around 1,000 essence per game is typical. Failing drops grenades at you instead, so treat a bad run as a real cost.
- Then replay the HARDER versions, again one per round across later rounds.
- The reward is THE MASK — a wearable head item, visible in third person. Its passive has the Twins periodically strike down in lightning and hurl the zombies around you. It is a rare proc and a serious flex, and it is the best side reward on the map.
- Complete all three and loot drops beneath the vines, including an Aether Tool and an Aetherium Crystal.
The dance-off — cassette, fireplace, calling card
Grapple the BONE PILES near the OUTER ISLANDS — never the ones by the centre or Pack-a-Punch — and there is a chance a cassette tape is inside. It glows yellow, has no interact prompt and never shows in your inventory — the grapple simply grabs it. (Same piles, separate mini-Easter-egg: grapple a floating purple orb onto a pile first and the pile pays better.) Take the tape to Aranea Insula and find the cassette player, in a hole not far from Widow's Wine. Insert the tape, interact again to start the dance minigame (in co-op it goes to a vote). Rewards scale with your performance — mystery perks, epic aether tools and Pack-a-Punch crystals are all possible — and it awards the “Survivor's New Groove” calling card and challenge.
- Trigger chain still being confirmed — this is the community's best reconstruction.
- Find one of the Origins-style dig piles (piles of bodies) around the map — the cassette tape is buried in one.
- Grapple a purple Spatial Rift orb onto the pile with the Void Claw, then grapple the pile itself to free the tape.
- Worth farming beyond the tape: enough orb-onto-pile grapples eventually triggers a Deathspinner jumpscare that drops rewards including a Random Perk and an Aether Tool. It may be a fixed location rather than random — the second dig site, beside Juggernog, is the one commonly reported.
- Take the cassette to the tape recorder at Aranea Insula — back-left, right of the Mystery Box.
- The dance-off itself happens at the house.
- Reported extra, unconfirmed: a Peeks head picked up at the house beforehand may also be required.
Power-Up Statues — all nine located
Shoot the seven base statues for their power-ups, and the Free Perk and Fire Sale statues then appear. All nine are now located.
⚠ The power-up spawns ON YOUR POSITION when the statue breaks — so shoot from where you actually want it.
The trick worth knowing: stick C4 on a statue early and detonate it later, exactly when you want the drop — a Nuke mid-horde, or a Max Ammo the moment you run dry in boss prep.
① MAX AMMO — Her House: hold interact to slide the little painting aside (left of the telephone); the statue is behind it, top-left. (Meleeing that painting instead is the Goat Mask Easter egg — see Masks & Helmets.)
② BONUS POINTS — Nyxara Passage by Stamin-Up, on a distant building. Use a scope.
③ INSTA-KILL — Nyxara Main Chamber, down in the lava crevice below the main area.
④ DOUBLE POINTS — Caltheris Passage, past the triangular rock.
⑤ NUKE — Caltheris Main Chamber, on a distant rooftop outside.
⑥ FULL POWER — Veytharion Main Chamber, up in the ceiling above the tentacles.
⑦ MAX ARMOR — Dravakar Entrance, jump up at the zombie spawn window.
⑧ FREE PERK — Veytharion Sanctuary, on the distant bridge.
⑨ FIRE SALE — Spira Insula, beyond the Mystery Box spawn.
- Seven statues are hidden around the map. Shoot one and it drops its power-up at your feet.
- The seven are: Bonus Points, Insta-Kill, Double Points, Nuke, Full Power, Max Armor and Max Ammo.
- Once all seven are activated, two further statues appear: Fire Sale and a Random Perk.
- MAX AMMO — Her House. Hold interact on the little painting left of the telephone to SLIDE it aside (it does not break — meleeing it is a different Easter egg entirely), then shoot the statue behind. If you have already left the house you need the exfil trick to get back in.
- BONUS POINTS — Nyxara Passage. To the LEFT of Stamin-Up, far off in the distance — use a scope, it is not a close shot.
- INSTA-KILL — Nyxara. Behind and beneath the main chamber area.
- MAX ARMOR — confirmed found by the community, exact spot still to be pinned down.
- Three still missing: Double Points, Nuke and Full Power. They go in as they surface rather than being guessed at.
- As on every other map: C4 or an explosive on the statue saves you the walk to the pickup.
Eight crew cutscenes — the portal trigger
All eight crew characters have their own cutscene: Richtofen, Dempsey, Nikolai, Takeo, Carver, Grey, Weaver and Maya. The trigger is now documented.
In the mid rounds — roughly 13 to 16, before the twenties — a PORTAL can spawn at one specific spot on the map. Enter it, and you get the exclusive cutscene for the character you are playing. One per character, so seeing all eight means playing all eight.
⚠ Story spoilers: they expand Ava's history and the wider Dark Aether plot. Community compilations exist if you would rather watch than hunt — TheGamingRevolution has all eight in one, and MrDalekJD has cut them into a full-movie edit.
- All eight crew characters have their own quest and cutscene on Rex Infernus — the full dual-crew roster is questable here.
- The eight are: Richtofen, Dempsey, Nikolai, Takeo, Carver, Grey, Weaver and Maya.
- All eight cutscenes have been captured and published by the community.
- The per-character trigger steps are not documented anywhere yet. We are not going to reverse-engineer them from the cutscenes — the breakdown goes in when the steps are published.
The Rain Pool — quest-critical, and it has a prerequisite
Do not wait for rain to turn up on its own. It can arrive naturally on some spider rounds — one player grabbed the Woven Sash that way without ever touching the pool — but players have also run to round 38 without a single rain round. The pool is the reliable switch. The chain is: solve the four-cube wall → then interact with the Rain Pool in Veytharion → it rains a round or two later, and a metallic noise at the start of the round tells you it has begun.
Rain matters twice over. Every temple's final cleansing stage needs it — you use the pool four times, once per temple (the finish of each temple chain: light the statue's eyes, trigger rain, then a flame to the forehead). And the Woven Sash, Veytharion's Corruption item, only exists while it is raining — that is now confirmed by the primary written guide, and it is the most common reason players sweep the right spots and find nothing. Rain is also what makes the Novaline wall-buy glow — that turned out to be the Corrupted Legacy Weapons chain, not a “Corrupted Novaline” variant. The full procedure is in its own section below.
New perk — Widow's Wine (and its full augment set)
Widow's Wine returns with this map — redesigned can with animated spiders, original jingle. “When melee attacks bring your health low, retaliate with an explosion of webs.”
Major augments — Widow's Bite: melee attacks have a chance to trigger a web explosion, and melee kills on cocooned enemies can overcharge your health. Hatchling: web explosions summon a friendly Deathspinner ally. Web Spinner: the explosion adds a temporary slowing field around you. Tangled Web: normal and Special enemies caught in the explosion are cocooned in place; Elites are slowed.
Minor augments — Haste: decreased cooldown. The Wide Web: increased explosion radius. Golden Orb Silk: increased webbing duration. Sticky Grenade: thrown explosive lethals also cover surviving enemies in webs — explosive lethals only, so tomahawk and knife builds get nothing from it.
Heads-up — Widow's Wine may be bugged at launch. Multiple players report the web explosion simply never triggering, and the Hatchling augment never spawning its spider. One report suggests it only procs with no armour plates left. Treat the effects above as what the perk is meant to do rather than what it reliably does right now, and do not build a run around it until it is patched or confirmed working.
Enemies — Deathspinner, Web Mother & the Dread Skulls
Deathspinner (special): fast, three tongues, fires a slowing web projectile. Weak alone, dangerous in a swarm — and it can steal your weapon out of the Mystery Box and run off with it. Web Mother (Elite): lunges from the shadows, sprays webs that damage and slow, cocoons zombies into environmental hazards, and continuously spawns Deathspinners — kill her first or the spiders never stop. Dread Skulls: the Twins from Paradox Junction — confirmed in-game to be the two timeline versions of Samantha Maxis — and the Pack-a-Punch quest's objective rather than a random spawn.
Perk machines — all 13, by area
Every perk on the map and where it is. Her House: Quick Revive. Nyxara: Stamin-Up (Passage), Double Tap (Entrance/Main Chamber). Veytharion: Vulture Aid (Main Chamber), Mule Kick (Sanctuary, tucked away before the Aranea exit). Dravakar: Death Perception (Main Chamber), Speed Cola (Entrance). Caltheris: Elemental Pop (Main Chamber), and Wisp Tea at the Entrance — confirmed, with the augments Mask of Benevolence and Zombie Sitter, the latter holding the last zombie docile while you work a puzzle step. It is the quest quality-of-life pick on this map. Islands: Juggernog (Spira), Widow's Wine (Aranea), PhD Flopper (Ruinas). Nexus Forge: Rampage Inducer and Deadshot Daiquiri, plus Pack-a-Punch.
Der Wunderfizz replaces Deadshot once you have bought four perks, or on round 25 — settled; the earlier round-20 reports were wrong. It also dispenses Melee Macchiato.
Every main temple area also has an armour wall-buy, an Arsenal machine and a crafting bench.
Titan Traps — and their shackle symbols
The traps sit in front of the Veytharion and Caltheris entrances, cost about 2,000 points, and sometimes auto-activate as you walk past. They pull zombies in and slam them — standing dead centre is safe, but anywhere else in the flurry is not. More importantly, the symbols on each Titan's arm shackles are quest-relevant. When you break a temple's shackle, the marked zombie radiates a symbol in one of two smoke colours — and the colour tells you which of the two Titans to use; the symbol then tells you which of that Titan's wrist shackles has to land the kill. There are four shackles across the two Titans, one per temple. Worth learning where each symbol sits before you need it.
Wall-buys — all 19, by area
Every wall weapon on the map and where it is. Her House: CODA-9, Warden 308. Nexus Core: MK.78. Nexus Forge: Ryden 45K. Nyxara: Echo 12 (Passage), Peacekeeper Mk1 (Entrance), VS Recon (Sanctuary). Veytharion: M8A1 (Passage), Akita (Main Chamber), Shadow SK (Sanctuary). Dravakar: Dravec 45 (Passage), AK-27 (Main Chamber), M34 Novaline (Sanctuary). Caltheris: M10 Breacher and X9 Maverick (both Entrance). Islands: DS20 Mirage (Spira), XM325 and XR-3 Ion (Aranea), M15 Mod 0 (Ruinas).
Worth knowing: the M34 Novaline in Dravakar Sanctuary is the wall-buy the Corrupted-Novaline lead needs you to have bought.
Der Wunderfizz & the perk spread
Rex Infernus carries an unusually generous perk set — the community's read is that every Perk-a-Cola machine may be on this map. PhD Flopper is on its own grapple-reach island, Juggernog is on Spira Insula, Mule Kick is in Veytharion, and Deadshot and Widow's Wine have their own zones. Der Wunderfizz appears after you buy four perks or reach round 20.
Cursed mode — no rewards and no new relic
No Cursed-mode rewards and no new Cursed Relic for Rex Infernus (community-verified in-menu on day one), so the Black Ops 7 relic count is unchanged and there is no Rex relic to hunt. That may drip-feed in a later season — worth re-checking after a title update. Cursed mode itself is still playable here: no quest guidance, limited HUD, starting pistol only.
New with Rex Infernus — weapons, camos and the Aeon Super-EE camo (settled)
Legacy Mystery Box weapons: the Olympia shotgun and TR2 marksman rifle at Ultra rarity, with Wonder-Weapon-tier stats, full Pack-a-Punch progression and Ammo Mods.
Pack-a-Punch camos: three new map-toned finishes — Codex, Arcane and Ward.
New GobbleGum — Fully Packed (Ultra): instantly upgrades your current weapon to Pack-a-Punch Level III; in Dead Ops Arcade it gives a tactical armour vest with full plates. It is in our Black Ops 7 GobbleGum reference.
Super Easter Egg: Season 05 Reloaded added the “Aeon” universal Pack-a-Punch camo as the Super-EE reward. Whether Rex Infernus is part of the requirement is not yet confirmed.
Corrupted Legacy Weapons: the old “Corrupted Novaline” lead is closed — the Novaline is the trigger wall-buy for the Corrupted Legacy Weapons chain, which pays an Ultra-rarity Olympia or TR2. Full procedure in its own section.
Weapon balance this season: XR-3 Ion Vulcan buffed; the Pack-a-Punched DS20 Mirage dual-fire kit gained a headshot multiplier; the AN-94's headshot damage was restored; Pack-a-Punched Echo 12 Backlash grenades now explode on impact. Store blueprints Golden Claw and Gravity Ray are cosmetics, not separate weapons.
Dark Ops — three solved, one still unknown
Rex Infernus ships with four Dark Ops challenges — the hidden, unlisted ones that pay calling cards. Three are documented:
- TUTUS MORTUORUM — complete 30 rounds without ever leaving Her House. Never answer the phone, never leave. Camp the bed with gums and a Ray Gun.
- ARACHNID ENTHUSIAST — kill 75 zombies while riding the Web Mother. Grapple onto her; progress accumulates across separate rides.
- CONQUEROR — complete the main quest on round 100 or higher. For the high-round run, the Echo shotgun with its aftermarket part is the community pick.
Launch bugs worth knowing about
Flagged as bugs so nobody reads them as clues. Round transitions play a mixed Kowakujō/Totenreich music stinger instead of a Rex Infernus one. Der Wunderfizz breaks and becomes unusable if a Web Mother hits it. A Deathspinner can steal your weapon from the Mystery Box — genuinely unclear whether that one is a bug or intended spider mischief. And one report has the Surge the Nexus interact glitching in solo. The Wonder Weapon can be DELETED from your inventory by the house-to-map teleport. It is not a softlock — the fix is confirmed: from one round after you craft it, the Warden's Blight is in the Mystery Box. Lose it and you simply hit the box the next round. Also reported: the Nyxara scroll-cleanse markings can vanish — retry it the following round — and an anvil exploit granting a fourth weapon slot, which is a bug rather than a strategy and will presumably be patched. Widow's Wine itself may be bugged at launch: multiple players report the web explosion never triggering and the Hatchling augment never spawning a spider — one account says it only procs once your armour plates are gone. If the perk feels dead to you, you are probably not doing it wrong.
Interactive solvers
Every solver for Rex Infernus, in the order you meet them. Each also appears inside its step in the walkthrough above — use whichever is handier. Browse every Zombies solver →
Dravakar Pillar Riddle Solver
Dravakar Sanctuary — the four rotating pillarsMelee the blue writing in Dravakar Sanctuary to hear your riddle, then pick the line you heard. The riddle is randomised per match, so which one you get changes — the answer for each is fixed.
Cube Wall — guided move sequencer
Veytharion — the four-cube wall (a required quest stage)The transfer is a river-crossing puzzle, and the working sequence is the same in every game — what people lose is their place in it, halfway through, with no way to tell what they have already done. Step through it here. The rule stays on screen so you can recover from any state instead of starting over.
Monolith Alignment Helper
Nexus Forge — the three rotating pillarsThe pillars start in random positions each match, so there is no fixed answer to copy. Tell it what you are looking at and it gives you the confirmed procedure for that situation. It deliberately does not print a crank count — the note at the bottom says why.
Recommended loadouts
Three strong picks for this map — the map's Wonder Weapon plus reliable box/wall options. Each weapon lists a full recommended attachment build and the perks to pair with it, every perk shown with its Major and Minor augment. Push weapons to Legendary rarity and Pack-a-Punch; augment/attachment metas shift with balance patches, so treat these as a strong current baseline.
Warden's Blight (Wonder Weapon)
Dual crossbows+The map's Wonder Weapon — dual crossbows firing green venom bolt volleys, crafted at the anvil in Dravakar's Inner Sanctum once you have the three Forest parts and have solved the pillar riddle. Pack-a-Punch it to unlock the alt-fire, and use its charged shot for the Eye of the Forge step. Not a box pull and not buyable — everyone who wants it does the quest chain. Elemental variants and any further upgrade path are still being verified. Keep in mind the Void Claw is a separate temporary grapple tactical, not a damage option, so it never replaces your second weapon.
Attachments
- —Wonder Weapon — no Gunsmith attachments
Perks & augments
- Jugger-NogMajorReactive Armor — plate breaks stun nearby zombiesMinorDurable Plates — tougher armour
- Widow's WineMajorTangled Web — enemies caught in the web explosion are cocooned in placeMinorThe Wide Web — increased explosion radius
- Stamin-UpMajorGuns Up — fire your weapon while sprintingMinorFootwork — faster non-forward sprint
- PhD FlopperMajorPhD Slider — slide into a group to detonateMinorTribologist — longer, faster slides
- Speed ColaMajorPhantom Reload — magazine refills over timeMinorQuick Swap — faster weapon swaps
- Deadshot DaiquiriMajorDead Again — crits can add a bullet to the magMinorDead Break — extra armour damage
A parkour map with two spider enemies, so Stamin-Up and PhD Flopper are doing real work — and PhD Flopper is mandatory for the Fracture dive in step 4. Death Perception with Hidden Gems is worth a slot for finding the four symbol cubes.
M34 Novaline (wall-buy · Dravakar Sanctuary)
The creators’ shared primary+Both full-guide creators open with this gun. MrRoflWaffles leads on it (“medium-ranged weapons are very good”) and MrDalekJD names it as one of his two builds. The reason it beats a box pull is economics: it is a wall-buy in Dravakar Sanctuary, so ammo stays cheap for the whole run — and this quest asks you to hold a lot of rounds. The Mammoth LMG is the heavy alternative — MrDalekJD builds it, MrRoflWaffles calls it “insane” — and hits harder per shot, at the cost of reloads you will feel in the boss stun windows.
Attachments
- —Both creators show on-screen builds rather than naming parts. Build for recoil control and magazine size; the gun does not need a specific meta to do its job here.
Perks & augments
- Jugger-NogMajorReactive Armor — plate breaks stun nearby zombiesMinorDurable Plates — tougher armour
- Speed ColaMajorPhantom Reload — magazine refills over timeMinorQuick Swap — faster weapon swaps
- Deadshot DaiquiriMajorDead Again — crits can add a bullet to the magMinorDead Break — extra armour damage
- Stamin-UpMajorGuns Up — fire your weapon while sprintingMinorFree Faller — less falling damage
- Death PerceptionMajorDeath Stare — finishes low-health enemies hit with their elemental weaknessMinorHidden Gems — highlights interactables
- Mule KickMajorFree Throw — keep your equipment when you throw itMinorSturdy Strap — faster third-weapon swap
Medium range rules Rex Infernus — the fighting happens across Sanctuary interiors and platform gaps, not at sniper distance. Death Perception earns its slot twice over: Hidden Gems outlines the four symbol cubes, and Death Stare finishes shadow souls during the temple lockdowns.
SoCal LMG — the boss build
One-phases the Warden’s tail+⚠ Flagged 26 Aug 2026 and widely expected to be nerfed — use it while it lasts.
Build code L04-2RA46-4X0S5-51. Two non-negotiable pieces: the belt-fed attachment (no reloads, effectively bottomless) and the fully-auto rapid-fire mod (toggle left on the D-pad). The result melts the Warden’s tail fast enough to one-phase him inside a single skull-stun window. The Mammoth hits harder per shot — 8–15k — but reloads mid-window; the SoCal simply never stops.
Division of labour: SoCal for the tail only. Switch to the Warden’s Blight or the Echo-12 for skulls, stingers and zombies — it is mediocre against those. Also strong in Cursed mode and for speedruns. Credit: identified by CrazyShoot, popularised by MrDalekJD.
Attachments
- Fire ModsFully-auto rapid-fire mod — toggle left on the D-pad
- MagazineBelt-fed — the piece the build is built around
- —Full build code: L04-2RA46-4X0S5-51
Perks & augments
- Jugger-NogMajorReactive Armor — plate breaks stun nearby zombiesMinorDurable Plates — tougher armour
- Deadshot DaiquiriMajorDead Again — crits can add a bullet to the magMinorDead Break — extra armour damage
- Double TapMajorDouble Impact — more boss damageMinorDouble Down — more penetration damage
- Speed ColaMajorPhantom Reload — magazine refills over timeMinorQuick Swap — faster weapon swaps
- Stamin-UpMajorGuns Up — fire your weapon while sprintingMinorFree Faller — less falling damage
- Death PerceptionMajorDeath Stare — finishes low-health enemies hit with their elemental weaknessMinorHidden Gems — highlights interactables
Bring the Echo-12 with the Backlash Launcher fire mod alongside it — MrRoflWaffles’ pick, and it two-shots the boss’s Dread Skulls as well as clearing hordes. That pairing is worth the Mule Kick third slot.
Recommended kit & gum picks
Now tuned to the completed quest, not to launch day. The map throws Deathspinner swarms, a Web Mother that keeps spawning them, and a lot of parkour at you, and the Warden fight rewards armour economy and equipment discipline. PhD Flopper is mandatory — the Fracture of Nyxara only drops if you dive into the wall. Death Perception with Hidden Gems highlights the four symbol cubes, and the Corruption steps need Shatter Blast (Dravakar) and Shadow Rift (Nyxara) specifically, so plan your ammo mod around whichever temple you are working. Light Mend deserves a mention beyond the list — MrRoflWaffles runs it with Booster Shot, and it both heals you and melts the shadow souls that gate the temple lockdowns and the boss phases. Weapons are in Recommended loadouts above.

Aether Shroud
The safe way to work the laser-mirror puzzle, the tree step and any Sanctuary interaction with a horde on you.

Frenzied Guard
Pull aggro and repair armour when a Web Mother turns a Sanctuary into a spider pit.

Dead Wire
Chain-stuns Deathspinner packs before they get their web projectiles off.

Napalm Burst
Burning area damage for the tight Sanctuary lanes and the goo pools.

Shatter Blast
Explosive shrapnel to chew through the Web Mother.

Brain Rot
An ally in a swarm buys you the seconds a grapple step needs.
Molotov
A fire pool over a gap-jump landing or a Sanctuary chokepoint.

Monkey Bomb
Bait for the block puzzle, the mirror routing and any interact-and-hold step.
Kazimir
Both completion-team creators bring these. Throw one at the Warden’s feet as the skull-stun lands — free damage inside the only window where his tail is exposed.

Fully Packed
UltraNew with this map — instantly upgrades your current weapon to Pack-a-Punch Level III.

Perkaholic
UltraEvery perk at once, including Widow's Wine.

Raindrops
EpicMrDalekJD and MZC both bring it. Power-ups rain in — the cheapest way to hold armour and ammo through the temple chain.

Power Keg
RareThe other pick both creators name, and it is blue rarity, so you will actually own it.

Shields Up
RareRefills armour at 2× strength for 3 min. With Power Keg and Cashback this is MZC’s no-money-spent set — the one to run if you are not spending Ultras.

Armor Gettin'
LegendaryA full 3-plate armour vest with plates.

Aftertaste
RareKeep your perks after a revive — worth a lot on a parkour map.
Perkaholic
UltraFull perks for whoever pops it.
Fully Packed
UltraGets one player to Pack-a-Punch III immediately — the boss wants a PaP-3 bullet weapon at gold or legendary.

Phoenix Up
UltraMrRoflWaffles’ co-op call: revives the whole team with perks intact. The Warden knocks people off the map, and those downs are slow to reach.

Near Death Experience
UltraRevive from range — the gap-jumps make downs awkward to reach.

Idle Eyes
LegendaryZombies idle for 30s — a clean window for the mirror routing or a block insertion.

Power Vacuum
EpicMore power-ups for 5 min while the team works a Sanctuary.
Per-map augments
The Major + Minor augment to run on each core perk for this quest. BO7 gives 4 Major and 4 Minor options per perk — a different set from BO6, so don't cross them. Picks are tuned to this map's boss and steps; augments unlock at Level 11 and metas shift with patches, so treat as a strong baseline. Per-map augment recs are ground no competitor covers. Widow's Wine is new on this map — its full official augment set is listed in the side Easter eggs section, and the pick below is the one that does most against Deathspinner swarms. These now cover the completed quest, boss included. Where MrRoflWaffles’ published augment list differs from ours, his pick wins if his reason is specific to this map — which is why Stamin-Up runs Free Faller here rather than the usual Footwork. Set augment research to Widow’s Wine and Wisp Tea before your first load — they matter most and are the slowest to unlock.
 Tangled WebMinor
 The Wide Web
 Reactive ArmorMinor
 Durable Plates
 PhD SliderMinor
 Tribologist
 Guns UpMinor
 Free Faller
 Phantom ReloadMinor
 Quick Swap
 Dead AgainMinor
 Dead Break
Calling cards on this map
Cosmetic calling cards you can earn on this map. ⏳ marks time-limited main-Easter-Egg cards — miss the window and they're gone for good. Global Dark Ops challenge cards are in the reference section below.

Early-completion Calling Card variant
Main EEComplete Warden's Blight BEFORE Directed Mode is added to the map.
A unique variant of the completion card, awarded only inside the pre-Directed-Mode window. Once Directed Mode arrives it can no longer be earned. Exact card name not yet confirmed.
⏳ Time-limited — only awarded if you finish before Directed Mode is added for this map; permanently missable afterwards.
Main-quest completion card
Main EEComplete Warden's Blight, the Rex Infernus main quest.
Awarded with the Bloodthorn Wonder Weapon skin and 10,000 XP. Exact card name not yet confirmed.
⏳ Time-limited — only awarded if you finish before Directed Mode is added for this map; permanently missable afterwards.

Intel calling card
CollectibleCollect all 14 Rex Infernus Intel pieces.
Awarded with 10,000 XP. Exact card name not yet confirmed.

Mastery Challenge card
MasteryComplete the Rex Infernus Mastery Challenge.
An animated card plus 10,000 XP. Exact card name and challenge requirements not yet confirmed.
GobbleGum reference — Black Ops 7
Black Ops 7's 52 GobbleGums: the 11 BO7-only gums (shown first) plus all 41 that carry over from Black Ops 6. Spare gums crush for Essence. Filter by rarity.
Aftertaste
RareKeep your perks after being revived.

Turncoat
RareNearby zombies are charmed. (Season 2 Reloaded)

Requipment
EpicEquipment slots refill over time for 5 min.
Power Vacuum
EpicPower-ups spawn more often for 5 min.

Elemental Exposure
EpicWeapons always hit the elemental weakness for 3 min. (Season 1)

Round Off
LegendaryThe round can't advance for 2 rounds.
Armor Gettin'
LegendaryA 3-plate armour vest plus full plates.

Hellping Hound
LegendarySummons a friendly Hellhound that follows and fights alongside you for 5 min; in Dead Ops Arcade it spawns three Hellhounds to fight for you for one round. (Season 4 Reloaded)

Gift Card
Ultra+30,000 Essence.
Fully Packed
UltraInstantly upgrades your current weapon to Pack-a-Punch Level III. In Dead Ops Arcade it grants a tactical armour vest with full plates instead. (Season 5 Reloaded)

Slaylist
WhimsicalPlays a random Zombies song. (Season 1)

Kill Joy
RareDrops an Insta-Kill.

Cache Back
RareDrops a Max Ammo.

Temporal Gift
RareYour next timed power-up lasts longer.

Stock Option
RareAmmo drawn from your stockpile for 60s.

Anywhere But Here
RareRandom teleport plus a concussive blast.

Arsenal Accelerator
RareFaster Field-Upgrade charge for 5 min.
Shields Up
RareRefill armour at 2× strength for 3 min.
Power Keg
RareDrops a Full Power power-up. (Season 1)

Tactical Diffusion
RareNext Nuke is disabled and pays +2,000 Essence. (Season 3)

Respin Cycle
EpicRespin the Mystery Box to an equal or higher rarity.

Who's Keeping Score?
EpicDrops Double Points.

Free Fire
EpicNo ammo consumed for 60s.

Exit Strategy
EpicInstant exfil vote with fewer spawns.

Profit Sharing
EpicShare Essence with nearby players for 2 min.

Soda Fountain
EpicYour next perk buy grants +1 random perk.

Nowhere But There
EpicTeleport to a downed player and revive nearby.

Dead Drop
EpicIncreased salvage and equipment drops for 5 min. (Season 2)

Explosive Flourish
EpicEach reload triggers an explosion for 2 min. (Season 4)
Idle Eyes
LegendaryZombies idle for 30s.

Wall Power
LegendaryYour next wall-buy comes Pack-a-Punched.

Immolation Liquidation
LegendaryDrops a Fire Sale.
Phoenix Up
LegendaryRevive all downed players, perks kept.

On the House
LegendaryDrops a Random Perk power-up.

Wall To Wall Clearance
LegendaryWall-buys cost 10 Essence for 30s.

Crate Power
LegendaryYour next box gun comes Pack-a-Punched.

Modified Chaos
LegendaryReduced Ammo-Mod cooldowns for 2 min. (Season 2)

Support Group
LegendaryGrants an ARC-XD, Mangler Cannon, Sentry and Mutant Injection. (Season 3)

Flavor Hex
LegendaryGrants a random Ultra gum. (Season 4)
Perkaholic
UltraEvery perk on the map at once.

Wonderbar!
UltraYour next box spin is a Wonder Weapon.
Near Death Experience
UltraProximity revive with perks for 3 min.

Reign Drops
UltraDrops all core power-ups at once.

Hidden Power
UltraYour held weapon becomes Legendary rarity.

Time Out
UltraClear all enemies and end the round for 3 min. (Season 1)
Newtonian Negation · Indiegestion · Holiday Cheer · Quacknarok · Die Pitched · Rainburps · Jacked Lanterns
Whimsical7 cosmetic seasonal gums — flair only, no gameplay effect.
Field Upgrade reference (Black Ops 7)
Black Ops 7's 9 Field Upgrades — charged by kills, each augmentable at Level 11 (one Major + one Minor, plus an extra Minor slot). Six shipped at launch; Tesla Storm, Frost Blast and Mister Peeks returned in Season 1. The carried-over field upgrades reuse and extend Black Ops 6's augment options (see the BO6 reference above); BO7's full, distinct per-augment names aren't yet reliably published, so they're not itemised here rather than shown incomplete (honesty over guesswork — §11).

Energy Mine
A proximity energy explosion.

Frost Blast
A frost AoE that slows enemies.
Healing Aura
Instant heal beams (also revives teammates in BO6/BO7).
Aether Shroud
Phase out of enemy detection.

Tesla Storm
Lightning links players, stunning and damaging enemies.
Frenzied Guard
Repair armour and taunt enemies; kills repair your armour.
Toxic Growth
Thorn vines that slow and damage.
Dark Flare
A penetrating shadow beam.

Mister Peeks
Summons a decoy that attracts and attacks enemies. (BO7 new)
Dark Ops & mastery cards (Black Ops 7)
Global ‘Dark Ops’ challenge cards plus mastery/prestige — earnable on any map. Filter by category.

Another Round
Dark OpsReach Round 100.

The One
Dark OpsReach Round 999.

Anathema
Dark OpsEliminate 1,000,000 zombies.

Social Distancing
Dark OpsReach Round 20 without taking damage.
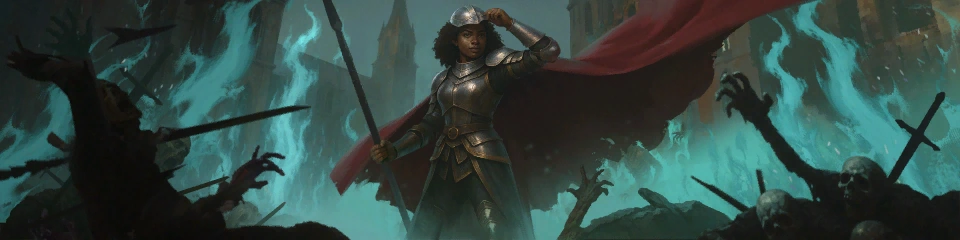
Invincible
Dark OpsSurvive to Round 50 without going down.
Armed to the Teeth
Dark OpsHold 3 Pack-a-Punch-III Legendary weapons with ammo mods and 8 perks.
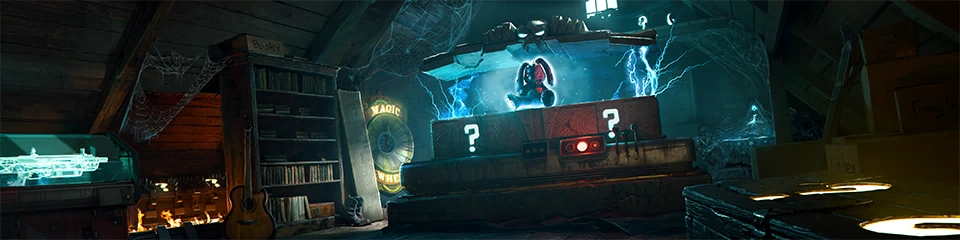
Box Addict
Dark OpsBuy 30 Mystery Box weapons in a single match.
Harbinger of Doom
Dark OpsKill 100 zombies with a single Scorestreak.

The Usual, Please
Dark OpsDrink Jugger-Nog 20 times in a single match.

New Main
Dark OpsKill 1,000 zombies with each of the 8 dedicated Crew Operators.

Action Hero
Dark OpsKill 100 zombies without reloading.
Martial Artist
Dark OpsReach Round 50 using only melee and Combat Axes.

Ready for Publishing
Dark OpsFully research all Augments.

Countdown
Dark OpsKill an Elite by launching it with a jump pad.
Ingenuity
Dark OpsReach Round 50 with the Dragon Wings + Lawyer's Pen relics active.

Zombies Dark Ops Master
MasteryComplete 15 Zombies Dark Ops challenges.

Force Multiplier / Dead Set
PrestigeReach Prestige (harder at higher prestiges).
Intel
All 14 Intel pieces are now located — 5 Audio Logs, 6 Documents and 3 quest Artifacts. Two of them come from the piano code 8-6-7-5-6-5-3-5-4 in Her House, which also pays 300 essence — they arrive in different tabs (Documents and Audio Logs), so check both. Play it before you answer the phone or you will need the exfil trick to get back inside. The unlock hint the game shows before you find a piece is given in brackets.
Audio Logs 5
The Long Game (hint: “Warped”)
Nyxara Sanctuary — against the wall, near the arsenal machine.
Pecking Order (hint: “A looming sense of dread”)
Veytharion Sanctuary — on a rock near the entrance, by the armour buy.
A Game of Cat and Strauss (hint: “Bone-picked”)
Her House — awarded alongside the Blurprint document for playing the Paradox Junction song on the piano (code 8-6-7-5-6-5-3-5-4). Both drop from a single play, but they land in DIFFERENT Intel tabs — this one is under Audio Logs, Blurprint is under Documents. Checking only one tab is why some players think they got just the one.
The Mark (hint: “Close-knit”)
Caltheris Main Chamber — on the ground near the armour buy.
Spa Day (hint: “Forgery”)
Dravakar Main Chamber — next to the door-buy above the workbench, on the balcony.
Documents 6
The First to Fall (hint: “Birds-islet view”)
Spira Insula, near Juggernog — on a rock pillar. Grapple to a floating rock with the Void Claw and grab it as you fall past.
The Others That Followed (hint: “Web of lies”)
Aranea Insula — the big web-covered rock across from Widow's Wine, between Widow's Wine and the grapple spawn, towards Dravakar. Shoot its base until “Immune” appears, then burn the webs off with a Molotov.
The Inevitable End (hint: “Void Clause”)
Dravakar Main Chamber — on the ledge above the temple exit facing PhD Flopper. Grapple up to it.
Longterm Goals (hint: “Bone to pick”)
Dug out of a bone pile — grapple the pile, no shovel needed. The pile location appears to be random; one commonly reported spot is on the cliffs overlooking Pack-a-Punch.
Blurprint (hint: “House keys”)
Her House — drops with the audio log above when you play the piano code 8-6-7-5-6-5-3-5-4.
Squish (hint: “Bed Bed Bed Bed Bed”)
Her House — jump and bounce on the bed. No explosives needed.
Artifacts 3
World Seed
Placed on the central pedestal at the Nexus Forge in step 2 — already filled in on your quest-items table when you spawn.
Void Claw
Taken from a green lantern around the Nexus Forge once Pack-a-Punch opens.
Warden's Blight
Crafted at the anvil in Dravakar's Inner Sanctum, after the three Forest parts and the pillar riddle.
Common Rex Infernus questions
Direct answers to the specific things players look up mid-game — part locations, puzzle steps and more.
Where are the three Warden's Blight parts on Rex Infernus?
All three sit beside charred bodies in the Forest, which you reach by feeding the vines in Nyxara's Inner Sanctum and eating the fruit. One is against a rock in the middle of the area (a short animation plays first), one is at the broken house — melee the floor just to the left of the body, which we confirmed in-game — and one is opposite the spawn side near the cavern entrance, by the dead Warden figure. One report describes that third trigger as meleeing a smoky wisp near the cabin instead, so the exact interaction is still being confirmed.
How do you upgrade the grapple on Rex Infernus?
Build the Warden's Blight first — this chain needs a charged shot from it. Stand at the Nexus Forge, look back at Her House and shoot the basketball — it sits at the top of the broken window, up in the roof rafters — until it falls out of the map. You can do this the moment you first leave the house; you do not have to wait for Pack-a-Punch. The four blue symbols only start spawning the round after Pack-a-Punch opens, then appear on the house one every round or two — memorise the order they appear in and do not shoot them yet. Wait for an Exfil round, shoot the four symbols in that order, then activate the Exfil: the prompt changes to "Go to Her House" and you are sent back inside, where the Twins drop a Raw Aether Crystal. Upstairs, fire a charged Warden's Blight shot into the bathroom through the barrier window to drop the Eye of the Forge, wait for the portal back to the Forge, then empower a green-orb pillar with it — that gives you the Void Talon, which lasts far longer than the Void Claw.
How do you cleanse the Corruptions on Rex Infernus?
Every temple uses the same ten-step chain; only the item, the plate trigger and the beam target change. Align the three monolith pillars on the temple, get its item, put it in the temple's cauldron and throw purple fire in. A mist rises and marks a nearby zombie — if that zombie dies the mist transfers, so you cannot easily lose it. Lead it to the right Titan, bring it to the middle and activate the trap: it walks to the correct wrist by itself. Veytharion and Nyxara runes go to the Titan outside Veytharion; Caltheris and Dravakar runes to the one outside Caltheris. Then interact with the floor plate for its quote, release it with that temple's trigger, raise the mirror with a charged shot and steer the beam — shoot the outside of the mirror for big movements, the centre for fine adjustment. Kill one zombie as a test: gold cracks on the wall mean you are aligned. If a purple rune lights up instead, that temple's Titan step is not done — that is the most common stuck state on the whole quest. Fill the soulbox, shoot the statue, clear the four shadow souls, shoot it again. Finish by launching a purple orb into the giant head, making it rain, and throwing purple fire at the head's exact target — lightning strikes and the temple is cleansed. Four lightning strikes unlocks the boss.
Where is each Corruption item on Rex Infernus?
All four are identified. Dravakar — the Blacksmith's Hammer: slot Shatter Blast and proc a kill next to each of the four shields in Dravakar Inner Sanctum — behind each is an ammo mod, a self-revive or the Hammer, and which is random. Nyxara — the Ancient Scroll: slot Shadow Rift and proc kills in the Forest until it drops; pure RNG. Caltheris — the Shimmering Thread: clear the four-tile trial left to right, then grapple purple orbs anywhere on the map and interact with them until it drops. Veytharion — the Woven Sash: it only spawns while it is raining, which is why so many players find nothing. Interact with the pool inside Veytharion's temple and flip the round, then grapple out of bounds — being off the map is intended — and spam interact at one of three spots: right of the Mystery Box behind PhD Flopper, left of Juggernog, or by Widow's Wine. It is a tiny turquoise glint, so sweep with interact held rather than looking for it. If it is not at any of your spots, run one round with the rain off and then re-activate rain — it respawns somewhere else.
How do you solve the Dravakar pillar riddle on Rex Infernus?
The riddle is randomised every match, so learn the key rather than copying an answer. Melee the blue writing on the wall to hear it — it names four symbols: Moon, Star, Galaxy and Runner (the comet). Three levers each rotate a fixed pair of pillars in opposite directions, and the central-pillar lever confirms. Worked examples from the community pool are listed in the walkthrough; match your riddle's pattern to the closest one.
Where are all 14 Intel pieces on Rex Infernus?
All 14 are now located — five audio logs, six documents and three quest artifacts — and the full checklist with each location is in the Intel section of this guide. Two of them come from the piano code 8-6-7-5-6-5-3-5-4, one from bouncing on the bed in Her House, and one from burning a web-covered rock with a Molotov on Aranea Insula.
What does the Rain Pool do on Rex Infernus?
It makes it rain, and rain is a required quest condition — you use it four times, once per temple. The pool is the reliable switch: interacting with it guarantees rain the next round. Rain almost never turns up on its own — players have run to round 38 without seeing any — though it can occur naturally on some spider rounds, so if it starts raining unprompted, take the free round. To use the pool you must first solve the four-cube wall in Veytharion and interact with the opened portal. Each temple's final stage needs rain: you launch a purple orb into the giant statue's head, trigger rain, then throw a purple flame at the statue's forehead. Rain also makes the Novaline and Breacher wall-buys glow, which is the trigger for the Corrupted Legacy Weapons chain.
Why is the Woven Sash not spawning on Rex Infernus?
Almost always because it is not raining. The Woven Sash only exists during rain — in clear weather there is genuinely nothing at any of the spawn points, which is why so many players sweep the right spots and conclude they are in the wrong place. You cannot rely on rain turning up by itself — it does happen naturally on some spider rounds, but rarely. The reliable switch is the pool: solve the four-cube wall in Veytharion, interact with the opened portal, then interact with the Rain Pool and flip the round. A metallic sound at the start of the round tells you rain is active. Then grapple off the map — being out of bounds is intended — and spam interact at one of three spots: right of the Mystery Box behind PhD Flopper, left of Juggernog, or by Widow's Wine. If it is at none of them, run one round with the rain off and then re-activate it — the sash respawns in a different location.
The boss entry circles are not appearing on Rex Infernus — what is missing?
You are almost certainly short a lightning strike, not a shackle. The four blue circles under Pack-a-Punch only appear once all four temples are fully cleansed, and a temple is only finished when it has been struck by lightning — the very last action of the chain, after you launch an orb into the giant exterior head, make it rain, and throw purple fire at the statue's forehead. Breaking all four Titan shackles is only the halfway point. Count your lightning strikes: if you have fewer than four, one temple's chain is unfinished. A round flip, or re-interacting with the Veytharion cube portal, clears stuck states.
The Nexus generator will not charge on Rex Infernus — how do you fix it?
Go back to the Veytharion cube wall and interact with the opened portal again. This is the known fix and it is the single most common stall on the whole quest. Solving the cube wall is a required quest stage, but it is the portal interact afterwards that actually registers it — and it is easy to solve the puzzle, walk away, and never touch the portal. If the generator still refuses after the supercharge, re-interacting there clears it.
The Dravakar plate will not open on Rex Infernus — what is the trigger?
Stand on the plate and RE-PLATE YOUR ARMOUR about five times. That is the actual mechanic, confirmed in the definitive guide — “there are a lot of misconceptions about how this works, but it IS re-plating”. Interact with the plate first to hear its two quotes, and you can step off and resume; it is cumulative.
This finally explains a fortnight of contradictory reports. Frag kills on the tile, taking zombie damage, firing a charged shot at your own feet — all of them appeared to work, because all of them force you to re-plate afterwards. People were describing the side effect rather than the trigger. Skip the middleman and just re-plate.
The beam will not align on Rex Infernus — how do you know if it is in the right spot?
Kill one zombie and watch the wall. If the beam is correctly aimed, the wall starts cracking with gold as the soul feeds in. No gold cracks means the disc is misaligned — stop feeding kills into it and re-aim. This one test is the difference between losing ten minutes and losing an hour, because the aiming is precise to within a hair and nothing else tells you that you are wrong. The exact targets are: Dravakar the very back-right corner, Caltheris the top-left side, Nyxara the bottom-left lava pit (by far the hardest and least forgiving), and Veytharion the middle of the zombie-spawn barrier down the hall on the left.
The four blue symbols are not appearing on Her House on Rex Infernus — why?
They are gated on Pack-a-Punch, not on the basketball. The symbols only begin appearing the round after Pack-a-Punch is unlocked, and then arrive one per round flip — you need four, so that is four round flips. Shooting the basketball early loses you nothing and is worth doing straight away, because the symbols are the slow part. Note the order they appear in and do not shoot them until you are on an Exfil round.
Which Titan wrist do you need on Rex Infernus?
You do not need to work it out. Lead the marked zombie to a Titan Trap, bring it to the middle and activate the trap — it walks to the correct wrist by itself and dies to the slam. The symbol on the zombie does match one of the wristbands if you want to confirm it, and the smoke colour tells you which of the two Titans to head for, but there is no manual matching to do once you are there. The trap switching off and a completion quote confirm it worked.
Can you do the Rex Infernus Easter egg solo?
Yes — the full quest is soloable and both of the first complete guides were solo runs. Co-op's only real advantages are having someone hold a zombie during the plate steps, which can leave you standing still and exposed, and splitting the Clausura trials in the boss fight, where each player is sent to a different one. Slot Shatter Blast and Shadow Rift before the match since the temple chain needs both, bring decoys or Aether Shroud for the plates, and carry Semtex or C4 so you do not need PhD Flopper for the Fracture of Nyxara.
Visual guides & sources
Screenshots and exact part locations live in these — open one on a second screen.