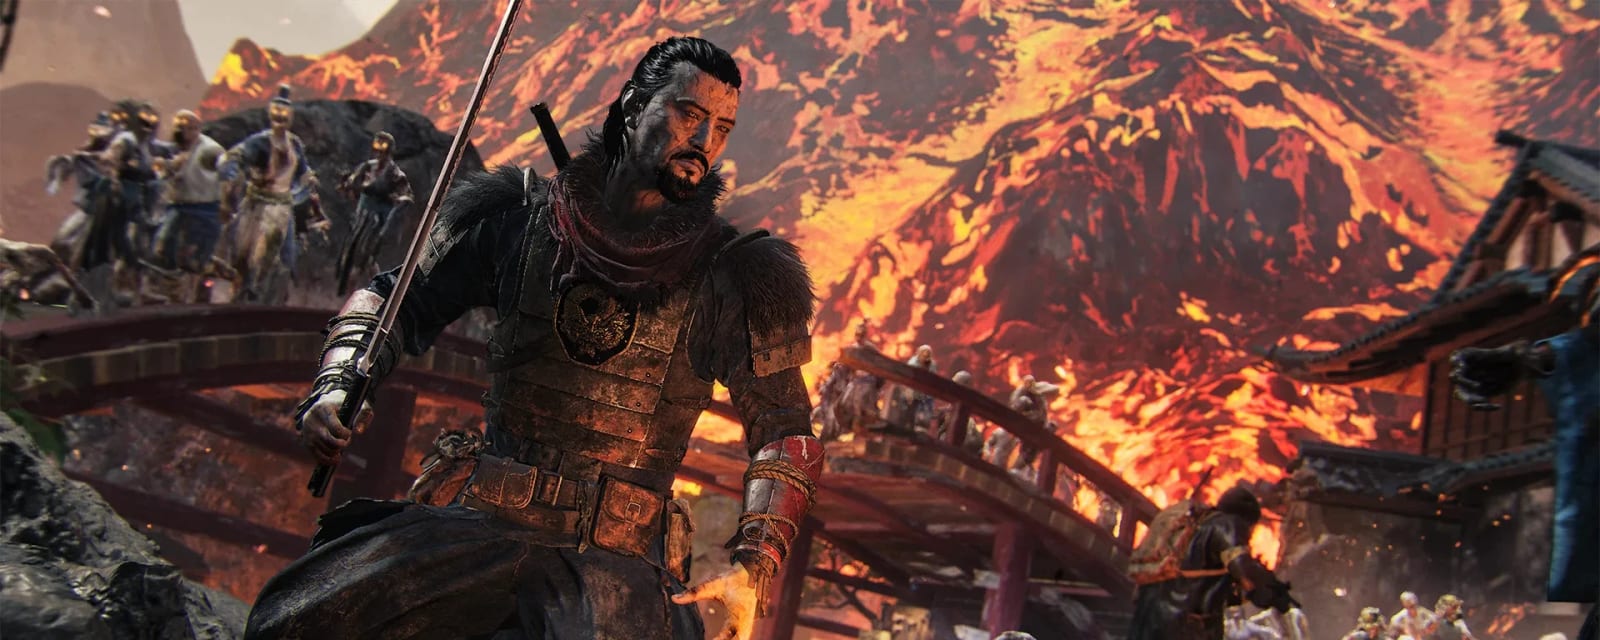

Kowakujō
Takeo's cursed family castle in the Dark Aether. Solve the murder of the Shogun, build the Nekomancer, and slay Nyxara.
Quick answers
The Kowakujō main Easter egg is a 13-step quest in Black Ops 7 Zombies. You solve the Shogun's murder on the meditation-room evidence wall, build the Nekomancer cat Wonder Weapon, then defeat the boss Nyxara. Pack-a-Punch sits on the top floor of the Shogun's Sanctum. It takes roughly 60–100 minutes and is solo-capable.
Where is Pack-a-Punch on Kowakujō?
Pack-a-Punch is on the top floor of the Shogun's Sanctum. Capture both ward banners to open the central courtyard, kill the oni in the war room for the shogun hanko, slot it into the golden circle door, then fill the World Seed upstairs with purple-aura souls and Pack-a-Punch appears.
How many steps is the Kowakujō main quest?
The Kowakujō main quest is 13 steps and takes roughly 60–100 minutes. It is rated Very Hard and is solo-capable for 1–4 players.
What is the Wonder Weapon on Kowakujō?
The Wonder Weapon is the Nekomancer, a talking-cat weapon. You build it by dropping the caged cat into molten lava, following the paw-print trail into a circle, scooping the sleeping cat, then corrupting the World Seed at Pack-a-Punch.
Who is the boss of Kowakujō?
The boss is Nyxara, a dragon. The fight runs on flag captures — kill flag-carrying onis, plant flags in the marked zones and stand in the circle for immunity while you damage the dragon's weak spots: eyes, then body, then wings.
What is the most-missed item on Kowakujō?
The toxins note is the most-missed item. It sits on the bottom shelf of the wall at the foot of the Pack-a-Punch stairs, and you cannot finish the murder deduction without it — grab it as soon as Pack-a-Punch opens.
Map & Key areas
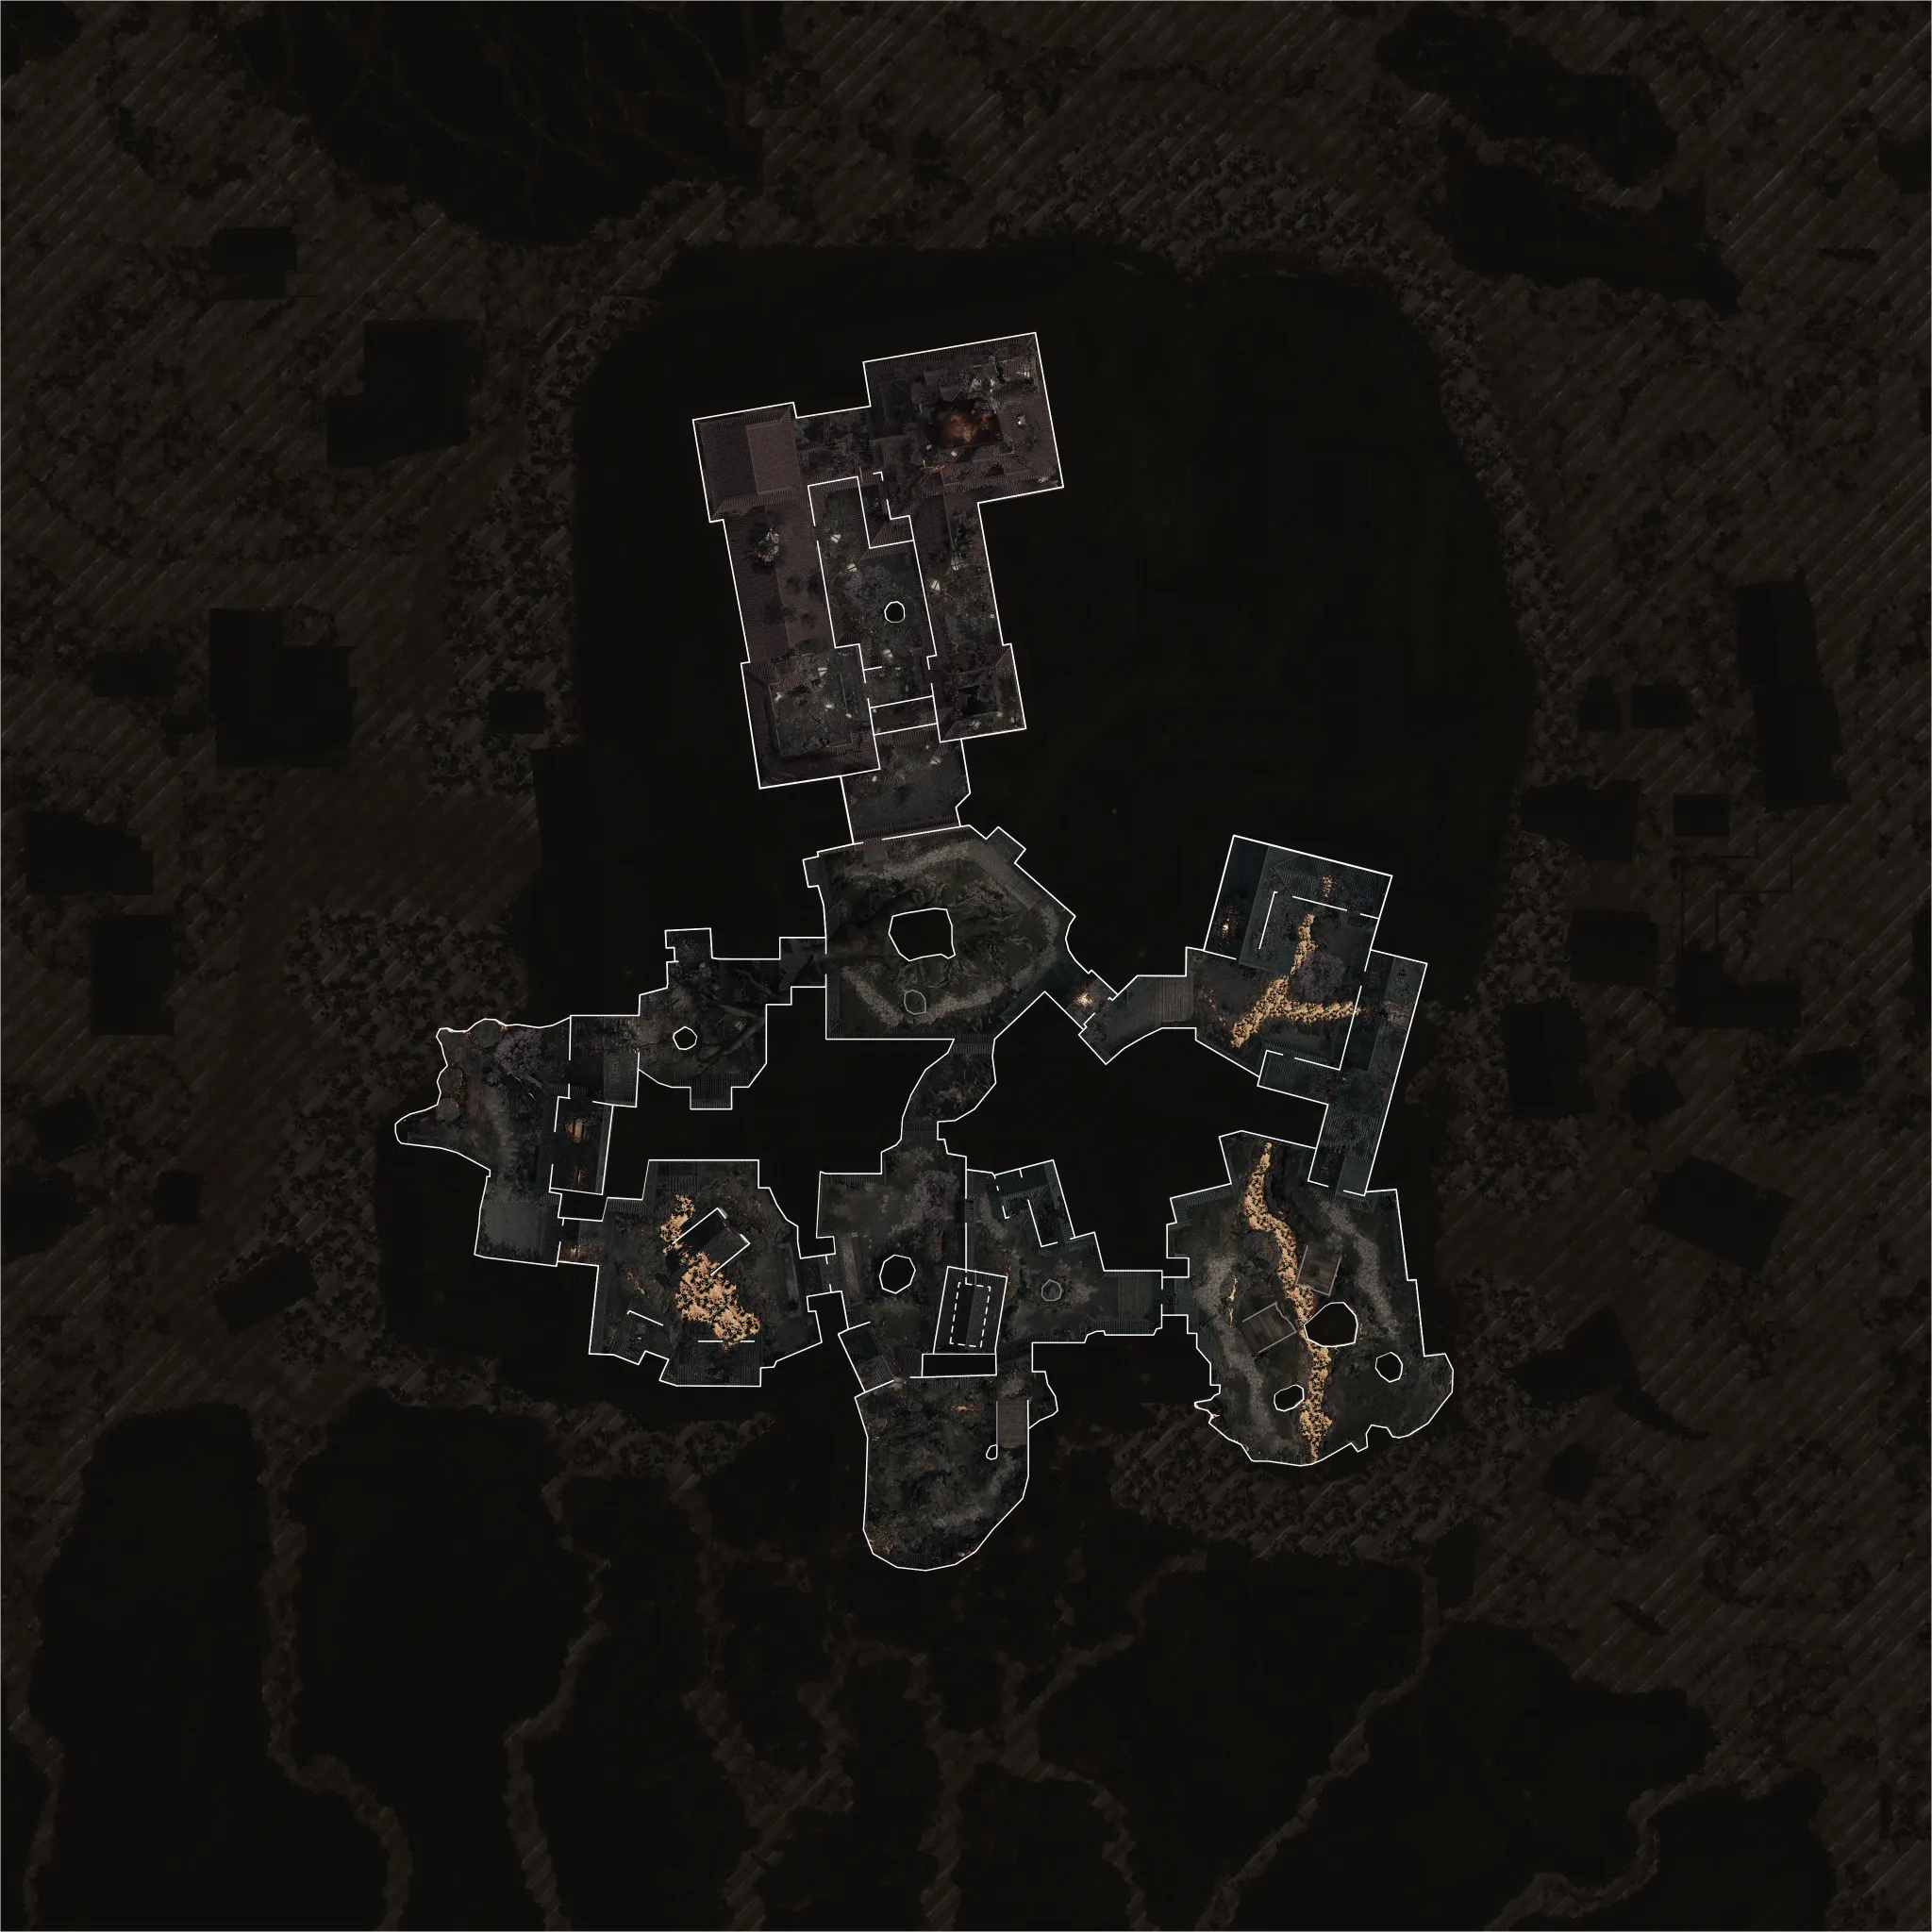
The map layout first, then the areas worth knowing by name. Map imagery © Activision, self-hosted.
 Pack-A-Punch
 Jäger 45M10 BreacherRyden 45KM34 NovalineEcho 12MPC-25Warden 308Peacekeeper MK1M15 Mod 0XM325MK. 78XR-3 ION
 Ammo CacheAmmo CacheAmmo CacheAmmo CacheAmmo CacheAmmo CacheAmmo CacheAmmo CacheAmmo Cache
 Quick Revive
 Stamin-Up
 Wisp Tea
 Death Perception
 Melee Macchiato
 Jugger-Nog
 Double Tap
 PhD Flopper
 Mule Kick
 Elemental Pop
 Speed Cola
 Mystery BoxMystery BoxMystery BoxMystery BoxMystery BoxMystery BoxMystery BoxMystery Box
 GobbleGum MachineGobbleGum MachineGobbleGum MachineGobbleGum MachineGobbleGum Machine
 Armor VestArmor VestArmor Vest
 ArsenalArsenalArsenal
 Crafting TableCrafting TableCrafting Table
 TrapTrapTrapTrapTrapTrapTrapTrap
 ExfilExfilExfil
 Door BuyDoor BuyDoor BuyDoor BuyDoor BuyDoor BuyDoor BuyDoor BuyDoor BuyDoor BuyDoor BuyDoor BuyDoor Buy
Tap a category to show or hide it. Pinch or double-tap to zoom in — marker positions come from the official Call of Duty map data.
Outer Ward
Spawn. Rampage Inducer; Coin Purse cutscene.
Shogun's Sanctum
Top floor — the World Seed & Pack-a-Punch.
War Room
Below PaP. Ghost trigger, Sake Cup defence.
Kitchens
Double Tap & box. Plum Pit, Merchant, Pestle.
Flower Gardens
Monkshood, Gardener watering, lava circle.
Storage Rooms
PhD Flopper. Mask wall, scrolls, clock.
Meditation Room
The evidence wall — solve the murder here.
Tenshu Rooftops
Ninja Kite glide launch for the Fox Mask.
Steps at a glance
- Capture both ward banners → kill the oni for the shogun hanko
- Fill the World Seed with marked souls → Pack-a-Punch
- PICK UP THE TOXINS NOTE at the bottom of the PaP stairs — most-missed item
- Build the maneki-neko cat grenade (3 parts)
- PhD-flop the cage → lava → follow the paw prints → scoop the sleeping cat
- Corrupt the World Seed → Nekomancer wonder weapon
- Shoot all 11 lanterns → kite for the fox mask → mask Simon-says
- Shoot the mask at 3 perches → painting 1
- Coin purse, gardener, merchant and nobleman → painting 2
- Plum pit, monkshood and pufferfish → painting 3
- Kintsugi bowl at three placements → painting 4
- Clock digits + flag values → painting 5
- Deduce accomplice, weapon, location and set the zodiac wheel
- Boss: capture flags for immunity, then eyes, body and wings
Full walkthrough
Pack-a-Punch and the easy-to-miss pickups
Open both sides of the map and capture the two ward banners — interact, then defend the circle — on the right by the kitchens and on the left in the training area. That removes the gate glyphs on the central courtyard door, letting you into the Tenshu entrance and on to the war room.
A special oni spawns there. Kill it, take the shogun hanko and slot it into the golden circle door. Upstairs, kill the purple-aura marked zombies to fill the World Seed with souls, and Pack-a-Punch appears.
Grab the toxins note now — it is the most-missed item on the map. It sits on the bottom shelf of the wall at the bottom of the Pack-a-Punch stairs. You cannot complete the murder deduction without it, and people routinely reach the final step and have to go hunting.
Two other early grabs: the first ceramic shard drops by the PaP stairs when the oni dies, collectable any time after. And in the stables lava, when the lava periodically cools and hardens, a small statue is stuck in it — cook a Molotov onto it and the twin brothers statue pops out nearby.
Loadout: an accurate ranged weapon for the dragon, and spawn with Molotovs and decoys — both are used in the quest. You will need PhD Flopper and Death Perception during the run.
Build the maneki-neko cat grenade
Three parts, three possible spawns each, then craft at the bench next to the Vulture Aid machine.
You will need two of these — one for the paw-print circle and one for the coin-purse step — so remember you can rebuy at the bench with salvage after using the first.
- Bell — on a wooden beam left of the spawn door in the staging area, hanging on the submerged house front door in the stables, or pinned right of the Warden wall-buy in the training area
- Cat figurine — on the box in the gatehouse, on the barrel opposite Double Tap in the kitchens, or on a barrel-table on the far side of the kitchens
- Figure of a man — in the storage rooms: on the ground opposite PhD Flopper, on the hallway table, or in the workshop beside the barrel
The Nekomancer wonder weapon
Buy PhD Flopper and slide-bounce at the hanging cage in the Tenshu entrance to drop it, then pick it up and throw it into a deep, actively molten lava pool — the training area or the far side by Wisp Tea. Flip the round.
Paw prints. At four or five gateway spots, kill a couple of zombies in the doorway until prints appear — the player holding the cat grenade should be the one doing it. The gateways are stables to training, stables to staging, flower garden to staging, flower garden to kitchens, and kitchens to central courtyard.
Following the trail: kill zombies about five metres in front of the direction the prints face and the next set spawns. Repeat until the prints form a circle. Roughly five kills with nothing appearing means try a different gateway.
Throw a cat grenade into the exact middle of the circle — and only while that lava is still molten, not cooled. It can bounce, so aim carefully. The cat leaps out and an abomination spawns; kill it and the cat runs off into the wall. Flip the round.
The sleeping cat. Buy Death Perception to highlight the creaky floorboards, then check the spots — two in the kitchens, one in a training-area corner.
Crouch-walk only. Sprinting, shooting or using a field upgrade anywhere near it scares the cat and costs you the round. Weave between the glowing floorboards, then interact to scoop it up.
Carry it to the World Seed on Pack-a-Punch. It floats in, corrupts, and the seed pulses red — after five pulses, melee the seed repeatedly between pulses, since the pulses knock you back. The seal breaks and the cat flies out as the Nekomancer.
Suspect evidence — the masks
Eleven lanterns, timed. Shoot them all with the Nekomancer in quick succession: spawn, then the one visible through the right door toward the Flower Garden, the mid-map pair left then right, the stables middle, the training-area one out in the lava (genuinely hard to see), the tea garden, mid-map, up through the Tenshu entrance, the central courtyard by the middle tree, and the kitchens.
Confirmation cue: a sound and a character line about the lights being on.
Interact with the ghostly samurai body in the war room for a cutscene. Then take the rooftop kite and hold both sticks right to swing over the rooftop, mashing interact mid-flight to grab the fox mask.
The mask wall in the storage rooms by PhD: place the mask, then play Simon-says three times — sequences of three, then four, then five masks flash, and you kill the matching masked zombies in that exact order.
Do this at end of round so you are not fighting the spawn rate. A wrong kill gives black smoke and a retry next round.
Success gives a glowing blue mask and a cutscene, after which the mask flies and must be shot down at three perches, each dropping evidence. It then flies into the World Seed. Deposit all three at the meditation room evidence wall for painting 1.
Keep returning to that wall throughout the run — later evidence sets are gated behind earlier paintings.
- Workshop shelf — Kiyoshi's pipe
- Collapsed study above the beam, back corner near WunderFizz — Takeo's case
- Onsen baths window left of Elemental Pop — Mitsumasa's comb. Shoot the top-left of the window; it is near-invisible
Accomplice evidence — the coin purse
One mystery-box platform has a small wooden tag on its side. You need the box to actually be there — spin it away manually, use a Fire Sale gum, or use Mr Peeks with the Peek’s Favour minor augment to summon the box wherever you cast it.
Then throw a cat grenade on top of the box and spin it. A blue floating coin purse appears — grab it, then interact with the ghostly coin pouch next to the Rampage Inducer in spawn for a cutscene.
Box platforms: spawn, flower garden, kitchens, the big tree mid-map, tea garden centre, stables, the right side of the Onsen baths, opposite PhD, and the roof.
Accomplice evidence — three suspects
The Gardener. Find a bucket — Onsen baths rooftop, the cat café in the tea garden, the gatehouse corner behind Speed Cola, or the stables left of Death Perception — and fill it at the tea-garden puddle or the Onsen pool by standing in the water. Sprinting, jumping or taking a hit spills it, so walk. Water the three weeds on the Flower Garden paths. The Gardener spawns immune: destroy the glowing orange flower pots to open damage windows. Drops gardening shears.
The Merchant. In the kitchens, melee the fruit basket to drop a plum, then jump on one piece three times for the plum pit — that is poison evidence, pocket it. Separately, melee the shelf by the arsenal machine for a second fruit and leave it alone, clearing the area entirely for a round or ninety seconds. Come back and a zombie will be kneeling eating it — lead it to the staging-area window and kill it there, and the Merchant climbs out. He has high health but eats the tomatoes on the ground while vulnerable. Drops the mercantile abacus.
Keep those two kitchen interactions separate — the basket gives the jump-fruit for the plum pit, the arsenal shelf gives the bait. The basket only yields once per round.
The Nobleman. Craft decoys and throw one at each of the three boarded windows above the training-area gatehouse in quick succession. The windows open and the Nobleman hurls blue grenades down. Cook and throw grenades back at whichever window he is currently in — he moves fast, so wait for him to pause. Each clean hit does around 28,000 damage and three should finish him. Drops the noble’s hat.
Deposit shears, abacus and hat for painting 2.
Poison evidence — the monkshood
Take the flower from the crack in the floor right of the workbench in the Flower Garden — a fixed spawn, but hard to see — and place it in the flower pot left of the Xville booth at the Tenshu entrance.
Then knock down the empty ash pouch with a charged Nekomancer shot at the rafters above the training-area gate pillar.
Volcanic ash means deliberately hurting yourself. Wait for a fissure — a red map icon — and stand in the choking ash letting your health drain to roughly 150 with Jugger-Nog, or about 55 without, until “volcanic ash” lands in your inventory. Lap the fissure if it is slow. Add it to the pot.
The cherry-blossom buff. Melee a live glowing cherry tree — dead trees never glow, so try another: mid-map, kitchens, by Melee Macchiato, or up in Tenshu — and stand under it until you are overhealed and glowing, with a green health bar and a ringing sound.
The last bit is fiddly: run circles around the flower pot until your buff drops a flower-power speed pickup near it. Circles that are too tight will not trigger it, and there is roughly a 30-second cooldown after any drop. The pot glows pink and you collect the monkshood flower.
Poison evidence — the pufferfish
Needs painting 2 placed first. In the storage rooms, solve the 3×3 scroll grid: hitting a scroll toggles it and its orthogonal neighbours — a lights-out puzzle — and you need every scroll flush.
Use a solver. Enter the in-and-out state and follow the click order; the perspective in that room makes it very easy to misread which scrolls are actually out. Success pops out the pestle and a death-records note.
In the kitchens, put the pestle in the pot for green gas, then put Brain Rot on a weapon and kill Brain-Rot zombies beside it until the soul box completes. Interact with the ghostly pestle for a cutscene, and the pufferfish appears in the window at the back of the room.
Deposit the plum pit, monkshood and pufferfish for painting 3.
Scroll Puzzle Solver (3×3)
Storage Rooms — south wallToggle each scroll between out and in — hitting one flips it and its up/down/left/right neighbours. The solver finds the fewest scrolls to interact with so every scroll ends in.
Location evidence — the kintsugi bowl
You need two ceramic shards: the first from the oni area by the PaP stairs, and the second pulled off painting 3 itself — hold interact in the middle of the painting.
Repair the sake bowl at the tea-garden table, flip the round, and it glows blue. Interact for a ghost cutscene and pick it up. Then place it at three locations, defending each from blue-eyed zombies.
Failing a defence destroys the bowl and you recraft it next round.
The third one is different: at the cat café there is no defence — a hellhound steals the cup and loops the map, centre to the kitchens side and back through the middle. Run the opposite way round to intercept it rather than chasing.
Deposit the horse, brush and whisk for painting 4.
- War room, by the big Japan-map painting — drops the horse statuette
- Collapsed study corner near WunderFizz — drops the calligraphy brush
- Cat café in the tea garden — the hellhound steals it; kill it for the tea whisk
Flags and the clock
With the kintsugi set done, the rubble at the bottom of the storage rooms reveals a clock. Interact and read the four numbers the hands stop on — you can re-interact to replay it.
The next round is an assault wave: kill the flag-carrying zombies so their wisps fly to the staging area, and finish the wave.
How the maths works: at the staging-area rack, each flag’s value is its symbol count. Around the map are four numbered wall glyphs marking locations 1 to 4 — spawn, the Flower Garden by Wisp Tea, the central courtyard and the stables roof — and which glyph is which number randomises.
Place flags in the bamboo shoots under each glyph so their values sum to your clock digits in order, location 1 matching digit 1. One or two flags per spot, and each flag is single-use, so plan combinations — if you need two sixes, use the 6 at one and 5+1 at the other.
Confirmation cue: a character quote per correct flag, and the clock face lights the digits you have entered. Wrong digits lit means redo the maths.
All four correct opens the clock for the crest medallion — deposit for painting 5.
Clock & Flag Combination Solver
Storage Rooms clock → Staging Area flagsEnter the four clock numbers in order and how many banners of each symbol-count you have. Each location takes one matching banner, or two banners that add up to the number — and every banner is used only once, so a flag is never reused across locations.
The deduction
Gather three facts before you place anything.
The accomplice: activate the ghost-archer wall traps — spawn, flower garden and the big tree are the eligible ones — and get 15 to 20 kills during a single activation. Then find the extra ghost facing the wrong way in the window before the trap ends. With subtitles on, his line either says nothing to report or names the merchant, gardener or courtier. Try another trap if you get nothing.
The two notes: the doctor’s note left of the paintings gives the cause of death and a time of death with a zodiac animal. The toxins note from the bottom of the PaP stairs gives hours-to-kill per poison.
Placing the evidence. Painting 1 is always the comb and painting 5 is always the crest medallion. Painting 2 is the accomplice’s item — abacus for the merchant, hat for the courtier, shears for the gardener. Painting 4 is read off the painting’s background: mountain takes the horse, bird the brush, fish the whisk.
Painting 3 — the murder weapon — depends on the accomplice as well as the symptom. Nobleman with emesis takes the pufferfish, nobleman with noxious plant the monkshood. Gardener with noxious food or emesis takes the plum pit, gardener with paralysis the monkshood. Merchant with noxious plant takes the plum pit, merchant otherwise the pufferfish. MrDalekJD maps on symptom alone, which diverges at the edges — cross-check with the murder-case solver if a submission fails.
The zodiac wheel to the left: take painting 3’s poison, read its hours-to-kill from the toxins note, take the animal from the doctor’s note, find that animal on the disc — boar is pig, stallion is horse — and rotate the dial that many hours anticlockwise, back in time, from it.
Submitting: light the incense on both sides of the wall — and it is very easy to nudge the wheel while interacting on the left, so check it before you light the second. Success sends a spark to the World Seed. Failure spawns an elite and you retry next round; if you change the poison, re-set the wheel to its new hours.
Interact with the World Seed to be teleported to a mini-boss oni in the central courtyard — dodge its homing masks and shoot it down. The dragon then lands on the PaP roof and the kite fast-travel to the boss arena appears.
Murder Case Solver
Meditation RoomPick the clues from the ghost Rifleman, the Court Doctor's Record, and the fourth painting — the item for each painting and the zodiac dial setting update live below.
Painting 2: Abacus
Painting 3: Plum Pit
Painting 4: Tea Whisk
Painting 5: Crest Medallion (always)
Zodiac dial: set to the Pig (Boar) (the Rat hour wound back 1 hour)
Before you submit: if you changed the Painting-3 poison, re-read its hours on the Known Toxins note — the dial depends on it. Light both incense bowls; the left one sits against the dial, so take care not to nudge the wheel as you interact. A wrong answer spawns an elite and locks the attempt until the next round — re-check paintings 1, 2, 4 and 5 first, then the poison and dial pairing.
Optional — upgraded cat grenades
Well worth the detour: the upgraded grenades create a bubble shield that makes you immune to zombies, which is excellent for the flag captures in the boss fight.
Activate the central-courtyard trap, use a combat-bow score streak through the window to hit the blue target, then from in front of the tree shoot the remaining targets. White powder spawns behind the trap. Add the piece under the kitchens cooker and the matches on the shelf in front of Double Tap, then return to the cat-grenade bench.
Boss fight — the dragon
The whole fight runs on flag captures. Onis spawn carrying flags — kill one, run through the flag, plant it at the marked zone and stand in the circle to capture. A captured zone is a blue area that makes you immune to both the boss and the zombies while you pour damage into the dragon’s glowing weak spots.
The escalation: phase 1 needs one flag, phase 2 needs two, and phase 3 needs three captures before each damage window. Weak spots move from the eyes to body spots to the wings. Max Ammo and max armour drop between phases in the middle.
Attacks: lava strip sweeps in phase 1, electrified tornadoes and lava geysers in phase 2, then fire breath that locks off arena sections and insta-down fireballs in phase 3. When the arena burns, get behind the rocks at the edges.
Shadowsmith blessings in the arena are worth knowing: the big bald one gives loot including a Pack-a-Punch crystal, the one with Viking braids gives an instant damage circle, and the horned one gives a gun-buddy. There are ammo crates too, and Kazimirs cover the gaps between immunity windows.
Side Easter Eggs & extras
Everything beyond the main quest. Tap any entry to open the full how-and-where breakdown.
“Evencry”
Kevin Sherwood ft. Malukah. Interact with 3 Mister Peeks headphones: Stables (left of the Mystery Box spawn), Onsen Baths (top shelf south of Elemental Pop), and one more past the Tenshu Entrance. Once per match.
- Interact with 3 Mister Peeks headphones, in any order (faint music guides you)
- Kitchens — on the leftmost woven tray on the lower shelf (south of Double Tap, near the M34 Novaline wall-buy)
- Stables — in a corner beside a stack of crates under a wooden canopy, near the Mystery Box
- Onsen Baths — on the top shelf (south of Elemental Pop / XM325 wall-buy); aim at the top shelf from the second column on the right. Needs the Tenshu Entrance opened
- ‘Evencry’ by Kevin Sherwood ft. Malukah & Cole Rolland plays; once per match
Takeo's Easter Egg — Path of Sorrows
Playing as Takeo, after opening Pack-a-Punch throw a Psych Grenade by the World Seed stairs and interact with the Takeo illusion holding the Path of Sorrows katana. Finishing the quest (a duel with his brother Takeshi) drops legendary loot and awards The Reunion Dark Ops calling card. The katana also appears in the PaP room before the final encounter.
- Play as Takeo and craft a Psych Grenade (800 salvage at a crafting table)
- Go to the World Seed room at the bottom of the Pack-a-Punch stairs, past Vulture Aid
- Throw the Psych Grenade at the ground there — Takeo appears and the Path of Sorrows katana drops; interact with it
- You enter an illusion where the katana is your only weapon — fight Hellhounds, Scorched, then Heavy zombies, then an Oni boss (lore: Takeshi, Takeo's brother)
- Defeat the final Oni to end the illusion — you keep the Path of Sorrows katana and earn The Reunion Dark Ops calling card
Free Ray Gun — lava platforming course
After Pack-a-Punch, a timed platforming course across the lava opens (checkpoints add time). Finish it and the classic World at War Ray Gun statues rise with Ray Guns in their mouths — one per player who completed it. Stamin-Up and a light weapon make it far easier.
- Unlock Pack-a-Punch first — the course opens after it
- Buy Stamin-Up and hold a light weapon (pistol or Nekomancer)
- Section 1: rock platforms — jump without sprinting to avoid overshooting (+15s checkpoint)
- Section 2–3: wall jumps and timed sliding doors — wait for doors to reappear (+30s each)
- Section 4: sliding door, three cabinets, three beams — sprint-jump then wall-jump to shore
- Finish and the WaW statues rise — one Ray Gun per player who completed the course
Hidden mini power-ups
Tiny power-ups hidden around the map: Nuke (Training Area lava, by the first Ward), Max Ammo (east Training building barricade), Bonus Points (Kitchens, opposite the Novaline wall-buy), Full Power (house outside the map seen from the Flower Garden), then a Random Perk (gold vase by the Kitchens fire pit) once all others are collected.
- Collect the hidden power-ups; the Random Perk and Fire Sale gate on the earlier ones
- Nuke: Training Area lava (by the first Ward). Max Ammo: eastern Training building barricade (sword rack). Double Points: the Central Courtyard cherry tree
- Bonus Points: SE corner of the Kitchens wall. Full Power: out of bounds at the Flower Garden. Insta-Kill: a Storage Rooms cupboard opposite the MK.78 (prone)
- Max Armor: the Workshop barricade by Vulture Aid (jump)
- Random Perk: in a vase in the top-left of the building NE of the Kitchens (by the fire pit), after the others
- Fire Sale: last — in a puddle at the Onsen Baths by the Mystery Box
Toy mice
Five toy mice spawn across eight possible spots (Flower Garden, Gatehouse, Kitchens, Central Courtyard crack by Juggernog, Training Area, Stables, Tenshu Entrance). Collect them all for a reward.
- Collect 5 of the 8 toy mice (all appear the same round) — interact with each
- Spots: Gatehouse floor, Flower Garden corner, Kitchens under the weapon rack, Stables zombie hole, Training Area by the Ammo Crate, Tenshu Entrance collapsed tiles, Onsen Baths stool, Central Courtyard by the tree
- 5 cats also spawn near where you grab mice — you need 5 cats + 5 mice
- Reward: the cat café in the Tea Garden, the Neko Cafe calling card, a free Random Perk and two Mystery Perks
Starting Room — Outer Ward (NEW, Season 05)
Kowakujō gained a Starting Room variant in Season 05, set in the Outer Ward. You are sealed into that area with no exfil and no Pack-a-Punch, armour vest or perk machine beyond what the room itself provides.
In the room: Mystery Box, Jäger 45 wall-buy, Ghostly Rifleman Trap, Ammo Cache, Quick Revive, Rampage Inducer and a GobbleGum machine. That gum machine is the whole game — perks and Pack-a-Punch effects have to come from gums.
Rewards: R10 ‘Hellping Hound’ GobbleGum (1,000 XP) · R25 ‘Armor Gettin'’ GobbleGum (2,500 XP) · R50 ‘Hidden Power’ GobbleGum (5,000 XP).
Season 05 fixes worth knowing
Season 05 cleared a long list of Kowakujō bugs, several of which were genuine progression stoppers — if you are following older guides, their workarounds are now obsolete.
Main quest: the Tea Whisk drop can no longer be blocked (this was a rare run-ender on the kintsugi step); the Hanko can no longer be shelved before the door; a Hellhound evidence trail was added; Banner 4 readability improved; boss-fight out-of-bounds and uncollectible-reward bugs fixed.
Nekomancer quest: cage retrieval, corner-trap and prone issues fixed, along with the disappearing-after-Abomination and animation-reset bugs. Armour plates no longer wake the sleeping cat, which removes the most frustrating failure in that step.
Pack-a-Punch quest: the objective marker now appears on all paths and critical-kill points were corrected.
General: the Oni is now correctly classed an Elite, an Aether Shroud boundary exploit was closed, and save/reload was fixed for Rhino, Path of Sorrows and the Maneki-Neko UI.
Directed Mode also arrived for Kowakujō in Season 05 — on-screen main-quest steps with a round cap of 15, rewarding the ‘Yōjinbō’ Operator Skin, a completion Calling Card and 5,000 XP.
Interactive solvers
Every solver for Kowakujō, in the order you meet them. Each also appears inside its step in the walkthrough above — use whichever is handier. Browse every Zombies solver →
Scroll Puzzle Solver (3×3)
Storage Rooms — south wallToggle each scroll between out and in — hitting one flips it and its up/down/left/right neighbours. The solver finds the fewest scrolls to interact with so every scroll ends in.
Clock & Flag Combination Solver
Storage Rooms clock → Staging Area flagsEnter the four clock numbers in order and how many banners of each symbol-count you have. Each location takes one matching banner, or two banners that add up to the number — and every banner is used only once, so a flag is never reused across locations.
Murder Case Solver
Meditation RoomPick the clues from the ghost Rifleman, the Court Doctor's Record, and the fourth painting — the item for each painting and the zodiac dial setting update live below.
Recommended loadouts
Three strong picks for this map — the map's Wonder Weapon plus reliable box/wall options. Each weapon lists a full recommended attachment build and the perks to pair with it, every perk shown with its Major and Minor augment. Push weapons to Legendary rarity and Pack-a-Punch; augment/attachment metas shift with balance patches, so treat these as a strong current baseline.
Ray Gun Mk I (free lava-course reward)
High-round splash+Win it from the post-PaP lava course (one per player) or the box. Splash damage stays reliable past round 30, and MrRoflWaffles rates both the Mk I and Mk II as perfectly viable for the dragon. Pair with Double Tap and a Deadshot crit build.
Attachments
- —Wonder Weapon — no Gunsmith attachments
Perks & augments
- Jugger-NogMajorTurtle Shell — back armour absorbs rear damageMinorDurable Plates — tougher armour
- Speed ColaMajorClassic Formula — even faster reloadsMinorQuick Swap — faster weapon swaps
- Stamin-UpMajorGuns Up — fire your weapon while sprintingMinorFootwork — faster non-forward sprint
- Double TapMajorDouble Dealer — every fourth bullet deals doubleMinorDouble Down — more penetration damage
- Elemental PopMajorRainbow Pop — triggers the enemy's weakness elementMinorVulnera Bean — more elemental-weakness damage
- Quick ReviveMajorEquivalent Exchange — kill enemies to self-revive (x3)MinorSlow Death — longer last-stand timer
XM325 (LMG, Legendary · PaP III)
Crowd control+Wall-buy in the Onsen Baths. Huge magazine holds long sightlines; Pack-a-Punch, push to Legendary rarity, run the extended-belt + recoil setup. Great for hordes on the courtyard hold. If you would rather have a marksman rifle, the M34 Novaline wall-buys in the Kitchens, opposite the Bonus Points spot — it is the creators' default BO7 bullet gun and fits MrRoflWaffles' brief here of something ranged and low-recoil.
Attachments
- OpticBowen X-25 IR
- MuzzleRL-7.62 Compensator
- Barrel19.3" R-556 Chief Barrel
- UnderbarrelFlow Guard
- MagazineEnforcer Extended Belt
- Fire ModsAccelerated Recoil System
- Rear GripLucius-90 Grip
- StockXM325 Titan Wield
- LaserMFS Motion Strike Laser
Perks & augments
- Jugger-NogMajorTurtle Shell — back armour absorbs rear damageMinorDurable Plates — tougher armour
- Speed ColaMajorClassic Formula — even faster reloadsMinorQuick Swap — faster weapon swaps
- Deadshot DaiquiriMajorDead Head — bigger critical-damage bonusMinorDead Break — more damage to armour
- Double TapMajorDouble Dealer — every fourth bullet deals doubleMinorDouble Down — more penetration damage
- Stamin-UpMajorGuns Up — fire your weapon while sprintingMinorFootwork — faster non-forward sprint
- Quick ReviveMajorEquivalent Exchange — kill enemies to self-revive (x3)MinorSlow Death — longer last-stand timer
Kogot-7 (Akimbo SMG)
Boss melter+Akimbo unlocks via weapon prestige. With PaP + Legendary it shreds elites — Deadshot, Double Tap and Death Perception stack the DPS; switch to single-hand for accuracy at range.
Attachments
- OpticEAM Dyad xL
- MuzzleHawker Ported Comp
- Barrel10.2" TZ-Incisor Barrel
- MagazineVex Expanse Mag
- Fire ModsBuffer Spring
- Rear GripRhinebeck Grip
- StockMFS Kogot-7 Akimbo
- LaserConvergence Box Laser
Perks & augments
- Jugger-NogMajorTurtle Shell — back armour absorbs rear damageMinorDurable Plates — tougher armour
- Speed ColaMajorClassic Formula — even faster reloadsMinorQuick Swap — faster weapon swaps
- Deadshot DaiquiriMajorDead Head — bigger critical-damage bonusMinorDead Break — more damage to armour
- Double TapMajorDouble Dealer — every fourth bullet deals doubleMinorDouble Down — more penetration damage
- Stamin-UpMajorGuns Up — fire your weapon while sprintingMinorFootwork — faster non-forward sprint
- Death PerceptionMajorSixth Sense — see enemies behind, less rear damageMinorHidden Gems — see nearby loot through surfaces
Recommended kit & gum picks
The recommended kit for this quest — Field Upgrade, Ammo Mods, equipment and the GobbleGums to bring, split by solo and co-op. Weapons are in Recommended loadouts above. Metas shift with balance patches, so treat these as a strong current baseline.

Aether Shroud
Cover for the lantern and mask steps, the Sake-Cup defence and the Nyxara fight.

Frenzied Guard
Pull aggro and repair armour on kills for the Onryo and murder-mystery steps.

Napalm Burst
Burning area damage for the packed courtyard lanes.

Dead Wire
Stuns and strips the Oni and Onryo during the charged-strike steps.

Light Mend
Overheals you on kills — keeps you up through the Sake-Cup defence and the boss.
Molotov
A fire pool for chokepoints and the flower/garden steps.
Decoy Grenade
Both creators say spawn in with decoys: they are required to open the three boarded windows in the Nobleman step, and the Mule Kick augment lets you carry three.

Monkey Bomb
Distraction bait during the murder-mystery and clock-flag steps.

Perkaholic
UltraEvery perk at once.

Aftertaste
RareKeep your perks after a revive.

Armor Gettin'
LegendaryFull 3-plate armour vest with plates.

Free Fire
EpicNo ammo for 60s on Nyxara.

Dead Drop
EpicMore salvage and equipment for ~5 min.

Shields Up
RareRefills armour at 2× strength for 3 min — the gum both creators bring on every map, and blue rarity so you will actually have it.
Perkaholic
UltraFull perks for whoever pops it.

Nowhere But There
EpicTeleport to a downed team-mate and revive nearby.
Aftertaste
RareKeep perks through a down during the boss.

Power Vacuum
EpicPower-ups spawn more often for ~5 min.
Free Fire
EpicNo ammo for 60s on the boss.
Per-map augments
The Major + Minor augment to run on each core perk for this quest. BO7 gives 4 Major and 4 Minor options per perk — a different set from BO6, so don't cross them. Picks are tuned to this map's boss and steps; augments unlock at Level 11 and metas shift with patches, so treat as a strong baseline. Per-map augment recs are ground no competitor covers.
 Reactive ArmorMinor
 Durable Plates
 SalvationMinor
 Haste
Haste Phantom ReloadMinor
 Quick Swap
 Dead AgainMinor
 Dead Break
 Guns UpMinor
 Hot Foot
 PhD SliderMinor
 Tribologist
Calling cards on this map
Cosmetic calling cards you can earn on this map. ⏳ marks time-limited main-Easter-Egg cards — miss the window and they're gone for good. Global Dark Ops challenge cards are in the reference section below.

Main-quest completion card
Main EEComplete the Kowakujō main quest.
Exact card name not yet confirmed.
⏳ Time-limited — only awarded if you finish before Directed Mode is added for this map; permanently missable afterwards.
GobbleGum reference — Black Ops 7
Black Ops 7's 52 GobbleGums: the 11 BO7-only gums (shown first) plus all 41 that carry over from Black Ops 6. Spare gums crush for Essence. Filter by rarity.
Aftertaste
RareKeep your perks after being revived.

Turncoat
RareNearby zombies are charmed. (Season 2 Reloaded)

Requipment
EpicEquipment slots refill over time for 5 min.
Power Vacuum
EpicPower-ups spawn more often for 5 min.

Elemental Exposure
EpicWeapons always hit the elemental weakness for 3 min. (Season 1)

Round Off
LegendaryThe round can't advance for 2 rounds.
Armor Gettin'
LegendaryA 3-plate armour vest plus full plates.

Hellping Hound
LegendarySummons a friendly Hellhound that follows and fights alongside you for 5 min; in Dead Ops Arcade it spawns three Hellhounds to fight for you for one round. (Season 4 Reloaded)

Gift Card
Ultra+30,000 Essence.

Fully Packed
UltraInstantly upgrades your current weapon to Pack-a-Punch Level III. In Dead Ops Arcade it grants a tactical armour vest with full plates instead. (Season 5 Reloaded)

Slaylist
WhimsicalPlays a random Zombies song. (Season 1)

Kill Joy
RareDrops an Insta-Kill.

Cache Back
RareDrops a Max Ammo.

Temporal Gift
RareYour next timed power-up lasts longer.

Stock Option
RareAmmo drawn from your stockpile for 60s.

Anywhere But Here
RareRandom teleport plus a concussive blast.

Arsenal Accelerator
RareFaster Field-Upgrade charge for 5 min.
Shields Up
RareRefill armour at 2× strength for 3 min.

Power Keg
RareDrops a Full Power power-up. (Season 1)

Tactical Diffusion
RareNext Nuke is disabled and pays +2,000 Essence. (Season 3)

Respin Cycle
EpicRespin the Mystery Box to an equal or higher rarity.

Who's Keeping Score?
EpicDrops Double Points.
Free Fire
EpicNo ammo consumed for 60s.

Exit Strategy
EpicInstant exfil vote with fewer spawns.

Profit Sharing
EpicShare Essence with nearby players for 2 min.

Soda Fountain
EpicYour next perk buy grants +1 random perk.
Nowhere But There
EpicTeleport to a downed player and revive nearby.
Dead Drop
EpicIncreased salvage and equipment drops for 5 min. (Season 2)

Explosive Flourish
EpicEach reload triggers an explosion for 2 min. (Season 4)

Idle Eyes
LegendaryZombies idle for 30s.

Wall Power
LegendaryYour next wall-buy comes Pack-a-Punched.

Immolation Liquidation
LegendaryDrops a Fire Sale.

Phoenix Up
LegendaryRevive all downed players, perks kept.

On the House
LegendaryDrops a Random Perk power-up.

Wall To Wall Clearance
LegendaryWall-buys cost 10 Essence for 30s.

Crate Power
LegendaryYour next box gun comes Pack-a-Punched.

Modified Chaos
LegendaryReduced Ammo-Mod cooldowns for 2 min. (Season 2)

Support Group
LegendaryGrants an ARC-XD, Mangler Cannon, Sentry and Mutant Injection. (Season 3)

Flavor Hex
LegendaryGrants a random Ultra gum. (Season 4)
Perkaholic
UltraEvery perk on the map at once.

Wonderbar!
UltraYour next box spin is a Wonder Weapon.

Near Death Experience
UltraProximity revive with perks for 3 min.

Reign Drops
UltraDrops all core power-ups at once.

Hidden Power
UltraYour held weapon becomes Legendary rarity.

Time Out
UltraClear all enemies and end the round for 3 min. (Season 1)
Newtonian Negation · Indiegestion · Holiday Cheer · Quacknarok · Die Pitched · Rainburps · Jacked Lanterns
Whimsical7 cosmetic seasonal gums — flair only, no gameplay effect.
Field Upgrade reference (Black Ops 7)
Black Ops 7's 9 Field Upgrades — charged by kills, each augmentable at Level 11 (one Major + one Minor, plus an extra Minor slot). Six shipped at launch; Tesla Storm, Frost Blast and Mister Peeks returned in Season 1. The carried-over field upgrades reuse and extend Black Ops 6's augment options (see the BO6 reference above); BO7's full, distinct per-augment names aren't yet reliably published, so they're not itemised here rather than shown incomplete (honesty over guesswork — §11).

Energy Mine
A proximity energy explosion.

Frost Blast
A frost AoE that slows enemies.

Healing Aura
Instant heal beams (also revives teammates in BO6/BO7).
Aether Shroud
Phase out of enemy detection.

Tesla Storm
Lightning links players, stunning and damaging enemies.
Frenzied Guard
Repair armour and taunt enemies; kills repair your armour.

Toxic Growth
Thorn vines that slow and damage.
Dark Flare
A penetrating shadow beam.

Mister Peeks
Summons a decoy that attracts and attacks enemies. (BO7 new)
Dark Ops & mastery cards (Black Ops 7)
Global ‘Dark Ops’ challenge cards plus mastery/prestige — earnable on any map. Filter by category.
Another Round
Dark OpsReach Round 100.

The One
Dark OpsReach Round 999.
Anathema
Dark OpsEliminate 1,000,000 zombies.
Social Distancing
Dark OpsReach Round 20 without taking damage.
Invincible
Dark OpsSurvive to Round 50 without going down.
Armed to the Teeth
Dark OpsHold 3 Pack-a-Punch-III Legendary weapons with ammo mods and 8 perks.
Box Addict
Dark OpsBuy 30 Mystery Box weapons in a single match.
Harbinger of Doom
Dark OpsKill 100 zombies with a single Scorestreak.

The Usual, Please
Dark OpsDrink Jugger-Nog 20 times in a single match.

New Main
Dark OpsKill 1,000 zombies with each of the 8 dedicated Crew Operators.
Action Hero
Dark OpsKill 100 zombies without reloading.
Martial Artist
Dark OpsReach Round 50 using only melee and Combat Axes.

Ready for Publishing
Dark OpsFully research all Augments.

Countdown
Dark OpsKill an Elite by launching it with a jump pad.
Ingenuity
Dark OpsReach Round 50 with the Dragon Wings + Lawyer's Pen relics active.
Zombies Dark Ops Master
MasteryComplete 15 Zombies Dark Ops challenges.

Force Multiplier / Dead Set
PrestigeReach Prestige (harder at higher prestiges).
Intel
20 pieces — 12 Audio Logs, 2 Documents, 6 Artifacts. Each piece is 1,000 XP; all 20 award 10,000 XP and the Kowakujō Intel calling card.
Audio Logs 12
Takeo's Resolve
War Room — after lighting all 11 lanterns with the Nekomancer, interact with the dead ghost; the log is behind it.
Mitsuhime's Reverence
Upstairs Storage Rooms — after the Fox Mask puzzle, just left of the glowing masks.
Takeshi's Dread
Outer Ward (by Rampage Inducer) — drops after the ghost cutscene once you have the Coin Purse.
Takeo's Devotion
Kitchens — after getting the Pestle & Pufferfish, in a basket opposite the Mystery Box spawn.
Takeshi's Perception
Tea Garden — after rebuilding the Sake Cup, left of that table once the cutscene ends.
Mitsuhime's Trepidation
Storage Rooms — on the clock step, in the corner opposite the clock.
Katanas Out
Shogun's Sanctum / World Seed — Takeo side quest; right of Pack-a-Punch after you spawn in.
Two Brothers
Outer Ward spawn — under the bridge.
Paydirt
Flower Garden — behind the rock near the lava, right of the phone exfil.
Subverting Control
Training Area — enter facing east, in the right-hand corner.
Extra Crispy
Roof above the Onsen Baths (mantle over when facing the big tree, after PaP is open) — interact with the pizza in the right corner.
What About the Cat
Tenshu Entrance — facing Mule Kick, go left through the doors; by a lantern on a table.
Documents 2
PssPssPss
Kitchens — interact with the barrels just right of Double Tap.
Hair Raising
After activating PaP, enter the open Wall-Buy wall and melee the shelf on your right.
Artifacts 6
Ninja Kite
After PaP, Tenshu Rooftops — interact with the paper-fish flagpole (500 Essence) to glide; you get it on landing.
Maneki-Neko
Build the Maneki-Neko tactical grenade (three parts).
Nekomancer
Complete the Nekomancer cat wonder-weapon quest.
Kitsune Mask
After activating all 11 lanterns and the cutscene, glide from the roof holding right and spam interact to grab the Fox Mask on the nearby roof.
Lantern Clock
After revealing the fourth painting, interact with the clock under the stairs by PhD Flopper in the Storage Rooms.
Path of Sorrows
After solving the murder mystery and beating the Onryo, you teleport back to the PaP room — turn around to grab the sword from the wood.
Cursed Mode relics
Cursed Mode is BO7's hardest mode; relics are pure curses (no buff) that bank points toward the Cursed Tiers — Grim → Golden Armor, Sinister → Ultra rarity, Wicked → Pack-a-Punch Tier IV. Unlock Cursed Mode by beating the Ashes of the Damned quest and opening its Mysterious Object; equip Kowakujō's relics by completing its own Easter egg (two also need EE progress in the same run). Each relic: satisfy its condition, Mr. Peeks laughs, a portal spawns (green/orange/red by tier), clear its Trial to claim it. Kowakujō has 6, two per tier. Steps below are community-sourced (GameRant + COD Central); higher-tier ones are still being verified.
Gramophone
Curse: Bullets hit harder, but each shot uses two rounds from the magazine.
- Find drumstick #1 on a west-facing window ledge in the Gatehouse (by Speed Cola), and #2 on a ceiling beam opposite the Arsenal near Pack-a-Punch.
- At the two big drums in the Kitchens, watch a rhythm then repeat it — a Simon-Says — three times, each pattern longer (record it if solo).
- The green portal spawns beside the left drum.
- Trial: sniper kills only across 4 waves — grab the XR-3 ION sniper (Shogun's Sanctum wall-buy) or the box; two HVT waves.
Druid Stone
Curse: No bleed-out bar — going down is instant death unless you have a self-revive (which then revives you instantly).
- Reach round 20 without taking a single hit from a zombie (lava/ash/fire damage is fine — only direct zombie contact breaks it).
- On the round-20 flip, the green portal opens in the Flower Gardens, left of the Wisp Tea machine.
- Trial: zombies only take damage while you're overhealed — keep overheal up with Stims, the Light Mend ammo mod or meleeing cherry-blossom trees; Elite Oni on waves 2 and 4.
Valkyrie Helmet
Curse: Lingering in one spot spawns electric fields that damage you — an anti-camping curse.
- Build the Upgraded Maneki-Neko (matches from a kitchen shelf, coal from the stove, powder from the castle ghost trap; craft at the Workshop) and get the Nekomancer.
- Farm 4 ceramic shards: fire charged Nekomancer shots while standing inside the Maneki-Neko bubble (~a shard per 30 kills).
- Fuse the 4 shards in the Kitchens fireplace with a Molotov. Get catnip via the Cat Café side-EE (from the cat tree in the Tea Gardens).
- Place the bowl and catnip on the flat rock by the big tree in the Central Courtyard; during an Assault Wave there, get ~50 Nekomancer kills to fill it.
- The portal spawns in the Training Area.
- Trial: ~5 HVT waves where each reload detonates you for ~30-40 HP. (Don't open the Cat Café before the bowl exists, and don't save-and-quit mid-quest.)
Film Reel
Curse: You can only ever have one Pack-a-Punched weapon at a time.
- Pack-a-Punch 10 different weapons in one game (duplicates don't count; the count is shared in co-op).
- The orange portal opens at the Tea Garden, against the shelf wall (visible from the Central Courtyard).
- Trial: zombies only die to your assigned scorestreaks (ARC-XDs, LDBRs, D.A.W.G.S., Ion Cores, HKDs, in random order) — bank heavy Salvage and run Dead Drop GobbleGum + Monkey Bombs.
Dragon Egg
Curse: Elite and special zombie spawns become randomized each round.
- Progress the main Easter egg to the murder mystery and solve it on the first try. Get the Path of Sorrows katana (Pack-a-Punch room).
- Find three blue Japanese wall symbols. Parry an Oni/Onryō lightning attack with the katana to charge it, then strike the symbols in order of brightness (brightest first) — correct hits turn them red.
- The red portal opens upstairs in the Onsen Baths.
- Trial: 6 waves — an Assault Wave, HVT Abominations, an escort, charged-Oni kills, a Doppelghast wave and a ~10-minute Nyxara boss fight.
Mannequin Turret
Curse: You start with no armor and can only buy top-tier Golden Armor from the wall-buy — no crafting or lower tiers.
- Reach round 60 as a set-up high-round run without ever fully losing an Assault-Wave flag defence (losing trap statues is fine; losing the flag ends the attempt for that game).
- On the round-60 flip, the portal opens in the War Room.
- Trial: in-wave health regen is off (you're fully healed only at each wave's end) — lean on Stims, Light Mend and special-kill augments.
Common Kowakujō questions
Direct answers to the specific things players look up mid-game — part locations, puzzle steps and more.
Where are the maneki-neko cat grenade parts on Kowakujō?
Three parts, three possible spawns each, crafted at the bench next to Vulture Aid. The bell is in the staging area, the stables or the training area; the cat figurine is in the gatehouse or the kitchens; and the figure of a man is in the storage rooms. You need two cat grenades, so rebuy at the bench after the first.
How do you solve the scroll puzzle on Kowakujō?
The 3×3 scroll grid in the storage rooms is a lights-out puzzle — hitting a scroll toggles it and its orthogonal neighbours, and you need every scroll flush. The room's perspective makes scrolls easy to misread, so use the scroll-puzzle solver; a correct solve pops out the pestle.
How do the clock and flags work on Kowakujō?
Read the four numbers the storage-room clock's hands stop on. Then place flags in the bamboo shoots under the four numbered wall glyphs so each location's flag values sum to that clock digit — each flag's value is its symbol count, and which glyph is which number randomises, so use the clock-and-flag solver.
How do you get the fox mask on Kowakujō?
Shoot all 11 lanterns with the Nekomancer in quick succession, interact with the ghostly samurai in the war room, then take the rooftop kite and mash interact mid-flight to grab the fox mask. Place it on the storage-room mask wall and play Simon-says — sequences of three, then four, then five masks.
How do you solve the murder on Kowakujō?
Gather the accomplice (from a ghost-archer wall trap), the doctor's note and the toxins note. Place painting 1 (always the comb), 2 (the accomplice's item), 3 (the poison — depends on accomplice and symptom), 4 (read off the painting's background) and 5 (the crest medallion), then set the zodiac wheel and light the incense on both sides. Use the murder-case solver for painting 3.
What is the Kowakujō song and how do you activate it?
The song is 'Evencry' by Kevin Sherwood featuring Malukah. Interact with three Mister Peeks headphones — in the Stables (left of the Mystery Box spawn), the Onsen Baths (top shelf south of Elemental Pop), and one past the Tenshu Entrance. Once per match.
How do you get the free Ray Gun on Kowakujō?
After Pack-a-Punch, a timed lava platforming course opens, with checkpoints that add time. Finish it and the classic World at War Ray Gun statues rise with Ray Guns in their mouths — one per player who completed it. Stamin-Up and a light weapon make it far easier.
Visual guides & sources
Screenshots and exact part locations live in these — open one on a second screen.