
IX
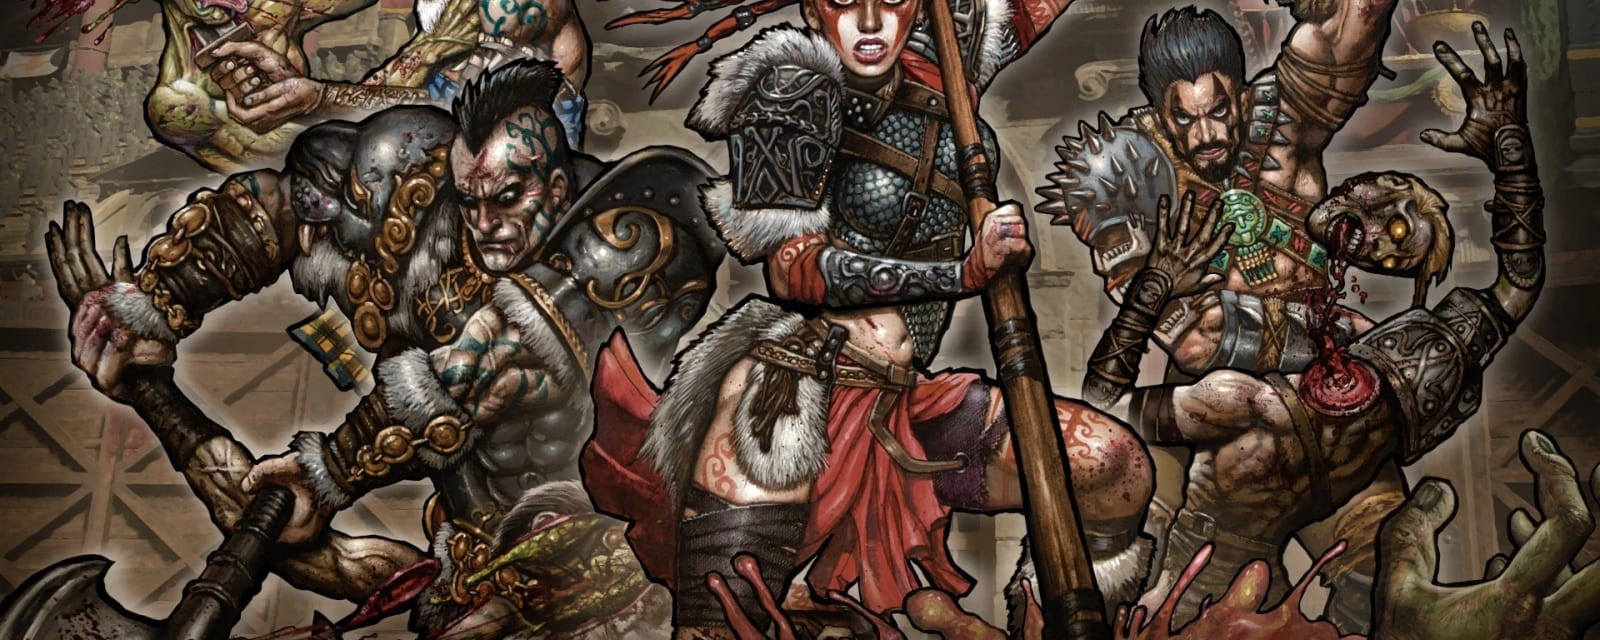
The Chaos-story opener — a Roman/Egyptian gladiator arena where the crowd howls for blood and four god towers (Danu, Ra, Zeus, Odin) ring the sand. Ring the gongs to raise Pack-a-Punch, poison the box for the Death of Orion scorpion gun, work the elemental trials, then face the twin armoured elephants Fury and Wrath in the Venerated Warrior main quest. Fully solo-capable; co-op only eases the crowd control and the Ra symbol calling.
Key areas
Arena
The central sand pit — challenge podium (points, self-revive, rewards), the crowd tiers whose affinity you manipulate, two wooden pyres for the axe-wood step, and the boss portal beyond the far gate.
Four God Towers
Danu (Arboretum), Ra (Burial Chamber), Zeus (Bath House) and Odin (Cauldron). Each has a top-floor gong + champion, a Brazen Bull / Death-of-Orion part, and perks/traps dotted around.
Temple
Below the Arena: the Pack-a-Punch altar with its ring of four head-spikes, and the wall of skulls that hides the single blue-symbol skull. The Viking-boat free-perk sits on the Odin route into here.
Flooded Crypt
Three skull grinders and a large pool of the map's Ra bull symbols; a key crossing between the Danu-Ra and Zeus-Odin halves.
Danu Arboretum & Ra Altar
The two Danu trees (fertiliser plant + Scorpion-Key tree hole), the corrupted-Danu tower climb, and the Ra obelisk that reads out the two enemy-kill orders.
Underground & The Pit
The four rotating poles and four Kill-O-Watt charge circles, the Pit workbench (Brazen Bull + Acid Trap builds), the final lockdown plate, and the key grate.
Steps at a glance
- Ring 4 tower gongs → kill champions → place 4 heads → Pack-a-Punch
- Poison the Mystery Box → pull the Death of Orion
- Find the blue skull → grind it for bone; char pyre wood; force manure
- Mix + plant fertiliser → Fire Bomb the green smoke
- Destroy the 3 corrupted Danu pods
- Shoot 4 bull symbols with the Brazen Bull → kill 4 gladiators
- Read + execute the two Ra obelisk enemy orders
- Raise 4 poles → charge 4 circles with Kill-O-Watt kills
- Shoot 3 matched symbols with charged Death of Orion → Pit lockdown → take the key
- Enter the portal → beat Fury, then Wrath
Full walkthrough
Ring the four gongs and raise Pack-a-Punch
Go to the top-floor altar room of each tower — Danu, Ra, Zeus, Odin — and interact with the gong. Each gong summons a Champion (a heavy gladiator). Kill it and pick up the severed head it drops before you leave the tower. Carry all four heads to the Temple and place one on each of the four spikes in the central ring. The heads burn away and the Pack-a-Punch altar rises — the machine appearing is the only completion cue you need.
Solo vs co-op: solo, do the towers one at a time and hold the head; in co-op split the towers but regroup at the Temple, because all four spikes must be filled to trigger the rise. There is no time limit on carrying a head.
Get the Death of Orion (poison the box)
This wonder-weapon chain is separate from the head/PaP step and can overlap it.
- From the Danu-Ra entrance bridge, shoot the flaming brazier so it topples; follow the flame/arrow clue to the tower it points at.
- Recover the stone head from that tower's named spot (Danu Arboretum / Ra Burial Chamber / Zeus Bath House / Odin Cauldron).
- Build/activate an Acid Trap, place the stone head on the grate below it and run the trap; when the head dissolves, take the Scorpion Key.
- Drive crowd affinity to full green and hold it a round so the crowd throws a golden jar into the Arena — pick it up.
- Put the Scorpion Key in the tree hole in Danu Arboretum and set the jar under the dripping poison; return next round for the filled jar.
- Interact with the side of the active Mystery Box to apply the poison — the box glows green and the next spin gives the Death of Orion. Pack-a-Punch it to Serket's Kiss if points allow.
Tip: the toppled brazier and the tower head location are match-generated — trust the flame's direction on your run, not a video's. The Acid Trap needs its Acid Pot part, which comes from the flag-rope trials: knife one of the four flag ropes around the Arena to start a trial, and completing three trials awards a Pack-a-Punched Strife pistol and the Acid Pot.
Grind bone, char wood, force manure
Three Danu ingredients, gathered in parallel:
- Bone: sweep the Temple wall of skulls for the one skull carrying a blue symbol (roughly 10-12 stable wall positions — search them, do not memorise a single spot). Aim at it, activate your Specialist weapon, and interact to knock it down; pick it up. Place it in one of the three Flooded Crypt grinders and fire three fully-charged Death of Orion shots (or two Serket's Kiss shots) into the grinder, waiting for the electricity to fade between shots; take the crushed bone when it stops.
- Wood: bait an axe gladiator into throwing at either wooden pyre in the Arena; pick up the sharpened wood fragment, hang it in the chain in Odin Cauldron, and leave it two ordinary rounds until blackened.
- Manure: drive crowd affinity to full red (running through fire, downs, or shooting/grenading the crowd lowers it — note Wraith Fire does NOT count); the crowd throws a gift package of manure — grab it, then restore a safer affinity.
Round-count rule: dog/tiger and other special rounds can fail to advance the two-round wood wait. Trust the blackening, not the displayed round number.
Mix, plant and ignite the fertiliser
In Zeus Bath House, add the crushed bone, charred wood and manure to the bowl and wait one full ordinary round; collect the fertiliser. Plant it on the ground between the two Danu trees in the Arboretum and wait two full ordinary rounds until the pile visibly emits green smoke. Get a Fire Bomb alternate-ammo kill directly over the smoking pile — blue cracks spread across the floor. All players stand on the cracks for about fifteen seconds to trigger the corruption.
Tip: the pile MUST be smoking before the Fire Bomb kill registers. If it never smokes, a special round ate the wait — play another ordinary round and recheck.
Destroy the three corrupted Danu pods
The corruption opens a warped version of the Danu tower. On the bottom floor, shoot the glowing red plant pod until it bursts — infinite enemies pressure the room, and a Max Ammo plus the opening to the next floor confirm the kill. Repeat on the middle and top floors. Do not rush the stairs before the current pod is visibly destroyed. After the third pod the team is returned to the normal Danu altar.
Solo vs co-op: solo, kite the infinite spawns in a tight loop and burst the pod between passes; in co-op assign one shooter per pod while the others hold the horde.
Answer the Dawn — bull symbols and the Ra obelisk
Build the Brazen Bull first (see Side). Search the wall pool across Arena, Danu Altar, Ra Burial Chamber, Danu Tunnel, Flooded Crypt, Temple, Pit, Odin-Zeus entrance and the Zeus-Odin bridge for four bull symbols and shoot each with the Brazen Bull. An axe gladiator spawns after each valid hit — kill all four to charge the Ra statue and unlock the obelisk.
All players interact with the Ra obelisk. It shows four special-enemy symbols one at a time — write the order down before killing anything, then kill only the enemy for symbol 1, then 2, 3, 4. A second four-symbol sequence follows; execute it exactly. Eight correct ordered kills produce a white flash and finish the chapter.
- Tiger head symbol → kill a Tiger
- Two crossed axes → kill an Axe gladiator
- Helmet / brawler → kill a Brawler gladiator
- Large open mouth / blight → kill a Blightfather
- Element glyph → kill the matching catalyst zombie (sources note up to seven special-enemy symbols in the pool — read your obelisk, do not assume)
Summon the Storm — poles and Kill-O-Watt circles
Find the carved stone on the underground route and shoot the four marked pole mechanisms; each pole rises and starts rotating — confirm all four are active before you start killing. Equip a weapon with the Kill-O-Watt alternate ammo and kill electrically-stunned zombies while standing inside each of the four circular markings. A blue orb/energy cue above a circle confirms it is charged. When all four are charged the orbs move to the Arena — interact as a team to begin the lockdown, and use the temporary unlimited Specialist energy to survive to the white flash.
Tip: Kill-O-Watt is an AAT (alternate ammo) from Pack-a-Punch, not a wall gun — re-roll PaP onto a fast automatic to farm the stunned kills. If the Pit plate later does nothing, an underground circle was left uncharged; re-sweep all four for the orb cue.
Channel the Flood — matched symbols, Pit lockdown, the key
Use charged Death of Orion shots on the revealed three-symbol panels in the Danu Tunnel, the Pit and the Crypts — fire only when the correct three-symbol panel is visible (a wrong panel wastes ammo but does not fail you). Then all players stand on the metal plate in the Pit for about twenty seconds; the screen flashes and the final lockdown begins. Clear every wave, then take the key that appears below the central grate.
Before the portal: top up perks, ammo, Elixirs and shield, and repair the Brazen Bull — the portal beyond the opposite Arena gate is the point of no return.
Fury and Wrath boss fight
The Arena first sends tigers and gladiators, then Fury charges in from the left gate; Wrath follows after Fury dies. Circle the outer Arena and drop ranged gladiators first — Max Ammo drops here do not time out, so leave one until reserves are low. Shoot the glowing red armour plates on both sides of the elephant; once the armour breaks, focus the exposed forehead. Dodge the charge laterally (never against a wall when it lowers its head) and sprint away from the tracking fire-spike trail — the Brazen Bull can block it and contact can instantly down even a shielded player. Repeat the plates-then-forehead sequence on Wrath.
Completion: the quest is done only when Wrath dies and the cutscene starts — there is no separate Arena pickup to hunt for.
Side Easter Eggs & extras
Everything beyond the main quest. Tap any entry to open the full how-and-where breakdown.
“Mad Hatter” (Avenged Sevenfold)
Shoot four hidden coins/medallions, once each, any order — one in each god tower. (1) Danu Tower entrance — look out of the window; the coin is on the underside of a wooden staircase on the exterior of the map. (2) Ra Tower Burial Chamber — in the corner by a burning brazier, between the two chests to the left as you come down from the Arena. (3) Zeus Altar Room — on the side of a statue pedestal, right next to the Mystery Box. (4) Odin Tower entrance — crouch at the low metal grating (facing the entrance from the spawn Arena) and shoot the coin inside. The song plays once all four are hit.
Brazen Bull (shield gun)
Collect the shield-gun part in the Ra tower, the metal blade in the Zeus tower, and the frame/barrels in the Odin tower, then build at the Pit workbench. Required to shoot the four Ra bull symbols and doubles as an emergency shield in the boss fight — save its ammo for the symbols.
Acid Trap
Complete three challenge-podium objectives and collect the cauldron reward, then gather the chain and gear on the Temple / Pack-a-Punch route and install the parts at either Acid Trap doorway. Used to dissolve the stone head for the Scorpion Key in the Death of Orion chain.
Viking funeral (bonus perk)
Give the Viking skeleton in the small boat (top floor of Odin Tower, into the Temple route) a proper burial for a free perk. Pack-a-Punch must be unlocked first. Collect three items: the Mug on a ledge to the left of the Temple door in the Ra-Danu entrance; the Sword from a crypt slot near the Zeus Temple (place it in the Viking's hands); and the Helmet on a weapon rack to the left of the Arena door on the ground floor of Odin Tower (place it on his head). Completing the funeral grants the free perk.
Crowd affinity
Not a quest so much as a map system, but it gates two main-quest steps: full green affinity (held a round) makes the crowd throw the golden jar for the Death of Orion; full red affinity makes them throw the manure gift. Positive play (kills, style) raises it; fire damage, downs and shooting the crowd lower it.
Recommended loadouts
Three strong picks for this map — the map's Wonder Weapon plus reliable box/wall options. These are pre-augment-era games, so the setup is the gun plus Pack-a-Punch and perk synergy.
Death of Orion (→ Serket's Kiss)
Scorpion wonder weaponPoison the Mystery Box to pull it, then Pack-a-Punch to Serket's Kiss. Charged shots power the skull grind and the three matched-symbol panels, so it is a quest tool as well as a crowd-clearer — pair with Stamin-Up and a shield for space.
VAPR-XKG / Titan (Pack-a-Punched)
Workhorse + AAT carrierPaP a fast automatic and re-roll for the required alternate ammo — Fire Bomb for the fertiliser and Kill-O-Watt for the underground circles. Back it with Victorious Tortoise + Stamin-Up and a Firebomb/Kill-O-Watt Elixir to farm the stunned kills.
Brazen Bull (buildable shield gun)
Required tool + panic shieldBuild from the Ra/Zeus/Odin parts at the Pit bench. The only weapon that triggers the four bull symbols, and its shield blocks Fury and Wrath's fire-spike trail — carry it into the boss and keep its ammo topped for emergencies.
Recommended elixirs & talismans
Black Ops 4 has no GobbleGums — you equip 4 Elixirs per class (consumable, from Nebulium Plasma) and one passive Talisman that applies from match start. Weapons and the Brazen Bull are in Recommended loadouts above.
Perkaholic
EpicAll loadout perks plus 6 random ones — the strongest solo opener.
Perk Up
Legendary+4 random non-loadout perks.
Cache Back
LegendaryDrops a Max Ammo.
Kill Joy
RareDrops an Insta-Kill.
Free Fire
LegendaryNo ammo consumed for 30s — a burst window on the Gauntlet arena.
Phoenix Up
EpicRevive all downed team-mates, loadout perks kept.
Near Death Experience
EpicProximity revive (10 min / 5 revives).
Suit Up
EpicFull armor for you and nearby players.
Join the Party
EpicSpectators spawn in and downed players are revived.

Glowing Phylactery
EpicAn extra self-revive — the safest pick for IX's long boss quest.

Charged Crystal
LegendaryStart your special weapon at Level 2.

Charm of the Miser
CommonCheaper Pack-a-Punch.
Calling cards on this map
Cosmetic calling cards you can earn on this map. Global Dark Ops challenge cards are in the reference section below.

Sands of Time
Map challengeComplete the IX main quest in under 100 minutes.
Elixir reference (Black Ops 4)
All 51 Black Ops 4 Elixirs — you equip 4 per class. Classic and Whimsical are unlimited; Common → Epic are consumable, brewed with Nebulium Plasma. These are Elixirs, not GobbleGums. Filter by tier.
Always Done Swiftly
ClassicFaster ADS walk/aim for 5 min.
Anywhere But Here
ClassicRandom teleport with a blast.
Burned Out
ClassicAttackers ignite nearby zombies (3 hits).
Equip Mint
ClassicRefresh your equipment cooldowns.
Head Scan
ClassicHeadshot instakill chance for 2 min.
Temporal Gift
ClassicLonger power-ups for 5 min.
Aftertaste
ClassicKeep perks on revive (5 min / 1 down).
Point Drops
ClassicDrop 500 of your points as a power-up.
Anti-Entrapment
ClassicTrap-damage immunity for 30s.
Nowhere But There
ClassicTeleport to a downed player.

Now You See Me
ClassicAll zombies chase you for 15s.
Arsenal Accelerator
ClassicFaster special-weapon charge for 2 min.
Pop Shocks
ClassicMelee electrostatic discharge (5).
Stock Option
ClassicAmmo drawn from your stockpile for 2 min.
Bullet Boost
CommonApply or re-roll an Alternate Ammo Type.
Ctrl-Z
CommonTurn up to 2 nearby zombies into allies (30s).
Dead of Nuclear Winter
CommonDrops a Nuke.
In Plain Sight
CommonZombies ignore you for 10s.
Licensed Contractor
CommonDrops a Carpenter.
Phantom Reload
Common30% chance of a free-magazine reload for 4 min.
Sword Flay
CommonMelee instakills basics / 5× for 1 min.
Who's Keeping Score?
CommonDrops Double Points.
Alchemical Antithesis
RareEvery 10 points becomes 1 reserve ammo (1 min).
Blood Debt
RareLose points instead of health for 1 min.
Extra Credit
RareA personal 1,250-point drop.
Immolation Liquidation
RareDrops a Fire Sale.
Kill Joy
RareDrops an Insta-Kill.
Shields Up
RareGrants a new shield.
Talkin' Bout Regeneration
RareConstant health regen while moving for 4 min.
Cache Back
LegendaryDrops a Max Ammo.
Dividend Yield
LegendaryBonus shared points for 5 min.
Free Fire
LegendaryNo ammo consumed for 30s.
Perk Up
Legendary+4 random non-loadout perks.
Power Keg
LegendaryDrops a Full Power power-up.
Wall to Wall Clearance
LegendaryA wall-buy Fire Sale for 30s.
Undead Man Walking
LegendaryZombies move at shambling speed for 1 min.
Shopping Free
EpicFree purchases for 1 min.
Head Drama
EpicBody shots register as head shots for 5 min.
Secret Shopper
EpicAny wall-buy discounts ammo for any gun (10 min).
Reign Drops
EpicOne of each of the 9 core power-ups.
Power Vacuum
EpicMore drops with the cap ignored for 5 min.
Near Death Experience
EpicProximity revive (10 min / 5).
Phoenix Up
EpicRevive all downed players, loadout perks kept.
Conflagration Liquidation
EpicDrops a Bonfire Sale.
Join the Party
EpicSpectators spawn in and downed players are revived.
Perkaholic
EpicAll loadout perks plus 6 random ones.
Refresh Mint
EpicRefresh equipment, special and perk cooldowns for all.
Suit Up
EpicFull armor for you and nearby players.
Wall Power
EpicYour next wall-buy comes Pack-a-Punched.
Newtonian Negation · Quacknarok
Whimsical2 cosmetic-only elixirs.
Dark Ops & mastery cards (Black Ops 4)
Black Ops 4's Zombies ‘Dark Ops’ challenge cards (the full set is a known community gap). Filter by category.

Put to the Quest
Dark OpsComplete the main Easter eggs on all three launch maps (IX, Voyage of Despair, Blood of the Dead).
Dodgy Devil
Dark OpsReach Round 20 on classic Zombies without taking a hit.
Perk Maestro
Dark OpsActivate every perk modifier.

Zombie Dark Ops Master
MasteryComplete all Zombies Dark Ops challenges.
Visual guides & sources
Screenshots and exact part locations live in these — open one on a second screen.