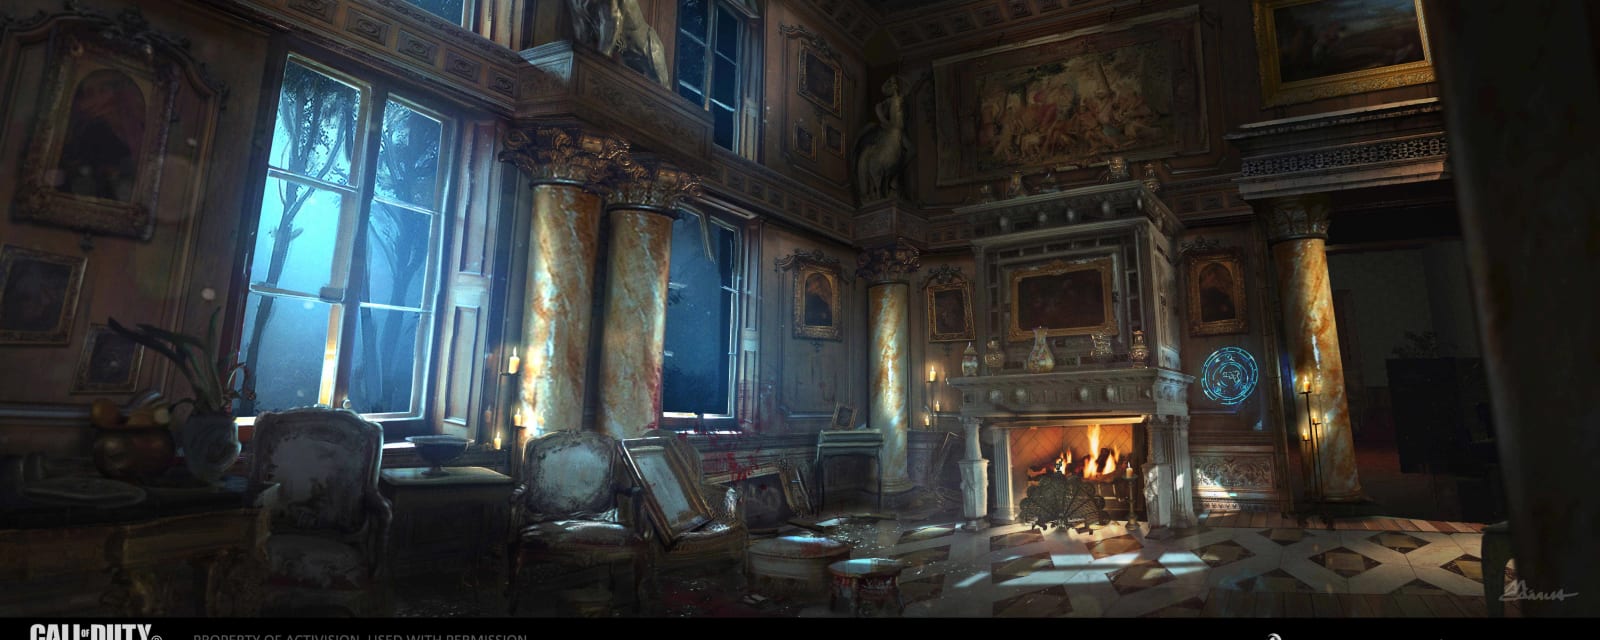

Dead of the Night
The Black Ops 4 Aether story detours to Alistair's Folly — a Victorian mansion on a storm-lashed English estate where Scarlett Rhodes and the Chaos crew hunt for a Sentinel Artifact among vampires, Nosferatu and Werewolves. Open Pack-a-Punch with three Tuning Forks, build Silver Bullets, the Ballistic Shield and the Alistair's Annihilator wonder weapon, then complete all three Trial by Ordeal quest lines — Telescope, Effigy and Knight — before the Forest Werewolf boss. Fully solo-capable; co-op only eases the timed lockdowns and the simultaneous shooting steps.
Key areas
Entrance Hall / Main Hall & North Atrium
Spawn and the mansion hub — the Sentinel Artifact, the Atlas statue and bridge wheel-boxes, a clock, and the perk-statue routes fan out from here.
Library / Study & Smoking Room
The Silver Bullets build table, the Folly lockbox at the back of the Library, the Library Fire Trap, and the Smoking Room shield bench.
West Wing — Billiards, Music, Master Bedroom
A clock, fireplaces for the Knight line, the Music Room, and a ghost-lady spawn; Mystery-song coin nearby.
East Wing — Dining, Galleries, Trophy, Wine Cellar
Dining clock, East/West Gallery fireplaces, the shield gun-assembly, a Folly red-symbol pool, and two Mystery coins.
Gardens / Greenhouse Laboratory
Perk statues, the Materia conversion benches and the two Annihilator craft tables (Chaos Theory and Annihilator).
Cemetery / Mausoleum
Lightning rod, the Nosferatu coffin, the four Mausoleum bat-lamps, an effigy grave, and a perk machine.
Forest Terrace & Boss Arena
The Tuning-Fork gate, Pack-a-Punch at the back of the Forest, the mushroom mounds, the Knight electric triangle, and the Werewolf boss square.
Steps at a glance
- Activate the Sentinel Artifact; reveal the three coloured stones
- Open Pack-a-Punch with three Tuning Forks (clock, perk statue, ghost object) → Forest
- Build Silver Bullets at the Library table
- Build the Ballistic Shield in the Smoking Room
- Get Alistair's Folly (four colour symbols → Library lockbox)
- Upgrade to Chaos Theory (silver Werewolf kill → Greenhouse craft)
- Upgrade to Alistair's Annihilator (bat lamps + Nosferatu bile + mushroom part)
- Telescope line: lightning rod, Atlas rings, zodiac totals, lockdown
- Effigy line: five branches, 1912 grave, Green Vision, ghost escort, lockdown
- Knight line: blue fire trap, three fireplace sets, gems, spectral knights, lockdown
- Kill the Forest Werewolf boss at the statue-beam square
Full walkthrough
Activate the Artifact and reveal the three stones
Buy into the mansion and interact with the Sentinel Artifact in the Main Hall to start the match's quest state. Then find the three vases giving off coloured particles — one purple, one green, one blue — shoot or melee each, kill roughly four zombies beside it, and interact to raise its stone indicator. These three stones become the Telescope, Effigy and Knight quest lines later.
Solo vs co-op: identical solo; in co-op split the vases to save a lap. The vase positions are drawn from mansion-wide pools each match — sweep every coloured glow while you open doors.
Open Pack-a-Punch — three Tuning Forks
Three objectives each drop a Tuning Fork. All three are match-randomised, so follow the glow/quote rather than a fixed spot:
Cost/route: Pack-a-Punch itself is at the back of the Forest once the gate is cleared; standard 2,500-per-weapon cost. Bring the forks in any order.
- Clock objective — at the active clock (Billiards, Dining, or Main Hall) interact to spawn a floor circle; stand in it and kill the infinite spawns until the first Tuning Fork appears
- Perk-statue objective — go to the shown random perk statue; the area locks and vampires spawn — kill them until one drops the second Tuning Fork
- Ghost-object objective — interact with the indicated will, doll, noose or portrait, then follow the drifting ghost through the mansion until it reveals the third Tuning Fork
- Open the Forest — place all three forks on the debris at the Forest Terrace gate, kill the Werewolf that spawns, and continue to Pack-a-Punch at the rear of the Forest
Build Silver Bullets
Silver Bullets are special ammunition needed to damage Werewolves and to sink the lightning rod. Collect the three components — silver, gunpowder and charcoal — from their mansion pools and assemble at the Library table. You can re-buy Silver Bullet ammo at that table for the rest of the match, so top up before every boss/lockdown step.
Tip: supported bullet weapons gain a silver ammo type once built; keep a strong primary loaded with it for the boss.
Build the Ballistic Shield
The Ballistic Shield is required for the Knight line (it carries the flame) and for the Telescope electric run. Gather three parts (three possible spawns each) and build in the Smoking Room — grab them on your way to the first Sentinel Artifact activation, since they sit along the same route and cost you no extra laps.
- Base / Body — Grand Staircase / Balconies
- Window pane / Frame — Library / Study
- Gun assembly / Cage — East Hall / Dining Room
Get Alistair's Folly — the four colour symbols
Find four glowing symbols, one each in red, yellow, green and blue. Every symbol is a stylised X / A / D / Z and every position is match-randomised from the pools below — note the shape under each colour, then enter that colour-order at the lockbox at the back of the Library. A correct code sounds an alarm and opens the window; take Alistair's Folly (a pistol firing self-safe exploding rounds with a charged blast).
Per-match cipher: the four shapes change every game — read your own symbols; never copy an example from a video.
- Blue — Cemetery perk-machine stairs, atop the Mausoleum barn/house, the Mausoleum lion statue past Fast Travel, or a rear-Cemetery gravestone
- Green — Gardens left/right of the perk machine or inside the Gazebo, or the Greenhouse Terrace left of the fountain
- Red — Master Bedroom fireplace wall, Dining Room bar painting, Wine Cellar barrel bases, or above the East Gallery table
- Yellow — Forest Terrace: right of the GKS wall-buy, left of the Bowie Knife wall-buy, or on a small ledge outside the right gate
Upgrade to Chaos Theory
First upgrade adds charged elemental effects. Kill a Werewolf with Silver Bullets to drop Chaos Materia, convert it in the Greenhouse Laboratory, reveal the Library gun part with a shield melee, then craft at the left Greenhouse bench to make Chaos Theory. This adds the yellow acid pool (stuns/confuses a group) and the blue whirlwind/tornado charge on top of the base blast.
Tip: Werewolves only spawn from certain quest/gate triggers early on — kill the Forest-gate Werewolf from Step 2 with Silver Bullets if you can, to grab the Materia in one loop.
Upgrade to Alistair's Annihilator — and its four charged elements
Collect three parts with Chaos Theory, then craft at the last (right) Greenhouse Laboratory bench for Alistair's Annihilator. The finished gun cycles four charged-shot elements, each of which a quest line needs:
- Fireball (fire) — vaporises crowds; lights the Effigy and turns the Library Fire-Trap flames blue for the Knight line.
- Whirlwind / Tornado (blue) — lifts and spins zombies; the tornado kill farms vampire Bile.
- Acid Pool (yellow) — stuns and confuses a group in place.
- Green mind-control / shrink — turns zombies green to dig the Forest mounds and to drop Effigy branches; on the Annihilator the green portal also shrinks enemies out of existence.
Cycling the charge (unverified input): the charge element rotates as you hold the charge — watch the charge glow colour to confirm which effect is loaded before firing. Sources disagree slightly on whether the green effect reads as “mind-control” or “shrink”; treat them as the same green charge for quest purposes.
- Bat Chaos Materia — in the Mausoleum, shoot the glowing orange lamp with Chaos Theory to move the glow; shoot all four lamps in quick sequence before the timer resets, then shoot down the bat/vampire that spawns to drop the Materia
- Nosferatu Chaos Materia — kill vampires with the tornado charge to drop three Bile piles (no more drop after three), smear them on the red glowing coffin in the Cemetery, then kill the Crimson Nosferatu that rises
- Gun part — in the Forest, hit zombies near the glowing-mushroom mounds with the green charge so they turn green and dig; one random mound yields the Annihilator gun part
Telescope line — lightning, Atlas, zodiac, lockdown
Select the Telescope at the quest stones. Then all players simultaneously shoot the lightning rod above the Mausoleum with Silver Bullets to lower it and project a beam at the Atlas statue. Open the three wheel-boxes on the North Atrium bridge and turn them middle-left until green is covered, left-left until blue is covered, right-left until red is covered, repeating until all three beams stay blocked and Atlas's head melts. Read three zodiac totals, dial them least-to-most on the telescope, open and lock the roof, run the electric trap with raised shields, then all players melee the eyepiece together, take the stone and hold-interact as a team to start the lockdown. Survive the endless spawns and final Werewolves until the white flash / Max Ammo, then collect the stone.
Zodiac totals (per-match): three of seven rooms are active — in each, identify the zodiac and add its three scratch groups; an invisible third group counts as zero. Enter the three symbols ordered by total from smallest to largest; a wrong order just resets the dial.
Solo vs co-op: solo, the “simultaneous” lightning-rod and eyepiece steps are single-press; in co-op every player must fire/melee together or the step will not register.
- Middle wheel — turn left until the green beam is covered
- Left wheel — turn left until the blue beam is covered
- Right wheel — turn left until the red beam is covered
- Repeat the sequence until all three beams remain blocked and Atlas's head melts
Effigy line — branches, 1912 grave, ghost escort
Select the Effigy stone. Fire charged green Annihilator shots at the five marked trees around the Cemetery/Forest route to drop five branches (if a branch will not drop, another timed line is blocking — finish it first). Find the grave whose death year is 1912 to fix the effigy identity, enter Green Vision and follow the green cue to the effigy, hit it with a fully charged fireball and interact. You are attached to the effigy and return as a blue-screen ghost — find and escort the ghost lady to the Cemetery Mystery Box spot, staying close. She burns and drops the stone; interact to exit Ghost Mode, hold-interact as a team, survive the Werewolves and take the stone after the flash.
Randomised: the five branch-trees, the 1912 grave, and the ghost-lady spawn (Entrance Hall, Wine Cellar, Master Bedroom or Dining Room) all vary per match. If downed mid-escort, repeat Green Vision → fireball → interact to re-enter Ghost Mode.
- Collect five branches from the five marked trees with green charged shots
- Identify the grave dated 1912 to set the effigy
- Enter Green Vision, fireball the effigy, interact to become a ghost
- Escort the ghost lady (Entrance Hall / Wine Cellar / Master Bedroom / Dining Room) to the Cemetery box
Knight line — blue fire trap, fireplaces, gems, spectral knights
Select the Knight stone. Activate the Library Fire Trap and shoot its flames with a charged Annihilator shot to turn them blue, then run through the blue flames with the Ballistic Shield raised to ignite it. Melee the three fireplace sets in order with the flaming shield (re-ignite between sets if it goes out), taking a gem from each set. Place the three gems in the three armour suits, escort each following gem to its matching coloured Forest circle, then kill zombies by each spectral knight to advance it (twice each) until all three reach Pack-a-Punch and form an electric triangle. Lure a Werewolf fully inside and kill it, take the stone, start the team lockdown and survive to the flash.
Gem escort: each gem follows you only while you stay close — walk it in short stages. The armour suits are at the Cemetery, Main Hall and Gardens.
- Set one — Smoking Room, Library right of trap, Library left of trap, Billiards Room (take gem 1)
- Set two — Main Hall right of Mozu, East Gallery, Main Hall left of Mozu, West Gallery (take gem 2)
- Set three — Trophy Room, Master Bedroom, Music Room, Dining Room (take gem 3)
- Place gems in the Cemetery, Main Hall and Gardens suits, then deliver each to its matching Forest circle
- Move each spectral knight twice toward Pack-a-Punch until the electric triangle forms
Forest Werewolf boss fight
With all three stones complete, the right-side Forest door is the point of no return — hold-interact only when kitted: Silver Bullet weapon with full ammo, Ballistic Shield, Annihilator, and Homunculus or Wraith Fire equipment. Inside, rotate the edge statues so their white beams converge on the glowing green floor square (aligned beams turn green). Bait the Werewolf into the square to trap it and open its glowing chest, then focus fire the chest until the phase ends. Later phases add heavier vampires and may hide the square — realign beams to relocate it, clear adds, and repeat. Continue until the final health segment is gone.
Ending cue: the completion cutscene is the only confirmation — there is no objective text. Do not quit during the final animation.
Solo vs co-op: solo you rotate all statues yourself between baits; in co-op assign one player per statue and a runner to bait, which is much faster.
Side Easter Eggs & extras
Everything beyond the main quest. Tap any entry to open the full how-and-where breakdown.
“Mystery”
Elena Siegmann / Scott Eckert. Shoot four hidden coins (any order, once per match) to play it: (1) under the table by the fireplace at the North-Atrium end of the Main Hall; (2) East Hallway, on the wall by the door into the Dining Room; (3) inside a broken barrel by a tall candlestick in the Wine Cellar; (4) in the Library, atop the Egyptian statue — only shootable from the Study.
Stake Knife
A silver melee that one-hits vampires — a strong non-quest vampire-control option built from parts around the mansion; outside the required route.
Savage Impaler
A wall-mounted spike trap that skewers vampires and zombies; excellent crowd/vampire control but not needed for the quest.
Hidden rooms & free items
Several hidden rooms and one-use power-up/free-item spots dot the mansion for economy; not quest-critical, best saved for lockdowns.
Recommended loadouts
Three strong picks for this map — the map's Wonder Weapon plus reliable box/wall options. These are pre-augment-era games, so the setup is the gun plus Pack-a-Punch and perk synergy.
Alistair's Annihilator (Folly → Chaos Theory → Annihilator)
Map-defining wonder weaponThe quest gun and best all-rounder — build through the lockbox symbols and two Greenhouse crafts. Cycle its four charged elements (fireball, tornado, acid, green mind-control/shrink); required for branches, the mushroom dig and the blue fire trap. Pack-a-Punch the base rounds and pair with Victorious Tortoise for survivability.
Spitfire (PaP → Dark Matter)
Horde-clear SMGHigh fire-rate Mystery Box / wall-buy workhorse for lockdowns and the boss. Pack-a-Punch it and load Silver Bullets so it also hurts Werewolves; run Stamin-Up and Deadshot Daiquiri for mobility and headshots while charging the Annihilator.
GKS (PaP → Reingenieur)
Reliable wall-buy primaryThe GKS wall-buy sits on the Forest Terrace beside a Folly-symbol spot — cheap, accurate and easy to keep stocked with Silver Bullets. A dependable second weapon while the Annihilator handles the quest charges; pair with Timeslip/Quick Revive and a Specialist (Scepter of Ra or Chakrams) for lockdown control.
Recommended elixirs & talismans
Black Ops 4 has no GobbleGums — equip 4 Elixirs per class and one passive Talisman from match start. Weapons and the Alchemical Sword are in Recommended loadouts above.
Perkaholic
EpicAll loadout perks plus 6 random ones.
Perk Up
Legendary+4 random non-loadout perks.
Cache Back
LegendaryDrops a Max Ammo.
Kill Joy
RareDrops an Insta-Kill.
Free Fire
LegendaryNo ammo consumed for 30s.
Phoenix Up
EpicRevive all downed team-mates, loadout perks kept.
Near Death Experience
EpicProximity revive (10 min / 5 revives).
Suit Up
EpicFull armor for you and nearby players.
Join the Party
EpicSpectators spawn in and downed players are revived.

Charged Crystal
LegendaryStart your special weapon at Level 2 — Dead of the Night is wonder-weapon heavy.

Glowing Phylactery
EpicAn extra self-revive.

Charm of the Miser
CommonCheaper Pack-a-Punch.
Elixir reference (Black Ops 4)
All 51 Black Ops 4 Elixirs — you equip 4 per class. Classic and Whimsical are unlimited; Common → Epic are consumable, brewed with Nebulium Plasma. These are Elixirs, not GobbleGums. Filter by tier.
Always Done Swiftly
ClassicFaster ADS walk/aim for 5 min.

Anywhere But Here
ClassicRandom teleport with a blast.
Burned Out
ClassicAttackers ignite nearby zombies (3 hits).
Equip Mint
ClassicRefresh your equipment cooldowns.
Head Scan
ClassicHeadshot instakill chance for 2 min.
Temporal Gift
ClassicLonger power-ups for 5 min.
Aftertaste
ClassicKeep perks on revive (5 min / 1 down).
Point Drops
ClassicDrop 500 of your points as a power-up.

Anti-Entrapment
ClassicTrap-damage immunity for 30s.
Nowhere But There
ClassicTeleport to a downed player.

Now You See Me
ClassicAll zombies chase you for 15s.
Arsenal Accelerator
ClassicFaster special-weapon charge for 2 min.
Pop Shocks
ClassicMelee electrostatic discharge (5).

Stock Option
ClassicAmmo drawn from your stockpile for 2 min.
Bullet Boost
CommonApply or re-roll an Alternate Ammo Type.
Ctrl-Z
CommonTurn up to 2 nearby zombies into allies (30s).
Dead of Nuclear Winter
CommonDrops a Nuke.
In Plain Sight
CommonZombies ignore you for 10s.
Licensed Contractor
CommonDrops a Carpenter.
Phantom Reload
Common30% chance of a free-magazine reload for 4 min.
Sword Flay
CommonMelee instakills basics / 5× for 1 min.
Who's Keeping Score?
CommonDrops Double Points.
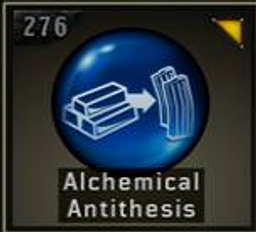
Alchemical Antithesis
RareEvery 10 points becomes 1 reserve ammo (1 min).
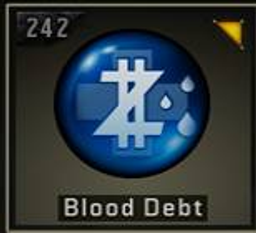
Blood Debt
RareLose points instead of health for 1 min.
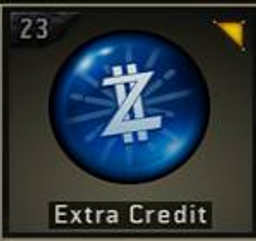
Extra Credit
RareA personal 1,250-point drop.
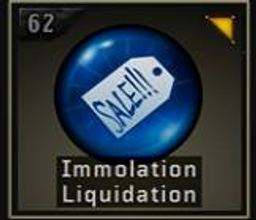
Immolation Liquidation
RareDrops a Fire Sale.
Kill Joy
RareDrops an Insta-Kill.
Shields Up
RareGrants a new shield.
Talkin' Bout Regeneration
RareConstant health regen while moving for 4 min.
Cache Back
LegendaryDrops a Max Ammo.
Dividend Yield
LegendaryBonus shared points for 5 min.
Free Fire
LegendaryNo ammo consumed for 30s.
Perk Up
Legendary+4 random non-loadout perks.
Power Keg
LegendaryDrops a Full Power power-up.
Wall to Wall Clearance
LegendaryA wall-buy Fire Sale for 30s.
Undead Man Walking
LegendaryZombies move at shambling speed for 1 min.
Shopping Free
EpicFree purchases for 1 min.
Head Drama
EpicBody shots register as head shots for 5 min.
Secret Shopper
EpicAny wall-buy discounts ammo for any gun (10 min).
Reign Drops
EpicOne of each of the 9 core power-ups.
Power Vacuum
EpicMore drops with the cap ignored for 5 min.
Near Death Experience
EpicProximity revive (10 min / 5).
Phoenix Up
EpicRevive all downed players, loadout perks kept.
Conflagration Liquidation
EpicDrops a Bonfire Sale.
Join the Party
EpicSpectators spawn in and downed players are revived.
Perkaholic
EpicAll loadout perks plus 6 random ones.
Refresh Mint
EpicRefresh equipment, special and perk cooldowns for all.
Suit Up
EpicFull armor for you and nearby players.
Wall Power
EpicYour next wall-buy comes Pack-a-Punched.
Newtonian Negation · Quacknarok
Whimsical2 cosmetic-only elixirs.
Dark Ops & mastery cards (Black Ops 4)
Black Ops 4's Zombies ‘Dark Ops’ challenge cards (the full set is a known community gap). Filter by category.

Put to the Quest
Dark OpsComplete the main Easter eggs on all three launch maps (IX, Voyage of Despair, Blood of the Dead).

Dodgy Devil
Dark OpsReach Round 20 on classic Zombies without taking a hit.

Perk Maestro
Dark OpsActivate every perk modifier.

Zombie Dark Ops Master
MasteryComplete all Zombies Dark Ops challenges.
Visual guides & sources
Screenshots and exact part locations live in these — open one on a second screen.