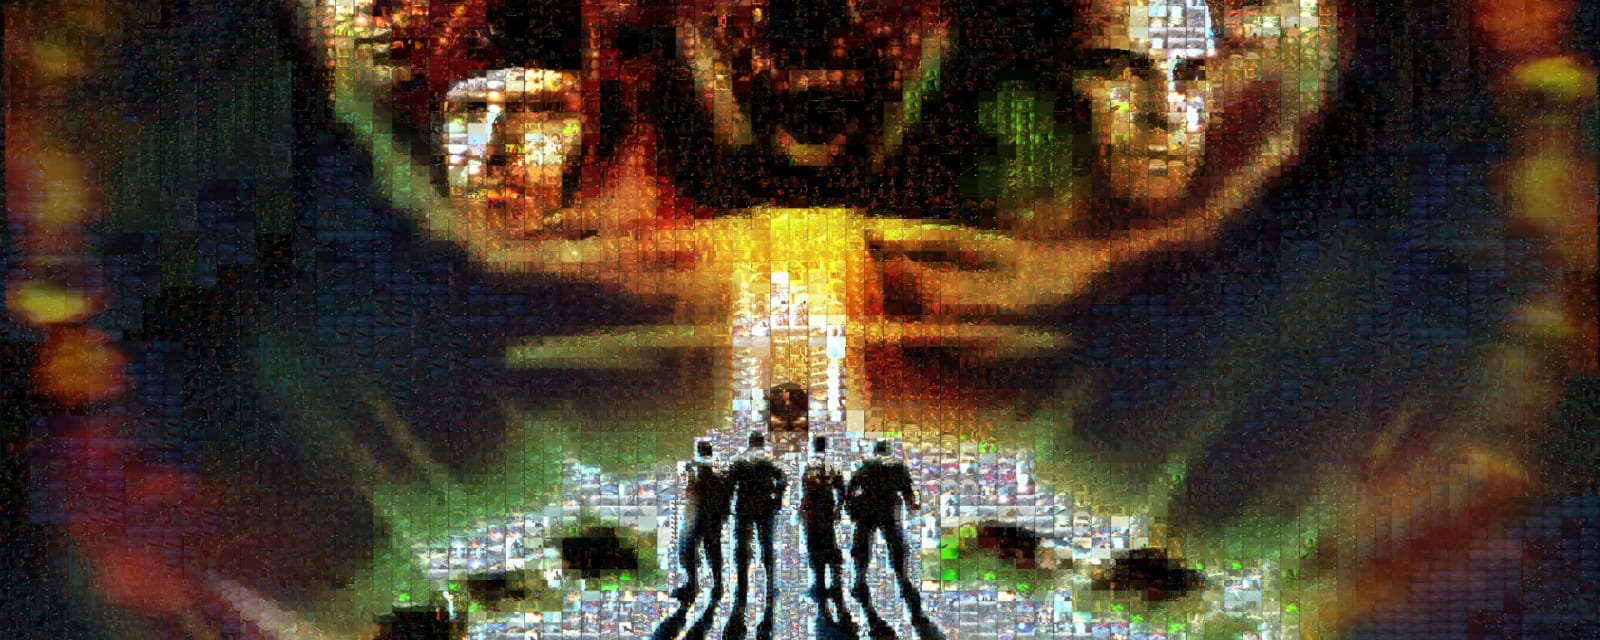

Alpha Omega
Camp Edward — the Broken Arrow research site built beneath a Nuketown test town. Primis and Ultimis join forces to run Nikolai’s plan: wake the A.I. Rushmore, decode the five-clock TV broadcast, escort a fragile Red Nova Crawler, scare Element 115 out of Marlton, and contain the electric Avogadro to claim the Elemental Shard in the Electromagnetic Awakening Party main quest.
Map & Key areas
The map layout first, then the areas worth knowing by name. Map imagery © Activision, self-hosted.
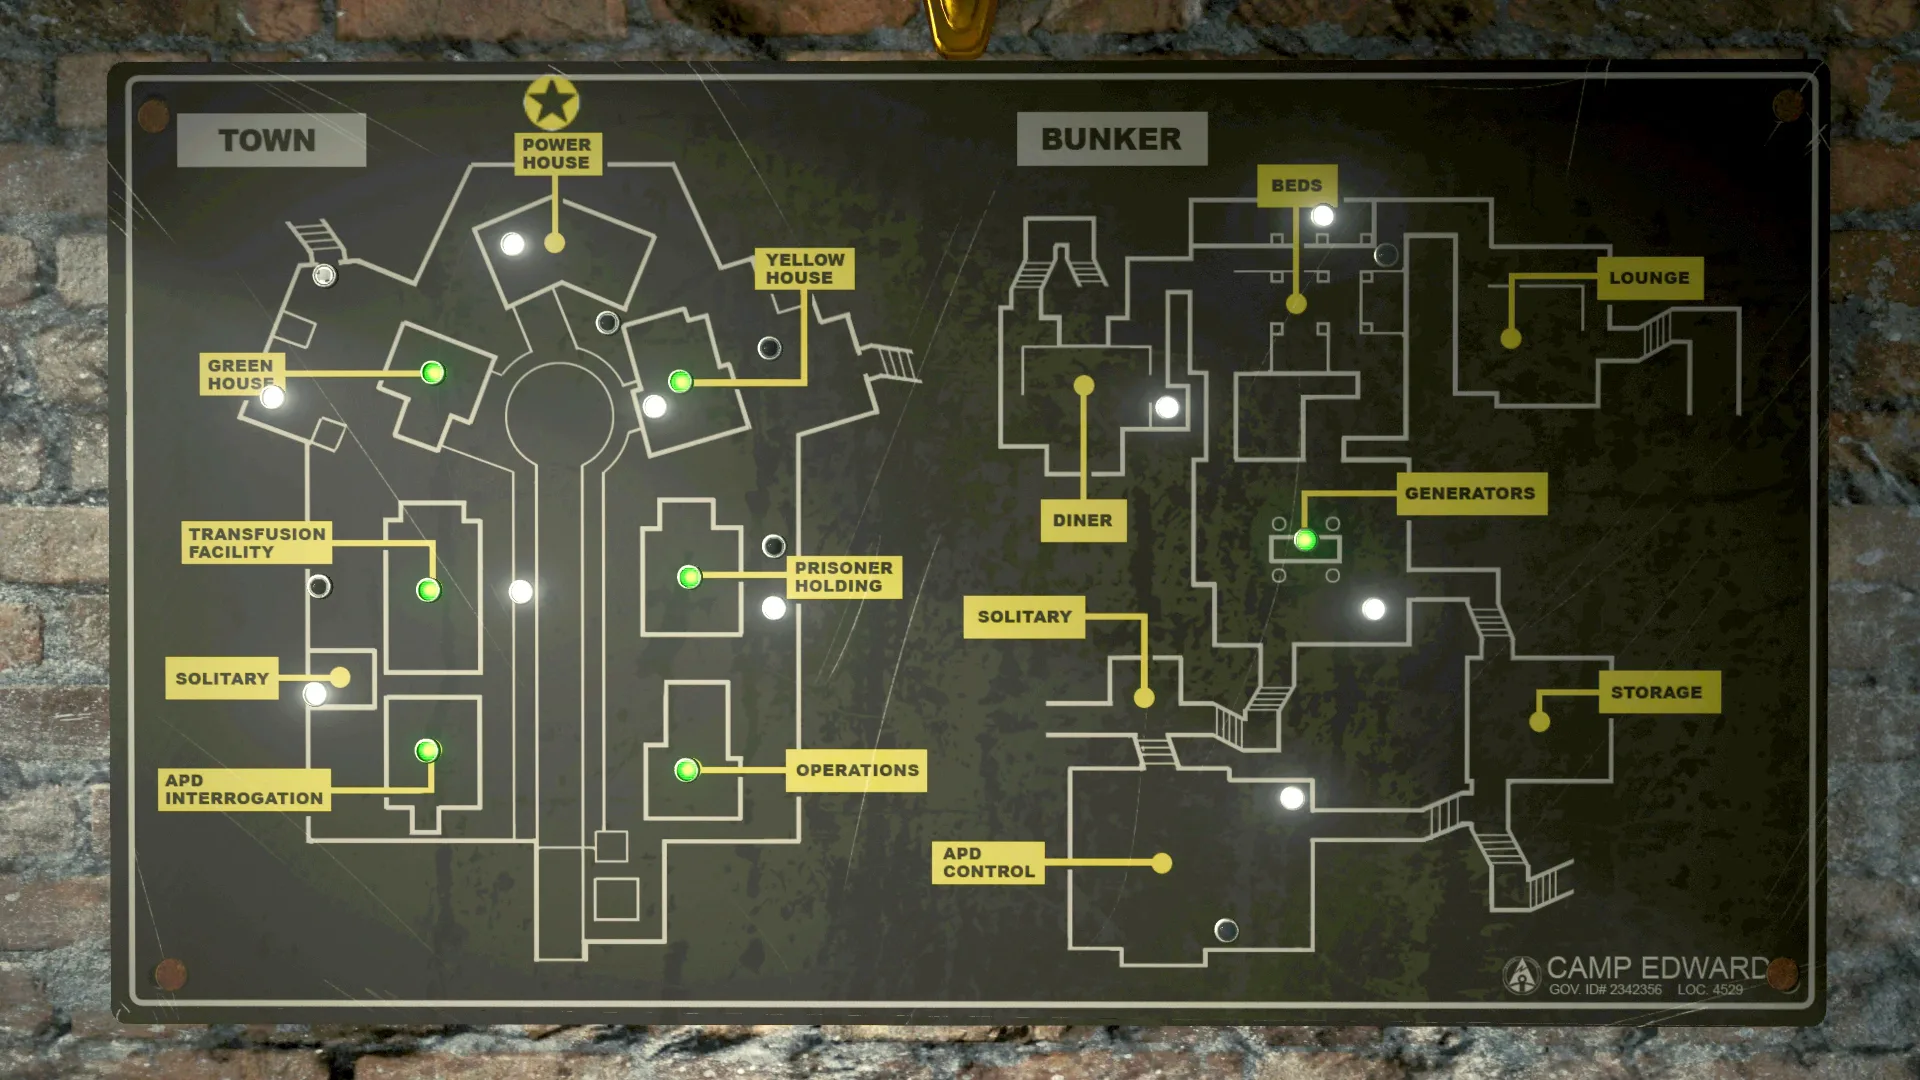
Cul-de-sac / Houses (Yellow & Green)
The Nuketown surface: the Galvaknuckles truck, the six house clocks, the static TVs, the Brain Rot pictures, the glowing-mannequin spawns, and one A.D.A.M. head.
Diner / Backyards
The Green House Backyard–Diner stairs hiding Marlton’s door, backyard mannequin spawns, and the Diner blackout switch.
Bunker (Beds · Lounge · Solitary · Storage · Generators)
The underground facility: Pack-a-Punch in Beds, more static TVs and pictures, two A.D.A.M. heads, and four of the six blackout switches.
Operations
Rushmore’s terminal and the server destination, plus the free Pack-a-Punched Ray Gun Mark II reward.
Power House
Main power, the Telepad build area, and the server core housing you crack open with a Jolting Jack blast.
Transfusion
The Red Nova Crawler barrier right of the RK7 wall-buy and the shelf where Marlton’s thrown 115 canister is placed.
APD Interrogation & Control
The seated mannequin you rebuild, the elemental-orb delivery point, and the central + four backup soul canisters where the Avogadro is contained.
Steps at a glance
- Restore ventilation/power → Pack-a-Punch (Beds) → activate Rushmore (Operations)
- Buy Galvaknuckles; melee a zombie by the static TV → record five letter/time pairs
- Set the five house clocks in broadcast order; read the unused clock → enter its trust code in Rushmore
- Escort the Red Nova Crawler to the Transfusion barrier (no gunfire near it)
- Wake Sergeant A.D.A.M.; bring him to Marlton → place the thrown 115 canister in Transfusion
- Bait a Jolting Jack into the Power House server → Telepad the core to Operations under the timer
- Brain Rot three misted pictures → enter all three codes in Rushmore within one minute
- Set the six blackout switches; restore main power
- Clear three mannequin lockdowns → rebuild the seated mannequin → escort the elemental orb to it
- Start the APD boss: fill the central + four backup canisters, push the Avogadro into the APD, take the Elemental Shard
Full walkthrough
Ventilation, power, Pack-a-Punch & Rushmore
Open the houses and drop into the bunker. Clear the ventilation objective and switch on the power — a Nova-6 Bomber horde spawns while you repair the leaking house vents, so keep zombies off the vent panels. Pack-a-Punch comes online in Beds after the setup. Then interact with Rushmore’s terminal in Operations and wait through the dialogue until he accepts inputs and gives quest prompts. Entering 2265 into Rushmore grants everyone a free 1,000 points — handy toward the 6,750 Galvaknuckles route.
Solo vs co-op: fully solo-capable throughout. Co-op only speeds crowd control and lets players cover separate clocks/pictures — no step changes count or timing in your favour except that a teammate can hold zombies off a timed input.
Galvaknuckles & the static-TV broadcast
Buy Galvaknuckles from the Cul-de-sac truck. Find the static (blank-screen) TV and melee a zombie right beside it with the Galvaknuckles — the shock powers the TV, which displays a test card of five letter/time combinations (e.g. D0745) in a fixed spoken order. Write down all five.
- TV site 1 — Beds, right of Pack-a-Punch
- TV site 2 — Beds, left of Pack-a-Punch
- TV site 3 — Lounge
Set the five clocks & enter the trust code
Each broadcast letter maps to a fixed clock — A = Yellow House, B = Green House, C = Prisoner Holding, D = Transfusion, E = Operations, F = APD Interrogation. Visit the matching clock and set its time in the exact broadcast order: hold interact = +15 minutes, melee = +1 hour. When all five register, interact with the one clock you never used — its hands spin and stop on a new time. Convert that to four digits and enter it into Rushmore. The success cue is Rushmore’s line “Nope! Still don’t trust you.” and free Pack-a-Punched weapons: the Ray Gun Mark II (Porter’s X2) in Operations and another dispensed in Prisoner Holding.
Per-match cipher: the five pairs and the unused-clock value are randomised every game — read them live and set in spoken order. There are only six fixed code sets, so hearing the first code identifies the whole set (credit GregFPS) — you don't have to catch all five. If the sequence resets, wait a round, re-listen, and re-enter exactly.
- The six clocks are in Yellow House, Green House, Prisoner Holding, Transfusion, Operations, and APD Interrogation
- One of these six is the unused clock — read whichever you did not set
Escort the Red Nova Crawler
Ask Rushmore for the next task and search the underground for the unique red Nova-6 Crawler. Walk close enough that it follows you to the barrier right of the RK7 wall-buy in Transfusion. Infinite zombies spawn on the way.
Critical: a single stray bullet kills the crawler and forces you to wait until the next round for a new one. Control ordinary zombies with equipment, cover or pathing — never shoot near it. If it wanders off, back-track and re-bait it, or reset on the next round.
Wake Sergeant A.D.A.M. & Marlton’s 115
Collect and insert the required component to wake Sergeant A.D.A.M. (the walking robot; learn his escort/command interaction). Then melee the hidden door on the stairs between Green House Backyard and the Diner until Marlton speaks. Escort A.D.A.M. to that door — spooked, Marlton throws out a 115 canister. Pick it up and place it on the shelf left of the Green House Backyard doorway in Transfusion.
- Wake A.D.A.M. (build/insert component) before approaching Marlton
- Melee Marlton’s door until he speaks
- Bring A.D.A.M. to the door → collect the thrown 115 canister
- Place the canister on the Transfusion shelf
Bait & Telepad the timed server core
Pre-place your two Telepads: one at Power House, one in the Prisoner Holding backyard, and test the route first. Bait a Jolting Jack’s electric blast into the server core housing left of the Telepad location to crack it open. Take the core, teleport, and sprint to Operations to insert it in the server before the timer expires (the window is tight — roughly ten seconds, so the pre-placed teleport route is mandatory).
Recovery: a failed timer immediately respawns another core, so retry as many times as needed. Keep every door between Power House, Prisoner Holding backyard and Operations open before you start.
Brain Rot picture codes & the blackout switches
Put Brain Rot on a controllable weapon. Shoot a zombie beside each green-mist picture — the turned zombie tears it down, revealing a four-digit code. Record all three, then enter them into Rushmore one after another within sixty seconds and interact; if the window lapses, re-enter the full set. A blackout follows: set the six switches to the fixed pattern, then restore main power at Power House and report to Rushmore. All switch lights turn green when correct.
Fixed switch pattern: Diner UP · Beds UP · Lounge DOWN · Generators UP · Storage DOWN · Solitary DOWN.
- Picture 1 — top of the Green House stairs
- Picture 2 — Lounge, left of the bunker exit
- Picture 3 — Beds, across from the KN-47 wall-buy
Mannequin lockdowns & the elemental orb
Find a blue-glowing mannequin and interact to start a ~one-minute lockdown — survival, not kills, is the objective. It shatters and drops a body part; repeat for three parts. Place all three on the broken seated mannequin in APD Interrogation. Then find the elemental orb in a zombie-spawn window and escort it back to the rebuilt mannequin — stay close or it despawns and returns next round. Wait for all dialogue before touching Rushmore.
Optional aid: enter 3279 or 6662 into Rushmore to slow zombies for five minutes, which makes the orb escort far easier.
- Mannequin spawn pool — Green/Yellow backyards, Transfusion yard, Prisoner Holding, Lounge, Diner
- Orb spawn pool — Yellow House Upstairs, Green House Downstairs, or Beds window
Contain the Avogadro → Elemental Shard
Finish all purchases, then every player interacts with the APD Control computer together — this is the point of no return. Kill mannequins around the pyramid to fill the central canister; the APD opens, the Avogadro appears and a nuke detonates. Fill the four backup canisters in the recommended order — Storage, then Lounge, Diner, Beds — killing souls while watching the Avogadro. Each completed room electrifies and seals, so leave the instant the completion quote plays; never leave equipment or a downed player inside.
Push mechanic: back at APD Control, bullet impacts shove the Avogadro away from the shooter. Assign one pusher behind him driving him toward the APD stairs while everyone else holds fire — mixed-angle shooting sends him the wrong way. When positioned, the APD pulls him in; interact with the computer when prompted, then pick up the Elemental Shard for the ending cutscene.
- Central canister — kill mannequins around the APD pyramid
- Backup order — Storage → Lounge → Diner → Beds (exit each on the completion quote)
- Push the Avogadro into the APD → activate the computer → take the Elemental Shard
Side Easter Eggs & extras
Everything beyond the main quest. Tap any entry to open the full how-and-where breakdown.
“I Am The Well”
Clark S. Nova, composed by Kevin Sherwood. Hold interact on three severed A.D.A.M. heads, any order (hold even with no visible prompt): (1) Green House Upstairs — under the bed in the Riot Shield crafting-bench room; (2) Solitary/Bunker — opposite the desk where the 115 canister sometimes spawns, left of the bench with the laying mannequin; (3) Lounge/Bunker — beside the edge of the pool table, opposite and down the steps from the ‘Beds’ tunnel.
Rushmore slow-zombie codes
Enter 3279 or 6662 into the Rushmore terminal to slow every zombie for roughly five minutes — a big help for the Red Nova Crawler escort, the timed core run and the elemental-orb delivery. Non-destructive to the quest; use freely.
Free Pack-a-Punched Ray Gun Mark II
Completing the five-clock trust code spawns a free, already Pack-a-Punched Ray Gun Mark II in Operations — grab it before continuing; it carries the boss fight.
The Pentagon Thief’s corpse
Despite the reputation, the Pentagon Thief is NOT an active enemy here — his dead body (revealed to be Yuri from Ascension) is found in the Prisoner Holding house purely as a story Easter egg. No weapon-stealing boss appears on Alpha Omega.
Ray Gun Mark II variants
Any Mark II variant (from the box or the frame/kit route) is excellent boss and high-round insurance; the main quest does not require a specific colour. Path of Sorrows or Ragnarok are the recommended Specialist weapons for the finale.
Recommended loadouts
Three strong picks for this map — the map's Wonder Weapon plus reliable box/wall options. These are pre-augment-era games, so the setup is the gun plus Pack-a-Punch and perk synergy.
Ray Gun Mark II (free Pack-a-Punched, Operations)
Wonder Weapon / boss damageThe trust-code reward hands you a Pack-a-Punched Mark II for free — splash that stays lethal into high rounds and the safest tool for chipping the Avogadro. Run Victorious Tortoise + Deadshot Daiquiri and keep an Anywhere But Here! Elixir for panic escapes; any box Mark II variant works too.
RK7 Garrison (Transfusion wall-buy, PaP)
Reliable primary / Avogadro pusherThe medium-fire-rate bullet weapon the finale wants — Pack-a-Punch it and use steady taps to push the Avogadro toward the APD from behind. Pair with Stamin-Up + Bandolier Bandit and a Bloodhound/rapid-fire Elixir; strong for the crawler and orb escorts where you must control, not spray.
Titan / high-capacity LMG (box, PaP)
Crowd control for lockdowns & holdsA big magazine feeds the mannequin lockdowns, the blackout and the soul-canister rooms without reloading mid-fight. Pack-a-Punch and run Dying Wish + Victorious Tortoise; carry Monkey Bombs/Wraith Fire and a Timeslip Elixir to reset drops during the boss.
Recommended elixirs & talismans
Black Ops 4 has no GobbleGums — equip 4 Elixirs per class and one passive Talisman from match start. Weapons and the shield are in Recommended loadouts above.
Perkaholic
EpicAll loadout perks plus 6 random ones.
Perk Up
Legendary+4 random non-loadout perks.
Cache Back
LegendaryDrops a Max Ammo.
Kill Joy
RareDrops an Insta-Kill.
Shields Up
RareGrants a fresh shield.
Phoenix Up
EpicRevive all downed team-mates, loadout perks kept.
Near Death Experience
EpicProximity revive (10 min / 5 revives).
Suit Up
EpicFull armor for you and nearby players.
Join the Party
EpicSpectators spawn in and downed players are revived.

Minor Reinforced Charm
RareExtra shield durability — the Alpha Omega shield does heavy lifting here.

Glowing Phylactery
EpicAn extra self-revive.

Charm of the Miser
CommonCheaper Pack-a-Punch.
Elixir reference (Black Ops 4)
All 51 Black Ops 4 Elixirs — you equip 4 per class. Classic and Whimsical are unlimited; Common → Epic are consumable, brewed with Nebulium Plasma. These are Elixirs, not GobbleGums. Filter by tier.
Always Done Swiftly
ClassicFaster ADS walk/aim for 5 min.
Anywhere But Here
ClassicRandom teleport with a blast.
Burned Out
ClassicAttackers ignite nearby zombies (3 hits).
Equip Mint
ClassicRefresh your equipment cooldowns.
Head Scan
ClassicHeadshot instakill chance for 2 min.
Temporal Gift
ClassicLonger power-ups for 5 min.
Aftertaste
ClassicKeep perks on revive (5 min / 1 down).
Point Drops
ClassicDrop 500 of your points as a power-up.
Anti-Entrapment
ClassicTrap-damage immunity for 30s.
Nowhere But There
ClassicTeleport to a downed player.
Now You See Me
ClassicAll zombies chase you for 15s.
Arsenal Accelerator
ClassicFaster special-weapon charge for 2 min.
Pop Shocks
ClassicMelee electrostatic discharge (5).
Stock Option
ClassicAmmo drawn from your stockpile for 2 min.
Bullet Boost
CommonApply or re-roll an Alternate Ammo Type.
Ctrl-Z
CommonTurn up to 2 nearby zombies into allies (30s).
Dead of Nuclear Winter
CommonDrops a Nuke.
In Plain Sight
CommonZombies ignore you for 10s.
Licensed Contractor
CommonDrops a Carpenter.
Phantom Reload
Common30% chance of a free-magazine reload for 4 min.
Sword Flay
CommonMelee instakills basics / 5× for 1 min.
Who's Keeping Score?
CommonDrops Double Points.
Alchemical Antithesis
RareEvery 10 points becomes 1 reserve ammo (1 min).
Blood Debt
RareLose points instead of health for 1 min.
Extra Credit
RareA personal 1,250-point drop.
Immolation Liquidation
RareDrops a Fire Sale.
Kill Joy
RareDrops an Insta-Kill.
Shields Up
RareGrants a new shield.
Talkin' Bout Regeneration
RareConstant health regen while moving for 4 min.
Cache Back
LegendaryDrops a Max Ammo.
Dividend Yield
LegendaryBonus shared points for 5 min.
Free Fire
LegendaryNo ammo consumed for 30s.
Perk Up
Legendary+4 random non-loadout perks.
Power Keg
LegendaryDrops a Full Power power-up.
Wall to Wall Clearance
LegendaryA wall-buy Fire Sale for 30s.
Undead Man Walking
LegendaryZombies move at shambling speed for 1 min.
Shopping Free
EpicFree purchases for 1 min.
Head Drama
EpicBody shots register as head shots for 5 min.
Secret Shopper
EpicAny wall-buy discounts ammo for any gun (10 min).
Reign Drops
EpicOne of each of the 9 core power-ups.
Power Vacuum
EpicMore drops with the cap ignored for 5 min.
Near Death Experience
EpicProximity revive (10 min / 5).
Phoenix Up
EpicRevive all downed players, loadout perks kept.
Conflagration Liquidation
EpicDrops a Bonfire Sale.
Join the Party
EpicSpectators spawn in and downed players are revived.
Perkaholic
EpicAll loadout perks plus 6 random ones.
Refresh Mint
EpicRefresh equipment, special and perk cooldowns for all.
Suit Up
EpicFull armor for you and nearby players.
Wall Power
EpicYour next wall-buy comes Pack-a-Punched.
Newtonian Negation · Quacknarok
Whimsical2 cosmetic-only elixirs.
Dark Ops & mastery cards (Black Ops 4)
Black Ops 4's Zombies ‘Dark Ops’ challenge cards (the full set is a known community gap). Filter by category.

Put to the Quest
Dark OpsComplete the main Easter eggs on all three launch maps (IX, Voyage of Despair, Blood of the Dead).
Dodgy Devil
Dark OpsReach Round 20 on classic Zombies without taking a hit.
Perk Maestro
Dark OpsActivate every perk modifier.

Zombie Dark Ops Master
MasteryComplete all Zombies Dark Ops challenges.
Visual guides & sources
Screenshots and exact part locations live in these — open one on a second screen.