
Zombies in Spaceland
A neon 1980s space-themed amusement park where four out-of-work actors are trapped inside horror director Willard Wyler's film. Round-based Zombies fused with arcade respawns, Fate & Fortune cards and a David Hasselhoff DJ.
Map & Key areas
The map layout first, then the areas worth knowing by name. Map imagery © Activision, self-hosted.
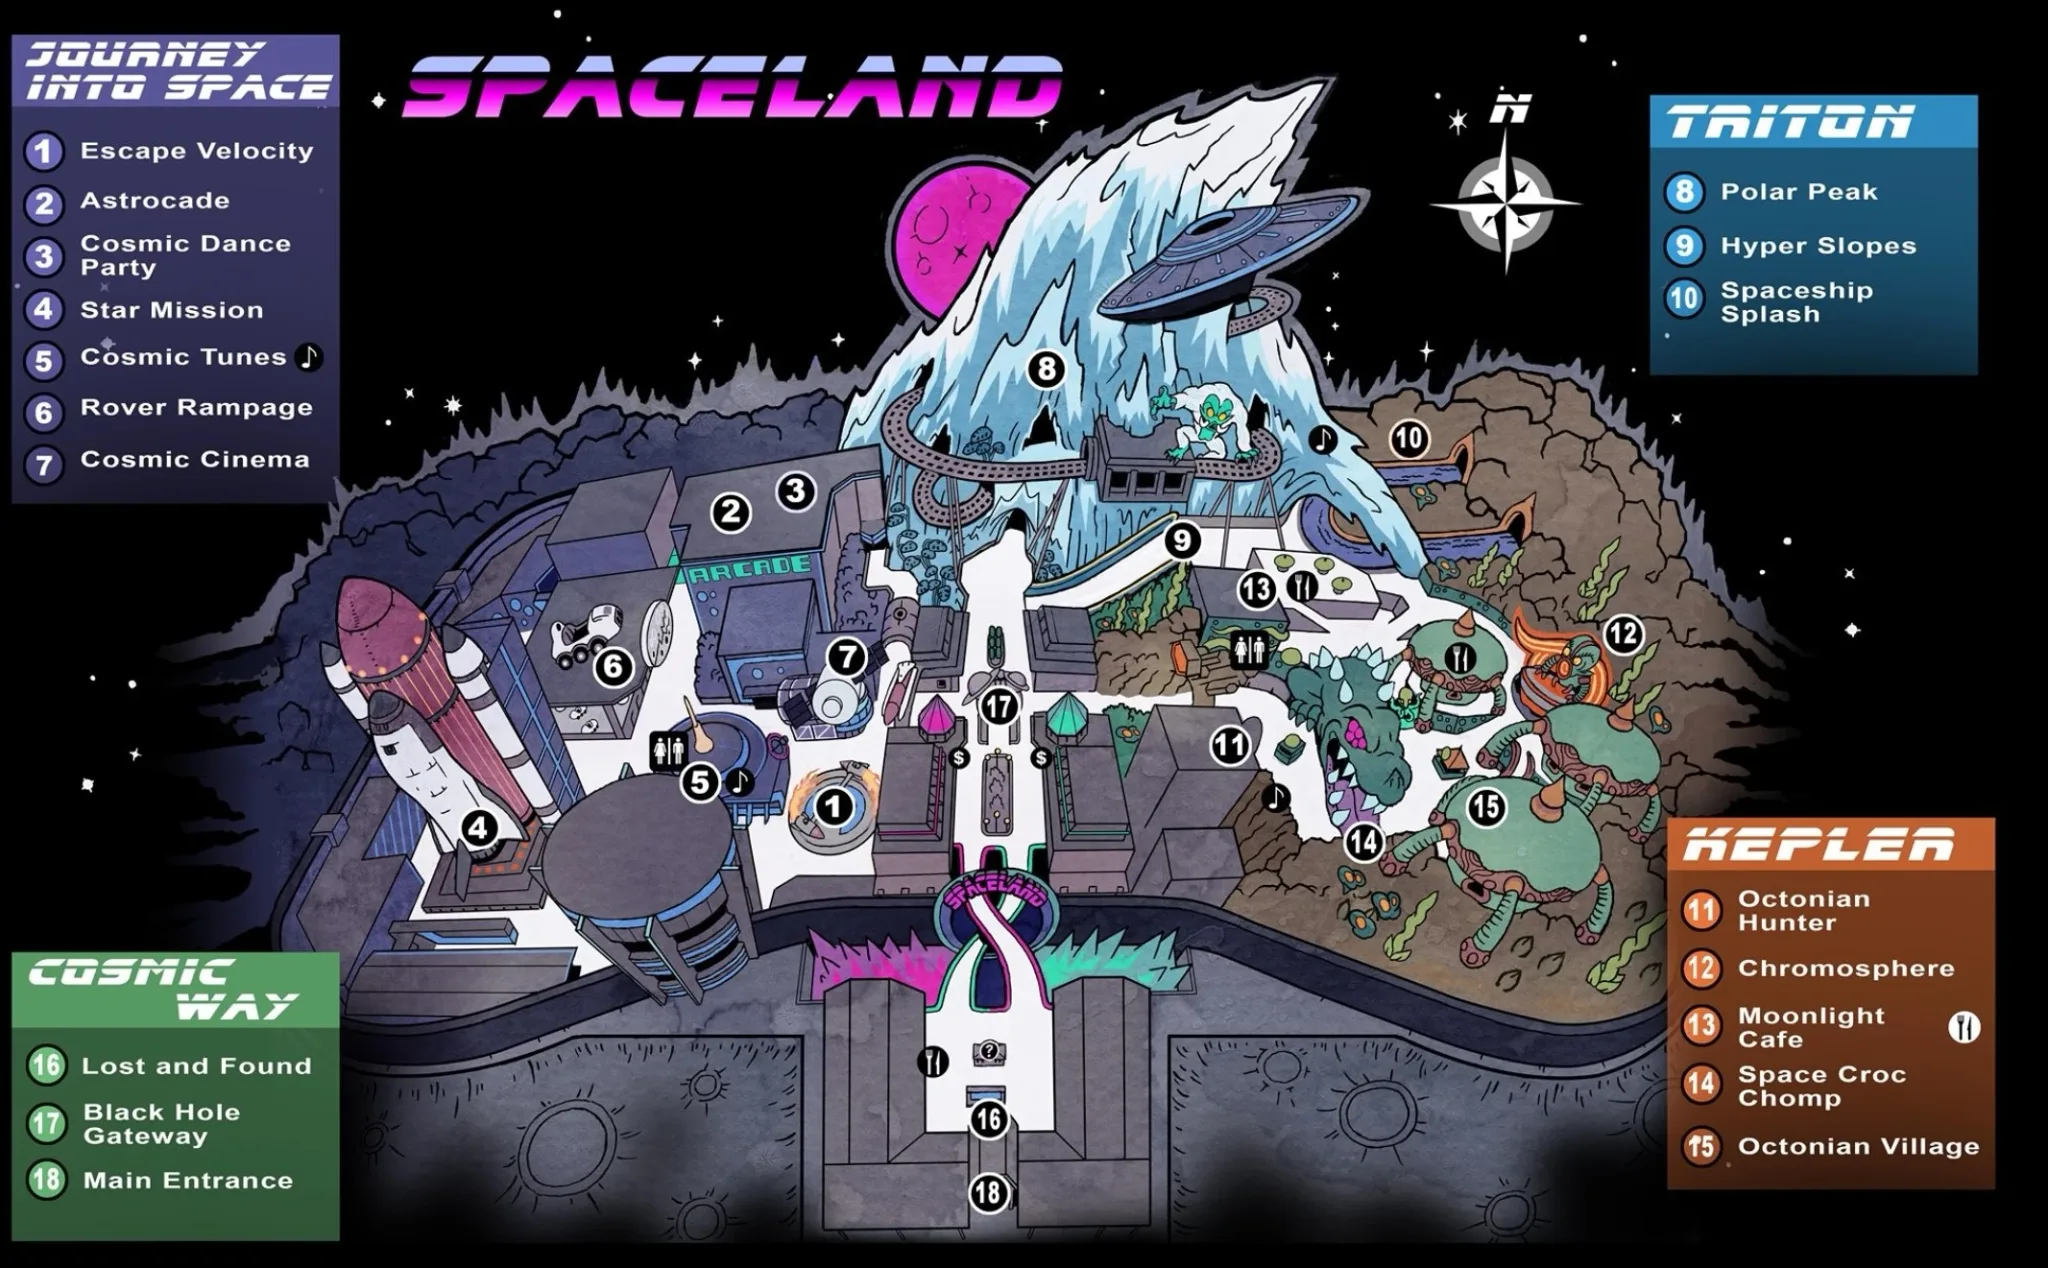
Cosmic Way (spawn)
Central hub — the ticket booth, the two bridges, the giant Spaceland ring, and the dead Pack-a-Punch (Black Hole Gateway) portal.
Kepler System
Cafe zone (Moonlight Cafe, Chromosphere) with a teleport portal and a souvenir-coin station.
Polar Peak
Ice/coaster zone with the gift shop, Bang-Bangs and a teleport portal.
Journey into Space
Rocket and bumper-car zone (Rover Rampage) with the rocket trap and a portal.
Astrocade
Indoor arcade — the disco-floor and Crocodile traps, prize counter, Golden Teeth and a portal; hub for the wonder-weapon builds.
Underground tunnels
Break-room/kitchen corridors linking the zones; frequent item and teddy-bear spawns.
Steps at a glance
- Turn on power (5 local switches)
- Use the 4 teleport portals → open the Pack-a-Punch gateway
- Enter the Projector Room & release the 4 mini-UFOs
- Build a Weapon of Rock (Shredder easiest)
- Collect 3 SETI-COM parts, then take the device from Hoff
- Defend the SETI-COM ×3 (60s / 90s / 120s)
- Return it for 4 speakers; place them round the PaP portal
- Record the speaker colours, then copy the UFO's sequence ×3
- Kill the Alien boss; melee its back for 2 Alien Fuses
- Install the fuses & Pack-a-Punch a Weapon of Rock
- Charge 4 ring nodes; fire the 5th under the UFO
- Grab the Soul Key at the PaP portal
Full walkthrough
Restore power (five local switches)
Power is local in Spaceland — each switch only energises its own zone, so all five must be flipped:
- Spawn — in the employees-only room by the M1 wall-buy, right of Lost & Found (opens the route toward Cosmic Way).
- Journey into Space — on the wall in the hallway between the Star Mission rocket trap and Rover Rampage / Bumper Cars.
- Astrocade — ground floor, immediately left of the local portal by the NV4 wall-buy (do the switch and portal together).
- Polar Peak — up on the rollercoaster level opposite Quickies, near the Magic Wheel / power-room wall (reach it via the Gift Shop).
- Kepler System — Moonlight Cafe upper level, on the wall by the portal stairs.
Cosmic Way itself has no switch. The Boombox SETI part can share the Kepler counter, so grab it while you power that zone.
Use the four side portals → open Pack-a-Punch
You must use each side portal once, not merely power it:
- Journey — near Star Mission, behind the Cosmic Tunes booth and right of the Volk wall-buy.
- Astrocade — between its power switch and the Astrocade main entrance.
- Polar Peak — inside the Gift Shop, in the corner by the Yeti statue.
- Kepler — at the foot of the stairs up to Moonlight Cafe.
Four lamps above the large Cosmic Way portal light blue left→right (Journey, Astrocade, Polar, Kepler). When all four are blue the big Black Hole Gateway opens as Pack-a-Punch.
Enter the Projector Room & release the mini-UFOs
Take the big portal into the Projector Room (the visit lasts ~30s, then a ~1 min cooldown). Interact with the small UFO display on the table — four mini-UFOs fly out to the map's elemental traps. That release is the gate for every elemental core, so it is what unlocks the Weapons of Rock (built in the side quests below). Pack-a-Punch here for 5,000 if you can, though upgrading isn't required to advance.
Common dead-end: simply entering the Projector Room is itself a required main-quest gate. You must collect all three SETI parts and visit the room, or Hoff will never hand the device over.
Collect the three SETI-COM parts
The device needs an Umbrella, a Calculator and a Boombox. Each has exactly one active spawn drawn from three possibilities — grab any you see (a sticker-pack pop confirms it):
- Umbrella — Cosmic Way bench at the foot of the Hyper Slopes slides (by the Polar bridge) · Journey, on/beside the Star Mission trap control box · Polar Gift Shop counter by the power-switch stairs.
- Calculator — Cosmic Way yellow bench facing the PaP portal · Astrocade upper level on a blue-topped bin by the broken railing · Kepler yellow picnic table above the ERAD wall-buy (opposite Chromosphere).
- Boombox — Cosmic Way lower bridge by the Proto-Popcorn stand · Underground break-room counter (by Racin' Stripes) · Kepler Moonlight Cafe counter beside the power switch.
Trigger the device & collect it from Hoff
With all three parts and the Projector-Room visit done, finish the round: the screen shakes and the large UFO embedded by Polar Peak flashes and plays four loud tones. Then find David Hasselhoff at the active Cosmic Tunes booth to receive the assembled SETI-COM. Three booths are possible — Journey (by Mule Munchies / Escape Velocity), Kepler (left of the Octonian Hunter cabinet), and the Fountain/Polar-side booth (by the geysers outside the Gift Shop).
If Hoff won't hand it over, the parts aren't the problem — re-check that you entered the large portal and advanced a full round after collecting all three. The third booth is labelled Kepler/Polar/Triton by different guides; the geyser + Gift Shop landmarks are the reliable cue.
Complete the three SETI-COM defenses
Drop the device at an active site and survive. The active site is random — seven positions exist but only three are used per match. Walk over a candidate; the screen shakes and a prompt appears only at the live one. Defences run 60s → 90s → 120s, one success per round, and each success returns the device with a Max Ammo. If zombies destroy it a Brute spawns — grab a replacement from Hoff and retry in the same round. The seven possible sites:
- Journey — on the blood pool in front of Escape Velocity / Star Mission.
- Journey/Astrocade — the Rover Rampage / Bumper Cars exit by the curving path.
- Underground — in front of the Racin' Stripes machine (cramped).
- Kepler — the corner across from Bombstoppers, by Space Croc Chomp.
- Fountain / Spaceship Splash — between the purple and orange geyser jets.
- Polar entrance — foot of the bridge from Cosmic Way.
- Polar Gift Shop — centre of the shop by the souvenir station.
Never start a defence at low ammo — the Max Ammo only drops after you survive the timer. Keep support (a trap / Boom Box / sentry) just off the device, and kill the attackers on it rather than kiting far away.
Return SETI-COM & place the four speakers
After the third defence, pick the device up (don't leave it) and return it to Hoff. Wait two full rounds before checking him — he won't hand the speakers over any earlier, and players assume the quest has bugged — and he then hands over four speakers. Place one on each of the four gold circles around the Cosmic Way portal: the three park-approach circles (Journey, Kepler, Polar) plus one on the steps beside the portal (the four spots are not all on the ring).
Point of no return: activating the speakers locks the arena until every Alien is dead. Finish perks, ammo, your Pack-a-Punch and at least one Weapon of Rock first, and keep 5,000 points spare for its post-boss upgrade.
Speaker Simon Says
Start the system — solo, interact any one speaker; co-op, cover all four in a short window (fallback if it won't release: each player uses the speaker they first touched, or tap the four low→high in pitch once, then activate together). The moment it starts, each speaker glows one of four colours — red, blue, yellow, green, randomised per run — so write down which speaker is which colour before you look up. The UFO then flashes a four-colour order; wait for everything to turn white, then repeat it by shooting/using the matching speakers in order. Complete three sequences.
A wrong or early input spawns a Brute and re-presents the same order after ~10-15s, so if unsure, wait. After the third correct sequence a sustained clown wave spawns (~45-60s) — save your high-damage ammo for the Aliens after it.
Defeat the Alien boss
One Alien spawns per player. Damage only its glowing collar (green = high HP, yellow = mid, red = low) until it teleports down and briefly kneels — then sprint behind it and melee the fuse on its backpack. Repeat the collar-damage cycle for the second backpack fuse, then a third collar-damage cycle kills it (no third melee needed). Do this for every Alien before the arena unlocks.
Why it seems to heal forever: shooting isn't enough — the melee target is on its back, not the collar, and missing the short kneel window forces another cycle. Watch its attacks: a fast small shot at range, a slower heavy blast that briefly slows you (side-step it), teleports to rooftops, and zombie reinforcements. In co-op, focus one Alien at a time.
Install the Alien Fuses & upgrade a Weapon of Rock
Every Alien dead, a pair of Alien Fuses drops in front of the PaP portal. Pick them up, re-enter the Projector Room, and insert them into the projector / PaP machine — this permanently upgrades Pack-a-Punch for the rest of the match. Now Pack-a-Punch one of your Weapons of Rock for 5,000. A normal gun — even double-PaP — cannot charge the final ring nodes; only an upgraded Weapon of Rock will.
Charge the ring & down the UFO
In Cosmic Way, face the twin bridges back toward Spawn and look up at the rear rim of the giant SPACELAND ring — five small blue power nodes are spaced around it. With the upgraded Weapon of Rock, shoot any four to turn them orange; leave the fifth blue and track the UFO circling overhead. Fire the fifth node only when the UFO is centred directly over the PaP portal — the ring takes ~3 seconds to discharge, so the UFO must still be in the rising beam's path.
If the beam misses, stay alive, re-shoot any node that has reverted to blue, and re-time the fifth. Trust the node colour, not a shot count.
Collect the Soul Key
The beam ignites and explodes the UFO, and the Soul Key piece appears on the ground in front of the Pack-a-Punch portal — interact to pick it up and complete Sooooul Key.
Side Easter Eggs & extras
Everything beyond the main quest. Tap any entry to open the full how-and-where breakdown.
MW1 Theme (Spaceland Mix)
An 80s remix of the Modern Warfare theme. Shoot 3 teddy-bear pictures pinned to the Employee of the Month boards (3 of ~9 spawn per match).
- Shoot 3 teddy-bear pictures pinned to Employee of the Month boards (3 of ~9 spawn per match)
- Spawn ticket booth, by Quick Revive
- Astrocade upper-level right stairs, by a zombie window
- Journey into Space, near the Rover Rampage doors
- Underground break-room and the rooms off the Kepler tunnel
- Also: top of the Hyper Slide, and behind the Polar Peak coaster counter — the 80s Modern Warfare remix plays
MW2 Theme (Radical 80s Mix)
An 80s remix of the Modern Warfare 2 theme. Shoot/activate 3 physical teddy bears around the park (3 of ~12 spawn per match). Getting both songs earns the I Love the 80's achievement.
- Shoot/activate 3 physical teddy bears around the park (3 of ~12 spawn per match)
- Cosmic Way gift-shop window; the cavern seen from the Cosmic Way↔Polar Peak bridge
- Underground tunnels on a ruined office chair; the Astrocade prize display case
- Polar Peak coaster railings and gift shop; Kepler upper railings by the Mystery Wheel
- Journey into Space balcony above Moon Shakes — the 80s MW2 remix plays; both songs together earn I Love the 80's
Weapon of Rock — shared setup
The four Weapons of Rock (Shredder, Head-Cutter, Face-Melter, Dischord) share one setup: release the mini-UFOs, buy an Arcane Core + Golden Teeth, open the Gator throat, and take each element's orb → crystal. Any one weapon finishes the quest; the Shredder is the easiest first build.
- Every build shares these prerequisites — do them once, then pick a weapon below.
- Enter the Projector Room (large Cosmic Way portal) and interact with the small UFO display so four mini-UFOs fly to the elemental traps.
- Buy an Arcane Core (300 tickets, Weapons of the Future stand) and attach it to a normal gun; buy Golden Teeth (300 tickets, Astrocade Prize Counter).
- Lead a Brute into the Space Croc Chomp (Kepler) and spring the jaw so it shatters the original teeth, then insert the Golden Teeth — the throat opens to four elemental targets.
- Gator throat order, left→right, is always Wind (yellow), Electric (blue), Laser (green), Fire (red).
- For your element: activate its trap with a big train (~20+ kills) until the mini-UFO breaks from its tight orbit, then get ~25 Arcane-Core gun kills near the moving UFO to charge it; it drops the elemental orb.
- With the elemental gun equipped, shoot the matching Gator target to spawn that weapon's crystal, then assemble the battery + souvenir toy + crystal on the weapon's Octonian cardboard cutout.
Build the Shredder (Fire)
Fire element, three red souvenir coins and the Kepler log-ride battery — the most forgiving first Weapon of Rock.
- Element: Fire (Chromosphere trap, Kepler) → red crystal from the right-most Gator target.
- Battery: at the Kepler log-ride / Spaceship Splash river, shoot the small battery off the back-middle of the passing boat so it drops into the water.
- Climb to the geysers above the river; the battery is launched out of a random geyser — catch it mid-air by watching one geyser rather than chasing each eruption.
- Souvenir toy (Alien Souvenir): feed three red Souvenir Coins into the Kepler Souvenir Station by the Moonlight Cafe stairs.
- Assemble battery + Alien Souvenir + red crystal at the Octonian cutout in the underground passage by the Kepler log ride, then collect the Shredder.
Build the Head-Cutter (Wind)
Wind element, three green coins and a Cryo-Grenade Yeti freeze/headshot challenge.
- Element: Wind (Steel Dragon trap, Polar Peak) → yellow crystal from the left-most Gator target.
- Battery: buy Cryo Grenades (350 tickets, Astrocade Prize Counter), then train 10+ zombies to the Yeti statue by the main Polar entrance.
- Throw a Cryo Grenade at the Yeti's face — it exhales freezing breath for ~10s; get ten headshots on zombies caught in the breath (a Yeti roar confirms). Repeat a breath cycle if needed.
- The battery then appears in the Yeti statue's hand in the Gift Shop, by the Polar portal.
- Souvenir toy (Yeti Plush): feed three green Souvenir Coins into the Polar Peak Gift Shop Souvenir Station.
- Assemble battery + Yeti Plush + yellow crystal on the Octonian cutout in the Polar Peak Gift Shop, then collect the Head-Cutter.
Build the Face-Melter (Electric)
Electric element, three blue coins and a timed red-grenade relay from the Journey portal to the main portal.
- Element: Electric (Star Mission rocket trap, Journey) → blue crystal from the second Gator target from the left.
- Battery (red-grenade relay): activate the Journey local portal, then throw a Frag/Cluster/Semtex into it — it spits back a glowing red grenade.
- Pick up and re-throw the red grenade repeatedly toward Cosmic Way; every pickup refreshes its short fuse, so use short controlled throws and never let it sit.
- Throw the red grenade into the large PaP portal in Cosmic Way; the battery appears near where you were standing.
- Souvenir toy (Rocket Ship): feed three blue Souvenir Coins into the Journey Into Space Souvenir Station (by the Cosmic Tunes booth / Escape Velocity side).
- Assemble battery + Rocket Ship + blue crystal on the Octonian cutout near Escape Velocity / Mule Munchies, then collect the Face-Melter.
Build the Dischord (Laser)
Laser element, one coin of each colour and the Shutter-Shades five-target battery hunt.
- Element: Laser (Disco Ball dance-floor trap, Astrocade) → green crystal from the third Gator target from the left.
- Battery (Shutter-Shades hunt): pick up Shutter Shades from a random zombie drop and wear them (the world turns black-and-white). Exactly five of thirteen possible targets are active — shoot all five while wearing the shades.
- Target positions: Spawn hedge by the bridge · Cosmic Way above the Deposit ATM · Cosmic Way under the Polar bridge · above the Astrocade entrance · above the Astrocade power switch · inside the Prize-Counter claw machine · the zombie window by the Cryptid Attack cabinet · floor behind the Prize Counter · the bin by the Black Hole cabinet · behind the alien cutout by the build area · the Blue Bolts shop window behind Astrocade · in the Bumper Cars behind the car pile · left of the Polar-side Yeti on the coaster walkway.
- If you take a hit the shades drop off — they stay on the ground ~10s, so grab them back and continue. After the fifth target the battery appears on the Astrocade dance floor.
- Souvenir toy (Disco Ball): feed one red, one blue and one green Souvenir Coin into the Souvenir Station behind the Astrocade.
- Assemble battery + Disco Ball + green crystal on the Octonian cutout near the Astrocade Prize Counter, then collect the Dischord.
Play as David Hasselhoff
After the main EE, enter Left, Right, Left, Up, Down quickly in the pre-game lobby (the code is on a scrap in the Hoff's DJ booth) for the Hasselhoff skin, a new melee and a Knight Rider intro.
- Complete the main Easter egg first
- Find the code on a scrap of paper in the Hoff's DJ booth
- In the pre-game lobby, quickly enter Left, Right, Left, Up, Down
- You spawn as David Hasselhoff with a new melee and a Knight Rider intro
Afterlife Arcade
When you're downed you enter a carnival arcade (skee-ball, basketball, etc.) — score enough to respawn straight into the round.
- Buy the Up N' Atoms perk — it unlocks the self-revive route when you're downed
- When you go down (solo, or with no teammate reviving), you're sent to the Afterlife Arcade in the theatre lobby
- Play the arcade games (skee-ball, basketball, the racer, classic cabinets) to earn Soul Power
- Fill the Soul Power meter to earn a self-revive token
- Turn the token in at the Revive door to warp back into the park
Fate & Fortune cards
Reusable Fate cards (earned by levelling) and single-use Fortune cards (from Zombie Crates) give temporary buffs equipped before the match — IW's take on GobbleGums.
- Fate cards are reusable and unlock as you level up (about 5 at Level 1); Fortune cards are single-use and come from Zombie Crates
- Buy Zombie Crates from the Store with Keys or CoD Points for more cards
- Build a deck of up to 5 cards in the Fate & Fortune menu before the match
- In-match, killing zombies and spending points fills the card meter
- Cycle equipped cards with the D-pad and activate with L1+R1 (LB+RB); refill a spent deck at a Fortune Teller machine in the map
Tickets & souvenir coins
Earn tickets from kills, the arcade and N31L's challenges to spend at prize booths; feed coloured souvenir coins into machines to craft weapon parts.
Ghosts 'N Skulls — permanent perks
Spaceland's Astrocade arcade quest — collect six skulls and win the minigame for permanent perks (needs the main quest done first).
- Spaceland's arcade cabinet is in the Astrocade — collect 6 skulls then win the minigame (complete the map's main quest first; no cleaning step on this one)
- Skull 1: pop all the balloons in spawn, across from Up N Atoms, until the completion tone
- Skull 2: shoot the 5 letter skulls spelling GHOST, each hidden behind a sign (two possible spots per letter — e.g. G on the Galaxy Journey or Rover Rampage sign)
- Skull 3: the machine shows 1984 in colours (green=1, blue=9, pink=8, gray=4) — stand on each colour floor square and get exactly that many kills (1 green, 9 blue, 8 pink, 4 gray)
- Skull 4: complete the five arcade games, each with its own skull (Basketball, Cryptid Attack, Black Hole, Zombie Zoom, Ski-Ball)
- Skull 5: equip the Shutter Shades to reveal a moving skull above the Pack-a-Punch portal, then time the Spaceland entrance lights to fire the portal beam at it
- Skull 6: spawn a Brute and let its beam hit the machine
- Win the minigame: use the Entangler to grab ghosts and shoot them at the matching skulls across three frames (prioritise red skulls; 3 misses ejects you)
- Reward: 1,000 XP and all perks permanently (except Up N Atoms solo)
Recommended loadouts
Three strong picks for this map — the map's Wonder Weapon plus reliable box/wall options. These are pre-augment-era games, so the setup is the gun plus Pack-a-Punch and perk synergy.
Shredder / any Weapon of Rock
Boss & finale Wonder WeaponBuild the Shredder (easiest — Fire core, three red coins, log-ride battery), then Pack-a-Punch it once the Alien Fuses are installed. Only an upgraded Weapon of Rock charges the ring nodes for the UFO kill.
Kendall 44 → Baby's Breath (PaP)
Area-control workhorseKeep the starting pistol and Pack-a-Punch it for 5,000 — its explosive rounds shred SETI defences and the clown wave. Buy Bombstoppers first so point-blank shots don't down you.
NV4 (PaP)
Reliable training ARA box/wall AR to circle-train the horde; stack Bang-Bangs (double-shot) + Tuff 'Nuff for survivability through the defences and boss.
Calling cards on this map
Cosmetic calling cards you can earn on this map. Global Dark Ops challenge cards are in the reference section below.

Director's Cut completion card
Main EEComplete the Zombies in Spaceland Director's Cut Easter egg and its Soul Key piece.
Exact card name not yet confirmed. Fate & Fortune is a separate system (see its reference).
Fate cards reference (Infinite Warfare)
Infinite Warfare's 16 Fate cards — unlimited-use, unlocked as you level. Held in a deck of 5; the Fortune Teller refills twice a match. We uniquely cover IW — no competitor documents these. Per-card rarity isn't officially documented, so none is shown.

Nade Party
Grenades regenerate for 3 waves.

Shop Class
Spawns a Carpenter.

Scorching Skin
Your next 10 attackers burn.

Mana Up
Faster health regen for 15s.

Eagle Eyed
Sniper hits are always critical (50 shots).

Timely Torrent
Melee summons 6 lava torrents (5 charges).

Irish Luck
Spawns a random Fate/Fortune card.

Blood Clot
Longer bleedout.

Scoped Dollars
$300 per sniper kill (×10).

Static Shock
Melee arcs electricity (5 hits).

Med Kit
You're revived faster.

Getting Railed
Ballista EM3 gets infinite ammo for 30s.
Best for Last
Last 4 bullets deal bonus damage for 3 waves.

5 Second Muscle
+damage for 5s after a reload (1 wave).

Socialist
Cash is split evenly.

Stimulus
Shots release an ally-healing AoE for 60s.
Fortune cards reference (Infinite Warfare)
Infinite Warfare's Fortune cards — single-use, drawn from Zombie Crates (a selection of the 46; some grouped as compiled). Rarity (Common/Rare/Legendary/Epic) exists in-game but isn't documented per card, so none is asserted here (§ honesty).
Perk Insured
Keep perks on revive.

Reanimated
Auto self-revive (3× solo / 1× co-op).

Get Head
Headshots instakill (15).

Pimp Slap
Melee instakill (1 wave).

Twice the Pain
2× bullet damage for 30s.

Kabooom!
Drops a Nuke.

Death's Party
Drops an Instakill.

All the Ammos
Drops a Max Ammo.

Black Friday
Drops a Fire Sale.
Pay Day · Money Shot · On the Money
Cash-boost cards.

Get Packed
Your next wall-buy comes Pack-a-Punched.
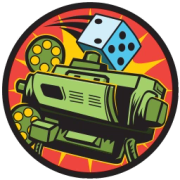
Packin' Heat
A random 2×-upgraded weapon.

Packed Magic
Your next Magic Wheel weapon is upgraded.
Coupon Clipper · Refund Policy
Free / refunded purchases.

Rising Phoenix
Revive all downed players.

Second Wind
Kill nearby zombies when near death (3×).

Raining Bullets
Drops an Infinite Ammo power-up.

Power Play
Higher power-up drop chance for 2 waves.
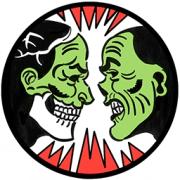
Turn Coat
The next zombie that hits you turns (3×).

Hide n' Seek
Team invisible for 20s.

Zombie Magnet
All zombies aggro you for 10s.

Escape Route
Teleport to a safe spot.

Evade
A dodge ability for 2 waves.

Explosive Touch
Contact zombies explode for 60s.

Twist of Fate
A roaming killer twister for 60s.
Scratch Post · Atomic Massacre · Dragon Breath · Black Hole Fun
Infinite special-weapon cards (30s each).

Super Minute Man
+1 weapon level for 60s.

Fire Chains
Kill-link to your closest ally for 30s.

Shared Fate
ADS marks zombies for shared damage (60s).

Ammo Crate
A crate refills ammo and the card meter (60s).

Head Reloaded
Headshot kills instant-reload (1 wave).

Restored Losses
Missed bullets refund stock ammo (60s).

Home Remodel
Instant barrier rebuild with a bonus (5).

Slug Butt
Zombies move at their slowest for 30s.

Punching Bag$
$100 per hit taken for 60s.

The 2-Team
Invulnerable while your nearest team-mate has health (30s).

Ego Trip
+headshot damage for 60s.

Temporal Increase
Longer power-ups for 3 waves.

Purify
Heal all players and damage nearby zombies.
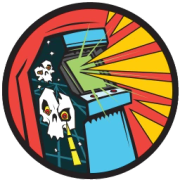
Skull Hacker
Activates the Ghosts 'N Skulls machine.
Super-EE cards (Infinite Warfare)
Infinite Warfare's headline animated cards for its cross-map ‘super’ Easter eggs. Per-map Director's Cut cards are listed on each map; Fate & Fortune is a separate system.

Demon Slayer
Super EEComplete every Director's Cut Easter egg (also unlocks the Director's Cut Camo).

Willard's Test
Super EEComplete ‘Sooooul Key’ as Willard Wyler.
Visual guides & sources
Screenshots and exact part locations live in these — open one on a second screen.