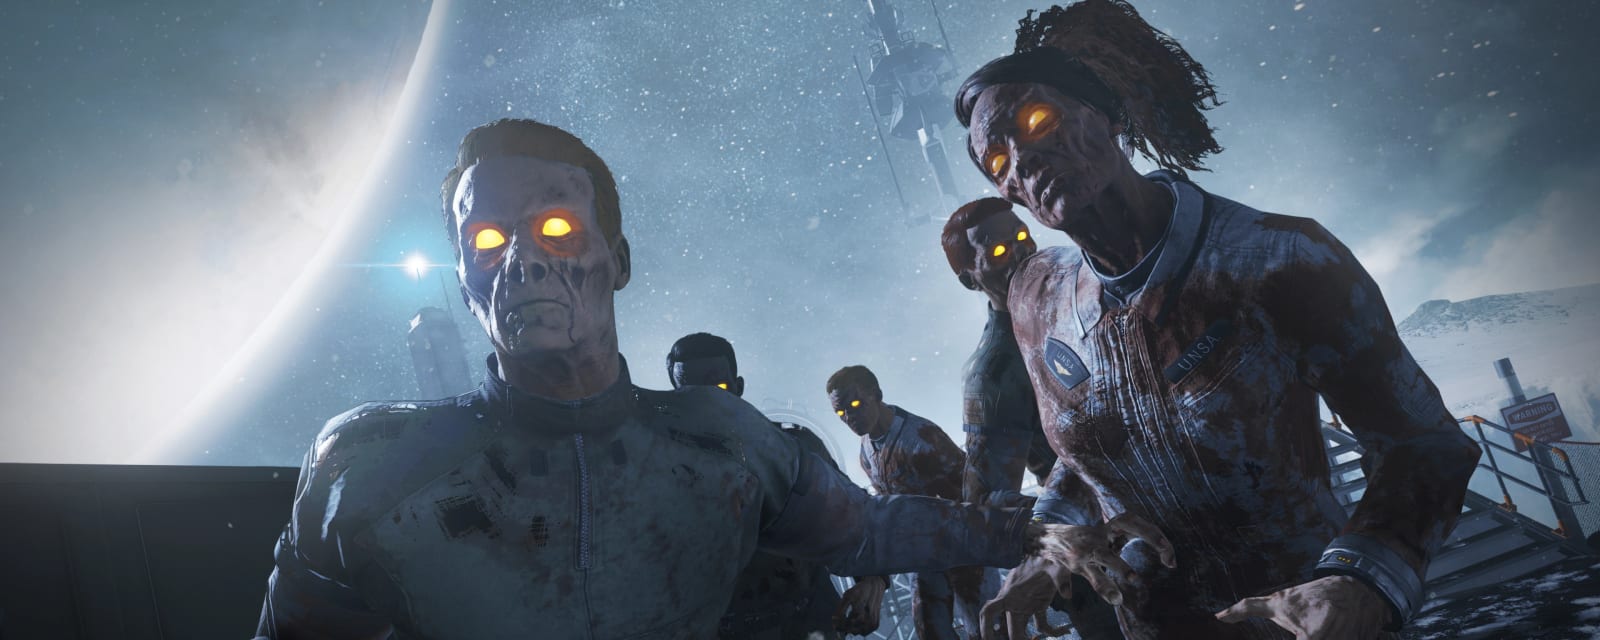

The Beast from Beyond
The finale of the Willard Wyler saga — a derelict military base on a frozen moon overrun by Ghosts-style Cryptids, stitched together from fragments of every earlier IW map. Beat the Beast to free the crew and trap Wyler in his own film.
Key areas
Spawn Room
The N31L terminal (green-monitor console) where the robot head is inserted; a Magic Wheel.
Ops Center
Huge central chamber with the Cryptid crater; drop in for the ledge, tunnel and catwalk.
Water Treatment / Cargo Bay
The electric trap for the Venom-X, and the red-X markers where the Entangler appears.
Medbay / Autopsy
The force-fielded autopsy room and the 16-switch hacking wall.
Afterlife Arcade
The Spaceland fragment — Magic Wheel, Skullbreaker and the Fate & Fortune Dealer.
Projector Room / Exterior
The snowy bridge to the Pack-a-Punch portal and the projector that opens the boss arena.
Steps at a glance
- Retrieve N31L's head from the Ops Center pit → install at Spawn for power
- Open the Theatre turret portal & both return portals
- Collect 3 bridge scraps → repair the Exterior bridge → Pack-a-Punch
- Skull Breaker 1 (explosive box) & 2 (Cargo circle defence) → the Entangler
- Collect the 4 floppy discs (Phantom, PaP snow, vent, Medical)
- Match the disc symbols to the six-row chart → insert at N31L
- Fire the Theatre button into a Beast poster → press the under-desk button
- Solve the coupled 16-handle panel → N31L turns friendly
- Escort N31L by his gaze to the projector-room computer (point of no return)
- Boss: four Rhinos → alternating portal banks → all portals & 3 monitors
- Survive the 99 countdown → kill the two Mammoths
- Ending — Wyler trapped, the crew freed
Full walkthrough
Restore power — N31L's head
Open from Spawn toward the large Ops Center; its floor has a huge central hole, and there is no conventional power switch — drop through onto the lower ledge. Follow the flooded lower walkway to its end, where N31L's detached robot head lies on the floor; interact to carry it as a quest item. Return to Spawn and install it in the head-shaped slot on the wall terminal by the Spawn exit. Power comes on globally, perk machines activate, and the opening Cryptid-only pressure ends — normal zombies take over next round.
Power still off? The head must be installed in the slot, not merely carried. Finish the lower-water route and interact directly with the terminal.
Open the Theatre & its return portals
Go to the Cargo Bay upper catwalk and press the wall button; a turret rolls in and blasts the opposite wall, exposing the portal to the Theatre film set. Inside the Theatre, interact with the floor symbol in front of each dormant portal to activate both return routes — the street portal in front of the Theatre links to the hallway near Medical Bay, and the side-alley portal links to Spawn. Activating both now shortens the later button and helmet runs.
Bridge scraps → repair the bridge → Pack-a-Punch
Three bridge scraps, each on a fixed spot:
- Cargo Bay — lowest level, left of the stairs / wedged beside the boxes at the stair base (three Cryptids spawn when you take it).
- Medical Bay — on the floor immediately right of the Blue Bolts perk machine (grab it while opening the force-field route).
- Theatre street — on the burning car to the right of the Theatre portal (needs the Cargo turret portal open first).
Carry all three to the broken bridge in the snowy Exterior and repair it, then take the portal into the projector room: Pack-a-Punch is open for about 30 seconds before the team is forced out, after which the portal cools down for roughly a minute.
First-exit floppy rule — on the first forced exit of a round the game spawns either a Phantom or three Cryptids. The first Phantom killed in the match drops a required floppy, so if one appears, lead it to Spawn and kill it beside N31L. The disc stays where it falls, and only one disc can be carried at a time.
Skull Breaker 1 — the explosive power box
The main quest needs the Entangler, which is gated behind the first two Skull Breaker steps (you do not need the remaining four). First find the single closed electrical box — it moves each match, so check all three spots:
- Flooded Room — above the stairs leading toward Medical Bay.
- Ops Center — high on the wall above the Bombstoppers machine.
- Cargo Bay — above the stairs beside the P-LAW wall-buy.
Hit the box directly with an explosive — cook a grenade so it detonates against the box, or use the OSA under-barrel launcher. The door swings open to expose a pixel skull; shoot it and wait for the completion sound before leaving.
Skull Breaker 2 — Cargo circle defence → the Entangler
Four red-X marks exist in Cargo Bay:
- Upper catwalk — near the P-LAW wall-buy.
- Main floor — near the foot of the P-LAW stairs.
- Main floor — directly below the catwalk that holds the Theatre portal.
- Main floor — near the X-Eon wall-buy.
Solo uses a single X; in co-op every player must stand on a different X at the same time. The marks turn into green circles and a local zombie defence begins — hold position (step out and the skull resets to next round) while the skull rises through the central beam. When it reaches the top it teleports to a random Cargo Bay spot for only a few seconds; leave the circle and sprint/jump through it. Success spawns the Entangler in the centre of Cargo Bay — pick it up. It occupies its own equipment slot and can carry marked objects over long routes.
Co-op: assign the catwalk player first (they only cover the Cargo-side approaches — the special-defence zombies don't come in from the external hallway), and put the strongest close-range weapon on the exposed main-floor X. Avoid explosive splash that hides the green-circle edge.
Collect the four floppy discs
The four discs can be taken in any order, but only one can be held at once and each has a different HUD symbol — record the symbol beside each disc's source before picking up the next.
- Disc A (Phantom) — from the first Phantom killed in the match (see step 3); kill it near Spawn/N31L so the disc lands there. A natural round-10 Phantom can also provide it if the first exit produced only Cryptids.
- Disc B (snow) — cross the repaired Exterior bridge, face the Pack-a-Punch portal and look in the snow at the base of the pillar on the left; the disc is always there.
- Disc C (vent) — in the fenced red-lit room off the Proteus-wallbuy hallway (between Cargo Bay and the Exterior); the floppy sits in front of a floor vent at the far end. Hold it with the Entangler and fire it into the vent only while the vent is emitting smoke (a mistimed shot respawns it in front of the vent).
- Disc D (Medical) — Entangle a space helmet (closest in the Exterior-to-Cargo hallway; more around Spawn) and carry it to the Medical force-field room. Fire the helmet through the field at the powered monitor above the microscope; the monitor breaks and the field drops. Collect the disc from the table to the left of the broken monitor.
A correct vent shot ejects Disc C from one of seven permanent exit vents, where it then stays for the match:
- Spawn — on the floor left of the Magic Wheel.
- Cafeteria — left of the Freezer, then around the corner.
- Main hallway — immediately right of the Cargo Bay door.
- Main hallway — across the corridor from that Cargo-door vent.
- Proteus hallway — right of the original red-room fence.
- Proteus hallway — at the top of the stairs.
- Ops-side hallway — close to the door into Ops Center.
Match the disc symbols & insert the order
Do not guess — a wrong four-disc combination spawns enemies and can reroll your symbols. Each disc shows a HUD symbol; match your four against the fixed six-row chart below — the chart itself never changes, only which four symbols you draw. Find the single row that contains all four of your symbols, read that row left to right, and skip the two symbols you did not receive. Retrieve the discs by source and insert them into N31L in that filtered order; a correct order flashes the HUD yellow then red and N31L turns hostile.

Verified six-row floppy chart — each colour is one valid left-to-right order. Artwork credit: /u/RayPoopertonIII.
Worked example: if your four discs are the 1st, 3rd, 4th and 6th symbols of the matching row, insert them in exactly that order — don't enter the row's 2nd or 5th symbols, since you don't have those discs.
Record each disc's symbol against its source (Phantom / snow / vent / Medical) as you collect it, and confirm one row holds all four before inserting anything. Thin the horde and keep one slow zombie alive first — this insert and the handle hack that follows are both fiddly under pressure. If enemies spawn instead of the yellow-then-red flash, the discs may return to their sources with new symbols; re-record all four and use the chart's left-to-right precedence, not your pickup order.
Corrupt N31L — the poster button
With N31L hostile, return to the Theatre. In the short hallway behind the Brute cardboard cutout, pull the small removable red button off the wall with the Entangler, carry it to the concession/arcade side and fire it directly into a The Beast from Beyond poster (a miss respawns it on its original wall). Then go to the Medical force-field room you opened for Disc D, go prone in front of the desk and interact with the button now mounted underneath it. A panel of 16 handles opens in the neighbouring room with the dead Cryptid.
Solve the 16-handle hack
The handles are coupled: moving one can spin others, so commit to a plan before you start. Number the positions 1–16 (top-left to bottom-right). Before touching anything, note every handle that is horizontal. Interact with each handle on that original list exactly once, ignoring whether a listed handle has flipped to vertical before you reach it. Then inspect the whole panel: if any handle is still horizontal, note the current horizontal set and flip that set. Repeat the “flip whatever is currently horizontal” pass until all 16 handles are vertical — N31L then becomes friendly (hacked).
No solver here — the rule is the answer. Sources describe this panel from opposite orientations (some say flip the vertical handles until all are horizontal), so trust the coupled-handle method above and the cue that N31L turns friendly, not a fixed orientation. The hacked state lasts only about five minutes; if he turns hostile again, return to the still-open panel and repeat the process.
Escort N31L to the projector room
Prepare the route first: repair the Exterior bridge, have Pack-a-Punch active or nearly ready, and open every purchased door on your path — once N31L is picked up, doors close and extra zombies spawn. Save one slow zombie. While he's friendly, pull his head from the Spawn terminal with the Entangler and keep holding it. His gaze opens only the door he's looking toward, so at each closed doorway face the opening and rotate/spin so his delayed head orientation catches the door before you move on. At the projector room, fire N31L into the computer immediately to the right of the projector to install him.
A version-dependent shortcut: fire the Entangler at an N31L television, switch weapons while still firing, then switch back — some builds then allow normal door interactions while carrying him. Treat it as optional and fall back to the gaze-and-spin route if it fails. Consider finishing Double Pack-a-Punch (in the side quests) before this escort — the Mammoths have very high health. Do not interact with the installed head until the whole team has finished perks, upgrades and cards: that interaction is the point of no return and starts the boss.
Cryptid boss — Rhinos & portal waves
Interacting with the installed N31L teleports the team into the alternate Cargo Bay. Find the yellow glowing ammo box as soon as its crate opens — it refills whatever weapon you hold and lasts the whole fight, so spend ammo freely.
Phase 1 — four Rhino crates: the laser cannon opens four crates on a timer, each releasing a Rhino Cryptid; the cannon keeps going even if the last Rhino lives, so focus fire and don't get boxed in by overlapping charges — sidestep when a Rhino lowers its head.
Phase 2 — alternating portals: portals on one side activate for about a minute, spawning Scouts, Cryptids and Phantoms; clear them and the barrier drops. The opposite bank then activates for another timed wave — move to the roofed sloped crate, which funnels ground enemies up one incline and blocks the cannon's line of fire while you hold inside.
Monitors, the 99 countdown & two Mammoths
Phase 3 — all portals & three monitors: every portal bank activates together while the cannon targets players — hold in the roofed crate. After about 45 seconds three arena monitors light up; from the crate hold, hit them in a tight loop — (1) the corner behind and left of the yellow ammo box, (2) the opposite corner behind and right of it, (3) the monitor at the foot of the sloped crate. Too slow and a monitor with its portals relights; just repeat the lit one.
Phase 4 — the 99 countdown: the cannon opens the crate across from the ammo box, revealing a computer showing 99. It is not a 99-second timer — the sequence takes about two and a half minutes while portals keep spawning; rotate around cover and refill freely. At zero the screen breaks into jumbled characters and sparks — only then interact with it.
Phase 5 — two Mammoths: the cannon opens the crate above the ammo box and releases two Mammoths. Aim for the mouth/head and burst one at a time; their damage leaves persistent blue fire pools, so pull both into open floor before committing heavy fire or the flames seal the crate, ammo box or doorway. Sidestep charges early (a charge can red-screen a fully-protected player) and break focus to clear the 3–5 add pulses the portals release every 30–60 seconds.
Side Easter Eggs & extras
Everything beyond the main quest. Tap any entry to open the full how-and-where breakdown.
“Scattered Lies”
Chris Egert. Shoot all 15 astronaut plush toys hidden across every region of the map; the last one plays the song and awards a calling card.
- Shoot all 15 astronaut plush toys hidden around the map (fixed spawns)
- They're spread across every region — Spawn, Ops Center, Cargo Bay, Medbay, Afterlife Arcade, Theater and the Exterior
- Shooting the last one plays the song and awards a calling card + XP
- Exact per-plush spots are best followed from a video map — text guides don't list all 15 precisely
Venom-X → Venom-Y → Venom-Z
The Cryptid-slaying Wonder Weapon and its two upgrades: lure a Phantom into the Water Treatment trap, read the Ops Center colour-button cabinet and clear the arrow-key mazes for the Venom-X, then upgrade via the purple Morse-code consoles by Bang Bangs (Y) — decode the beeps here — and a 1950/green-figure step by the PaP portal (Z). Links to the Morse decoder.
- Venom-X: open Pack-a-Punch once and leave — a Phantom (blue flying Cryptid) spawns; run it through the Water Treatment electric floor trap
- In the Ops Center (down from Bang Bangs), read the randomised colour-button cabinet and press the correct button
- Trap a zombie in the '666' chamber, then above Bombstoppers activate the centre console and solve the ~5-6 arrow-key mazes on the side consoles before the timer ends — the door left of the cabinet opens for the Venom-X
- Venom-Y: at the purple consoles by Bang Bangs, the upper console's first Morse beep gives the key (short = Archer, long = Cross); the lower console's Morse decodes to a number
- Input that number on the two-button console (left = dot, right = dash), kill that many Cryptids with the Venom-X, then Pack-a-Punch. Morse Code Decoder
- Venom-Z: repeat the Morse (the key is the opposite this time), get 50% from Venom-Y special kills, then set the Exterior terminal to 1950 and shoot the green-eyed figures by the PaP portal for the rest; Pack-a-Punch to finish
The Entangler
A gravity/tractor gun earned from the first two Skull Breaker steps (explosive box + Cargo circle defence). It grabs and repositions the quest items — floppy discs, the space helmet, the poster button and the Brute helmet — and is a hard requirement for the main quest.
Double Pack-a-Punch (Brute fuses)
Optional, but the final Mammoths have very high health. Shoot open the Alien-Fuse box by the Proteus wall-buy, place the fuses on the Sasquatch cutout, replace the projector film, pull a Brute helmet from the Wormhole trap with the Entangler and let the restored Brute's laser charge the fuses — then Double-Pack a once-upgraded gun for 10,000.
- Optional — not a quest requirement, but the final Mammoths have very high health, so do this before escorting N31L if your loadout needs a second upgrade
- Alien Fuses: in the hallway outside Cargo Bay near the Proteus wall-buy, shoot open the small wall fuse box and take the fuses (some legacy guides say melee, but shooting the panel is the most consistently documented)
- Place the fuses on the Sasquatch cardboard cutout in the Theatre hallway between the auditorium and the lobby
- Replace the projector film: take the film reel from the right side of the Theatre concession counter, carry it to the projector room and interact with the reels on the front corner of the projector — Zombies in Spaceland footage should now play on the Theatre screen
- Brute helmet: with the Entangler equipped, activate the Movie Wormhole Trap in the Theatre and fire the Entangler into the visible vortex to pull out a Brute helmet; drop it, then interact to carry it as a normal quest object
- Place the helmet on the headless Brute cutout opposite the Sasquatch — the restored Brute fires its laser and charges the fuses; wait for the charge animation to finish, then take the charged fuses
- Insert the charged fuses at the projector / Pack-a-Punch machine — a once-upgraded weapon can now be Double-Pack-a-Punched for 10,000 points (the fuse state lasts the current match only)
Skullbreaker — permanent perks
The Beast's six-skull Ghosts 'N Skulls arcade quest (explosive box, Cargo red-X, odd-symbol, Pac-Man-style colour trail, an 8-queens chess puzzle and a paper-scrap direction code), then win the match-three minigame for all perks permanently (except Up 'N Atoms solo), a Pack-a-Punched Magic Wheel and the Cracking Skulls achievement.
- Beast's Ghosts 'N Skulls cabinet is in the arcade outside the theater — collect 6 skulls then win the minigame (no cleaning step on this one)
- Skull 1: hit the single closed explosive box directly with a cooked grenade or the OSA launcher, then shoot the ejected skull — the box is at one of three spots each match: the Flooded Room above the Medbay stairs, Ops Center above Bombstoppers, or Cargo Bay above the P-LAW stairs
- Skull 2: stand on a Cargo Bay red-X (co-op fills all: near the P-LAW wall-buy, the foot of the P-LAW stairs, below the Theatre-portal catwalk, or by the X-Eon wall-buy) until the skull rises, then jump through it — the Entangler spawns here too
- Skull 3: four symbols appear across eight spots — using the chart, aim at the one symbol that's the odd one out
- Skull 4: stand on the red-X by the N31L console for a coloured skull (pink/purple or green), then shoot the matching-colour trail of icons around the map
- Skull 5: an 8-queens chess puzzle — find seven more queen pieces (of twelve spots) and place all eight so none threatens another
- Skull 6: assemble three paper scraps (of six spots) by their edges into an 8-direction code, then hold aim at the cabinet and enter it (read it upside-down if it fails)
- Win the minigame: chain same-colour skulls with the cubes and fire a matching nuke to clear them across three frames (3 strikes kicks you out)
- Reward: all perks permanently (except Up 'N Atoms solo), a Pack-a-Punched Magic Wheel and the Cracking Skulls achievement
Director's Cut
After all five IW map quests are done, interact with the Soul Jar in any projector room to enable the Director's Cut lobby toggle — 25,000 starting points, all perks, pre-Pack-a-Punched weapons, an upgraded box and automatic Double-Pack-a-Punch. In a Director's Cut run of Beast from Beyond the finale is extended by a Mephistopheles super-boss encounter (the trapped Willard Wyler / demon fight) beyond the standard Rhino-and-Mammoth ending.
- Complete the main quest on all five IW maps (each of the other four gives a Soul Key — Beast's completion is automatic with no physical key to grab)
- This unlock does not happen inside the same Beast completion match — start a new match, then in any projector / Pack-a-Punch room interact with the Soul Jar; the keys join the Spaceland rod and the jar opens
- Two golden film reels attach to Pack-a-Punch, toggling Director's Cut on the pre-game lobby screen
- Director's Cut gives 25,000 starting points, all perks from the start, pre-Pack-a-Punched weapons, an upgraded box and automatic Double Pack-a-Punch
- Replaying Beast in Director's Cut after obtaining the four earlier map talismans can transition the ending into the optional Mephistopheles super Easter Egg — a separate fight not covered here, so only start the boss if the team is prepared for it
Interactive solvers
Every solver for The Beast from Beyond, in the order you meet them. Each also appears inside its step in the walkthrough above — use whichever is handier. Browse every Zombies solver →
Morse Code Decoder
Shaolin phone · Beast Venom consoles · Shadowed Throne Nazi AxeTap in the dots and dashes you hear, using ▮ between letters — it decodes live. Used wherever a map plays Morse: Shaolin Shuffle's ringing phone (the poster number), The Beast from Beyond's Venom-Y/Z consoles, and The Shadowed Throne's Nazi Axe frequency (which decodes to coordinates).
Recommended loadouts
Three strong picks for this map — the map's Wonder Weapon plus reliable box/wall options. These are pre-augment-era games, so the setup is the gun plus Pack-a-Punch and perk synergy.
Double-Pack-a-Punched LMG or high-reserve rifle
Primary — the whole quest & bossThe field guide's core pick: a deep-ammo bullet weapon, Double-Pack-a-Punched (do the Brute-fuse side quest first). The arena's yellow ammo box refills whatever you hold, so a big magazine keeps you firing through the Rhinos, portal waves and Mammoths. Run Tuff 'Nuff first, then Quickies and Bang Bangs.
Mauler Sentinel or EBR-800 Bomber + Ego Trip
High-damage Mammoth melterThe documented fast-Mammoth options — a high-damage variant paired with an Ego Trip Fortune card bursts a Mammoth down before its blue fire pools spread. Aim for the mouth/head and one target at a time; keep the card for the Phase-5 crates.
Venom-X → Venom-Y → Venom-Z
Cryptid crowd controlThe map's Wonder Weapon — build and upgrade it through the trap / colour-button / maze / Morse quest. Its gas cloud melts Cryptid packs and, at Y/Z, slows and adds damage; strong for the portal waves and add pulses, but back it with a bullet gun for the Mammoths.
Calling cards on this map
Cosmetic calling cards you can earn on this map. Global Dark Ops challenge cards are in the reference section below.

Director's Cut completion card
Main EEComplete The Beast from Beyond Director's Cut Easter egg and its Soul Key piece.
Exact card name not yet confirmed.
Fate cards reference (Infinite Warfare)
Infinite Warfare's 16 Fate cards — unlimited-use, unlocked as you level. Held in a deck of 5; the Fortune Teller refills twice a match. We uniquely cover IW — no competitor documents these. Per-card rarity isn't officially documented, so none is shown.

Nade Party
Grenades regenerate for 3 waves.

Shop Class
Spawns a Carpenter.

Scorching Skin
Your next 10 attackers burn.

Mana Up
Faster health regen for 15s.

Eagle Eyed
Sniper hits are always critical (50 shots).

Timely Torrent
Melee summons 6 lava torrents (5 charges).

Irish Luck
Spawns a random Fate/Fortune card.

Blood Clot
Longer bleedout.

Scoped Dollars
$300 per sniper kill (×10).

Static Shock
Melee arcs electricity (5 hits).

Med Kit
You're revived faster.

Getting Railed
Ballista EM3 gets infinite ammo for 30s.
Best for Last
Last 4 bullets deal bonus damage for 3 waves.

5 Second Muscle
+damage for 5s after a reload (1 wave).

Socialist
Cash is split evenly.

Stimulus
Shots release an ally-healing AoE for 60s.
Fortune cards reference (Infinite Warfare)
Infinite Warfare's Fortune cards — single-use, drawn from Zombie Crates (a selection of the 46; some grouped as compiled). Rarity (Common/Rare/Legendary/Epic) exists in-game but isn't documented per card, so none is asserted here (§ honesty).

Perk Insured
Keep perks on revive.

Reanimated
Auto self-revive (3× solo / 1× co-op).

Get Head
Headshots instakill (15).

Pimp Slap
Melee instakill (1 wave).

Twice the Pain
2× bullet damage for 30s.

Kabooom!
Drops a Nuke.

Death's Party
Drops an Instakill.

All the Ammos
Drops a Max Ammo.

Black Friday
Drops a Fire Sale.
Pay Day · Money Shot · On the Money
Cash-boost cards.

Get Packed
Your next wall-buy comes Pack-a-Punched.

Packin' Heat
A random 2×-upgraded weapon.

Packed Magic
Your next Magic Wheel weapon is upgraded.
Coupon Clipper · Refund Policy
Free / refunded purchases.

Rising Phoenix
Revive all downed players.

Second Wind
Kill nearby zombies when near death (3×).

Raining Bullets
Drops an Infinite Ammo power-up.

Power Play
Higher power-up drop chance for 2 waves.
Turn Coat
The next zombie that hits you turns (3×).

Hide n' Seek
Team invisible for 20s.
Zombie Magnet
All zombies aggro you for 10s.

Escape Route
Teleport to a safe spot.

Evade
A dodge ability for 2 waves.

Explosive Touch
Contact zombies explode for 60s.

Twist of Fate
A roaming killer twister for 60s.
Scratch Post · Atomic Massacre · Dragon Breath · Black Hole Fun
Infinite special-weapon cards (30s each).

Super Minute Man
+1 weapon level for 60s.

Fire Chains
Kill-link to your closest ally for 30s.

Shared Fate
ADS marks zombies for shared damage (60s).

Ammo Crate
A crate refills ammo and the card meter (60s).

Head Reloaded
Headshot kills instant-reload (1 wave).

Restored Losses
Missed bullets refund stock ammo (60s).
Home Remodel
Instant barrier rebuild with a bonus (5).

Slug Butt
Zombies move at their slowest for 30s.

Punching Bag$
$100 per hit taken for 60s.

The 2-Team
Invulnerable while your nearest team-mate has health (30s).

Ego Trip
+headshot damage for 60s.

Temporal Increase
Longer power-ups for 3 waves.

Purify
Heal all players and damage nearby zombies.
Skull Hacker
Activates the Ghosts 'N Skulls machine.
Super-EE cards (Infinite Warfare)
Infinite Warfare's headline animated cards for its cross-map ‘super’ Easter eggs. Per-map Director's Cut cards are listed on each map; Fate & Fortune is a separate system.
Demon Slayer
Super EEComplete every Director's Cut Easter egg (also unlocks the Director's Cut Camo).

Willard's Test
Super EEComplete ‘Sooooul Key’ as Willard Wyler.
Visual guides & sources
Screenshots and exact part locations live in these — open one on a second screen.