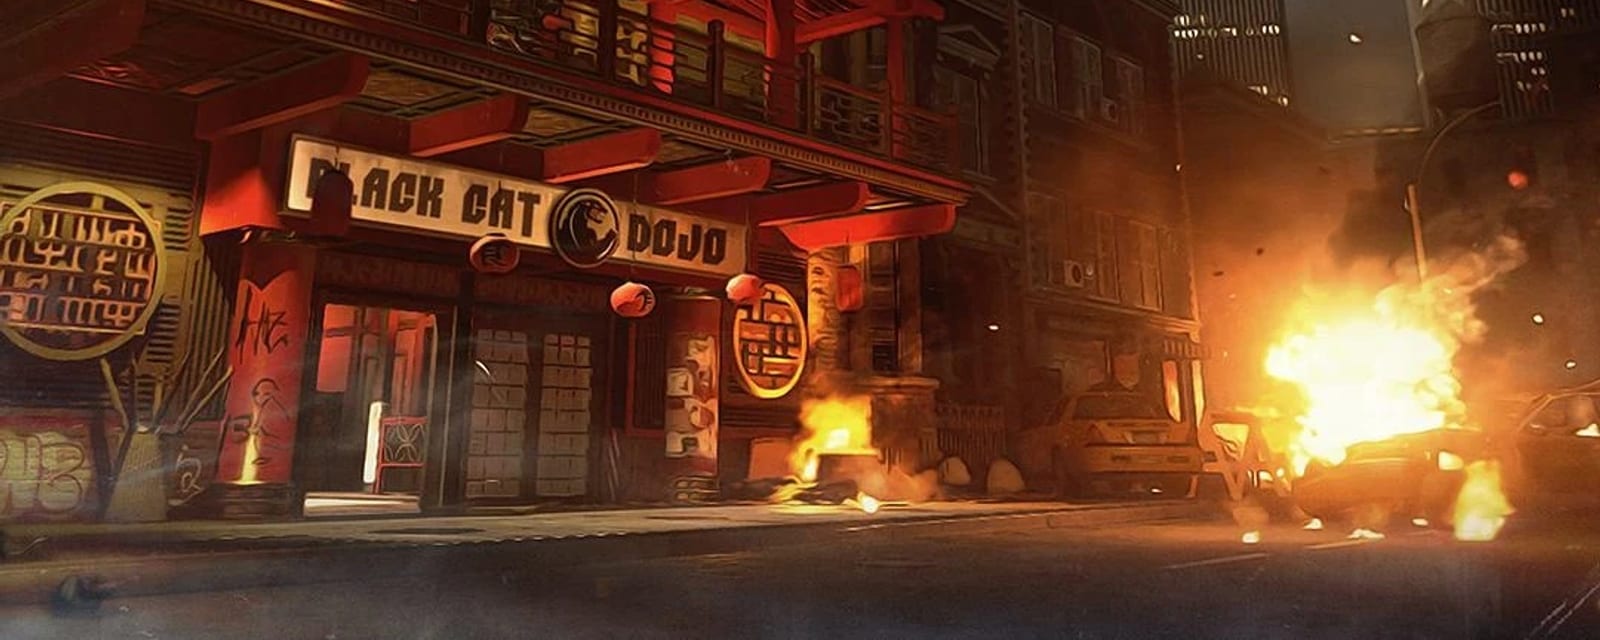

Shaolin Shuffle
Four disco-era New Yorkers drop into a 1970s kung-fu grindhouse fantasy staged in a Chinatown subway-and-streets block — master elemental Chi powers, wield nunchuks and a katana, and battle the giant Rat King in the Pest Control quest.
Key areas
Spawn Subway & Broadway
Starting station and the street strip — a district power switch on a support pillar, the bus, wall-buys, one of the two ringing payphones, and the broken turnstile you repair in the Heart branch.
Main Street & Bang Bangs Subway
Blue Bolts and a Magic Wheel on the street; downstairs are the symbol locker, the second payphone and the electrified rail that charges the Double Pack-a-Punch fuses. A switch sits across the tracks left of Bang Bangs.
Black Cat Dojo
Pam Grier teaches the four Chi styles here; the pavement circle out front triggers the first Rat King, and the Katana hangs on the wall after completion.
Heebie Geebies
Storefront, side hall and rooftops — active rat cages, several Eye symbols and song radios; the alley links by Chi fast-travel to the lower Main Street subway.
Park / Deadeye Dewdrops
Deadeye Dewdrops and the RPR Evo wall-buy — two locker symbols on the Volk wall, the second Rat King trigger, and Heart-branch soul circles. A district switch is on the wall left of Deadeye.
Disco Inferno
Multi-level nightclub — Quickies and a district switch on the roof, the rooftop searchlight and letter-cipher board, the second-floor DJ booth for the Disco Ball chain, and the Ghosts 'N Skulls cabinet.
Pink Cat & the Sewers
The Pink Cat strip club holds the projector that opens Pack-a-Punch; the sewers below hide the Pack-a-Punch coin (needs all four switches) and lead into the Rat King's lair for the finale.
Steps at a glance
- Turn on all four district switches (Spawn Subway, Disco roof, Deadeye wall, across the Bang Bangs tracks)
- Collect the Flyer, Coin & Film Reel → repair the Pink Cat projector → open Pack-a-Punch
- Round 5+: learn a Chi style from Pam and upgrade it to the Tier 2 Shuriken
- Eye branch: shuriken six rat cages → fill the yellow soul circle → clear Ninjas for the Locker Key
- Open the Bang Bangs locker → shoot the four symbols in order
- Beat Rat King #1 for the Eye
- Aim with the Eye to reveal & shoot six orange symbols → a subway phone rings
- Decode the Morse number → grab the matching Nightmare Summer poster
- Roof searchlight → explode the X → spell the cipher word
- Beat Rat King #2 (RPR Evo) for the Brain
- Heart branch: three burn rounds → Dojo fire lockdown → repair the turnstile → fill five soul circles
- Transfer the Disco Ball through ten zombies → beat Rat King #3 for the Heart
- Prepare fully (point of no return), then finish the three-organ finale → Soul Key
Full walkthrough
Restore power (four district switches)
Power is local — each switch only lights its own district, and the Pack-a-Punch coin route through the sewers stays sealed until all four are on. Flip every one:
- Spawn Subway — on a support pillar inside the starting station.
- Disco Inferno roof — on the wall to the left of the Quickies perk machine.
- Park / Deadeye — on the wall to the left of Deadeye Dewdrops.
- Main Street / Bang Bangs Subway — across the tracks, to the left of Bang Bangs.
Do all four before hunting the sewer coin or assuming a dead door is bugged — a district can look powered while still missing its own switch.
Open Pack-a-Punch (Flyer, Coin & Film Reel)
Three items open Pack-a-Punch, each with several possible spawns — grab whichever is present:
- Pink Cat Flyer (opens the club's front door) — one of four: on the garbage left of the Dojo; a chair in front of Racin' Stripes on the nearby rooftop; a stool around the KBS corner on the Disco roof; or the ground in front of the Pink Cat.
- Coin (opens the locked projector room inside the Pink Cat) — fixed: in the sewers directly under Tuff 'Nuff. All four power switches must be on to reach it.
- Film Reel (repairs the projector) — one of five: the Disco second-floor couch right of Rack-9; the Pink Cat couch by the right entrance; the Main Street Subway boxes between the booth and lockers; a sewer box at the stairs by Tuff 'Nuff; or the wall holes right of the Rat King's throne.
Use the Flyer on the Pink Cat door, the Coin on the locked room to the left, then load the Film Reel into the projector. A wall portal opens for about 30 seconds of Pack-a-Punch, then cools down for roughly a minute.
Learn a Chi style → Tier 2 Shuriken
Pest Control can't begin until at least one player has a Tier 2 Chi Shuriken. From round 5, let Pam Grier's current line finish, interact, and drink one of the four gourds around the Dojo — Dragon, Tiger, Crane or Snake (pick for comfort; the animal has no bearing on the quest). Activate the Chi and complete its displayed Tier 1 melee-kill challenge; the upgrade adds the chargeable Shuriken, which splits into three when fully held.
Start these kills while you finish the power / Pack-a-Punch route so the Shuriken is ready the moment the Eye branch opens. Chi melee or Shurikens also smash the Torii gates and open the paired fast-travel doors (Racin' Stripes roof ↔ Main Street by Blue Bolts; Heebie Geebies alley ↔ lower Main Street Subway).
Follow the rat through six cages
Advance Pam only after each voice line ends until she says the line about the one who terrorises these streets — that activates the rat cages. Throw a charged Shuriken (not a knife or grenade) at any occupied cage; a rat bolts out and runs to the next cage. Chase it just closely enough to track its route and shuriken each cage in turn. After the sixth cage the cage vanishes with no rat, and a large yellow soul circle appears there.
- Reliable starting cages: up the ramp from the street in front of the Dojo, and in the side hall of Heebie Geebies.
- Decorative cages can look occupied — watch for the actual rat exit animation before committing a shuriken.
Lost the rat? Go back to the last cage you definitely opened and scan both directions — it waits at the next cage. The path isn't fixed (it depends on the starting cage), so trust the audio and cage movement over any set route.
Fill the circle & take the Locker Key
Train zombies just outside the yellow circle, lead them in, and kill them while they stand inside the boundary — roughly 15–20 kills. The zombie (not just you) must be inside when it dies; the circle disappearing is the completion cue. A wave of Ninja Zombies then spawns — kill every one and pick up the Locker Key from where the circle was.
Check the ground carefully before the round ends; if the key never dropped, re-talk to Pam (a stalled line can hold it back).
Open the locker & shoot four symbols in order
Take the key to the symbol-covered locker at Main Street / Bang Bangs Subway and open it — inside, the word 'SOULKEY' is scrawled on the door, which both confirms you've found the right locker and is what drives the symbol order you shoot around the map. That arms the four-symbol sequence. Fire one clean shot at each glyph, in this exact order:
- 1 — right of the Dojo: the first / left-most of the two visible symbols.
- 2 — Disco Inferno bottom-floor bathroom: the second symbol from the left.
- 3 — the wall right of the Volk near Deadeye: the first symbol from the left.
- 4 — the same Volk wall: the second symbol from the left.
A wrong or repeated shot resets the sequence to symbol 1 — you don't need to reopen the locker, just start again at the Dojo-right glyph. (Older notes put symbols 3–4 at a lion statue; the current reference places both on the Volk wall by Deadeye.)
Rat King #1 → the Eye
With all four symbols registered, return to the Dojo and interact with the glowing circle on the pavement out front to summon the first Rat King. Damage him while a teammate controls the Ninjas; when he dies, pick up the Eye he drops. It fills your tactical slot and is needed straight away for the Brain branch.
Reveal & shoot six orange Eye symbols
Return to Pam and advance her only after each line ends until she says you must once again face your enemy. Now activate the Eye in the tactical slot and aim to reveal hidden orange Rat King symbols — only one is active at a time. Shoot it, wait for the Eye to recharge, then find the next; six in total. All thirteen possible sightlines:
- Spawn — above the train.
- Dojo street — the barber-shop window left of the Dojo.
- Dojo — above the main door.
- Heebie Geebies — behind the left-stage speaker.
- Bombstoppers — on the police-car door behind the perk.
- Heebie ramp — the first zombie spawn on the right as you climb.
- Deadeye / RPR — the far building right of the RPR Evo wall-buy.
- Deadeye wheel — on the clothesline by the Magic Wheel.
- Trail Blazers hall — the floor of the blue room (jump to see it).
- Disco roof — the water tower left of the KBS Longbow.
- Disco skylight — an air duct seen through the roof drop-down.
- Main Street — on the Disco Inferno sign above the Magic Wheel.
- Bang Bangs Subway — behind the stairs on the Bang Bangs side.
Because only one is live at a time, a spot you already checked can go active after the last hit — restart your scan loop (Spawn → Dojo → Heebie → Deadeye → Disco roof → Main Street → Bang Bangs) after every symbol. On the sixth, a subway phone starts ringing.
Decode the phone → matching poster
Answer the ringing, interactable phone in either subway (clear the area first). It plays Morse code for a three-digit number — dots are short beeps, dashes long. Let the call hang up naturally; a hit or an early exit makes it replay. The six possible numbers:
- 281 · 407 · 420 · 596 · 713 · 818.
- 281, 596, 713 and 818 have a unique first digit; 407 and 420 both open with 4 (....-), so listen to the last digit — five long beeps is 0 (→ 420), --... is 7 (→ 407).
Read the Film Registration number at the lower-left of each Nightmare Summer poster and pick up only the match. Poster sites: Spawn Subway (Up 'N Atoms side of the train); the wall left of the Dojo; the Dojo upper ramp right of the Magic Wheel; the Bombstoppers alley wall; the Disco roof beside the skylight drop-down; and the bottom of the Main Street Subway stairs.
Decode the beeps here: Morse decoder. Grab the wrong poster and Wyler laughs, the number is discarded, and you must shoot six fresh orange symbols before a new call — read the small number twice. Sources disagree on whether the live phone glows red; go by the ringing and the prompt, not the lamp.
Morse Code Decoder
Shaolin phone · Beast Venom consoles · Shadowed Throne Nazi AxeTap in the dots and dashes you hear, using ▮ between letters — it decodes live. Used wherever a map plays Morse: Shaolin Shuffle's ringing phone (the poster number), The Beast from Beyond's Venom-Y/Z consoles, and The Shadowed Throne's Nazi Axe frequency (which decodes to coordinates).
Standard international Morse. Short beep = dot, long beep = dash; a pause between letters = ▮. A ? means that letter's dots/dashes don't match a code yet.
Roof searchlight → spell the cipher word
Mount the matching poster on the spotlight fixture on the Disco Inferno roof — the beam paints a large X on a nearby window. Destroy the X with a grenade or other explosive and kill the Ninjas that spawn. A starting letter appears on the wall by the street drop-down, and six selectable glyphs appear around the roof:
- Glyph 1 — immediately left of the displayed word on the wall.
- Glyph 2 — around the corner from the zombie spawn behind Quickies.
- Glyph 3 — right of the Magic Wheel, on the underside of the scaffolding.
- Glyph 4 — inside the zombie spawn beside the wall clock.
- Glyph 5 — the back-left roof wall, across from the clock.
- Glyph 6 — on a white table left of the KBS Longbow wall-buy.
Translate the six glyphs to letters, then shoot only the glyph for the next letter that continues the displayed prefix; a correct hit extends the word and spawns a fresh set of six. A gong confirms the finished word. The full A–Z glyph key (recreated as original artwork) and the whole accepted-word pool now live in our rooftop cipher key — click each glyph you read to build the word and it tells you the only letter that fits next. The letter the game actually accepts on the wall stays authoritative; use the decoder to confirm, not override, what you see.
A wrong glyph resets the word to its first letter, and about nine wrong tries can lock the board until next round — translate all six before firing. Blue Bolts warning: the electric discharge from reloading near a glyph can select it, so reload away from the six positions or skip Blue Bolts while solving. If a prefix can't be reconciled, deliberately reset for a new word rather than guessing.
Rooftop Cipher Key
Shaolin Shuffle — Disco Inferno roofThe Disco Inferno rooftop wall paints six glyphs from a fixed A–Z cipher; you spell one map-themed word by shooting them in order. Tap the glyphs you see (each tile shows our redraw of the key glyph plus its letter), and the accepted-word list narrows live — when one word is left, that is the answer.
Rat King #2 → the Brain
After the gong, go to the RPR Evo wall-buy near Deadeye Dewdrops and interact with the Rat King symbol. Defeat the second Rat King and pick up the Brain; only return to Pam once it's visibly collected.
Heart branch — burn rounds, lockdown, turnstile & five circles
Advance Pam until she mentions the enemy holding the final ingredient. For the next three rounds a cigarette-burn mark shows top-right of the screen; after the third marked round the game jumps ahead three rounds and walls of fire trap the team on the street outside the Dojo. Kill everything; when the fire falls, grab the turnstile component before leaving and install it in the broken turnstile at the spawn subway.
Then head to the Mule Munchies / Bombstoppers alley, climb the wooden ladder and shoot the Rat King symbol in the window — that spawns the first glowing soul circle. Fill each active circle with ~5–10 kills inside its boundary, then find the next; a gong confirms all five. The five sites:
- Mule / Bombstoppers alley — near the ladder route.
- Disco private room — behind the Ghosts 'N Skulls arcade cabinet.
- Park path — near Deadeye Dewdrops.
- RPR Evo area — beside the wall-buy near Deadeye.
- Spawn Subway — near the Hornet wall-buy.
As with the yellow circle, the zombie must die inside the ring; trust the disappearance and gong over any manual count.
Disco Ball transfers → Rat King #3 → the Heart
In the Disco Inferno, interact with the second-floor DJ booth — a passive zombie with a glowing Disco Ball over its head appears on the dance floor below. Before killing the carrier, lead at least one ordinary living zombie fully onto the dance floor; only then kill the carrier so the ball transfers to the replacement. Repeat this controlled hand-off ten times. After the tenth, no new carrier appears and a gong plays; a Rat King symbol appears on the street in front of the Pink Cat — activate it, beat the third Rat King and collect the Heart.
Two things reset the whole chain: killing the carrier with no replacement on the floor, and killing the carrier when it's the round's last zombie. Start with a healthy group and keep several spares alive off the floor.
Point of no return — prepare
With the Eye, Brain and Heart in hand, kit up before committing — the finale's Max Ammo only drops after a trial completes, so entering under-gunned can soft-lock it. Confirm before you speak to Pam:
- A Pack-a-Punched, high-reserve bullet weapon with a full reserve (the Eye trial needs you to shoot wall / ceiling symbols — melee and explosives alone won't finish it).
- Tuff 'Nuff and your chosen perks bought; emergency revive / crowd-control Fate & Fortune cards ready.
- At least one Chi Shuriken charged for the Rat King's staff.
- No one still holding a temporary setup weapon instead of a final one.
Speak to Pam in the Dojo once her dialogue is free, then travel into the sewer lair — this commits the team to the boss.
Rat King finale → Soul Key
The fight alternates damage the Rat King → he retreats to the rafters → complete one organ trial, repeated until all three organs are cleared. On entry, damage him until he jumps up and the Eye, Heart and Brain appear on the floor; interact with an organ first, then the large centre-floor symbol to start that trial. Order is free, though many teams do Eye first while ammo is full. Each finished trial gongs and drops a persistent Max Ammo in the centre — save it until needed.
- Eye trial — the central eye scans every ~10s (your tactical Eye can scan too), revealing pink glyphs on the walls and ceiling; call them out and shoot every one. If you're slow, shield impacts add extra glyphs.
- Heart trial — acid fills sections around the outer edge; kill a zombie standing in a puddle to clear that section, working round the perimeter before he dumps another layer (don't stand in the acid waiting).
- Brain trial — friendly blue-eyed zombies spawn and attack the Brain; don't shoot them — keep the Rat King and hostile Ninjas off them (a shuriken to his staff helps a lot). If one dies, another replaces it.
After the third gong the Rat King becomes vulnerable — spend your saved Max Ammo and cards, dodge the yellow shield marker, and finish him. The ending plays and the Soul Key spawns in the centre; pick it up. In a Director's Cut run it's the Talisman instead.
Some solo runs are reported to spawn Pam Grier as an AI reviver in the lair; the field guide doesn't confirm this, so don't rely on it.
Side Easter Eggs & extras
Everything beyond the main quest. Tap any entry to open the full how-and-where breakdown.
“Cats on the Boulevard”
Chris Egert. Hold Use on 7 hidden radios around the map (16 possible spawns — spawn bus, the Heebie Geebies storefront/rooftops, the disco lounge/rooftop, and the Tuff 'Nuff tunnel). Rewards the Beat of the Drum achievement.
- Hold Use on 7 hidden radios (16 possible spawns — you need any 7)
- Spawn — on the trash beside the bus
- Heebie Geebies — under a pallet by the ramp, in the backroom, behind the stage speakers, and a rooftop tire
- Rooftops — by the Chi barrier trash can, on the scaffolding by Mule Kick, and the Stamin-Up roof
- Disco — the lounge table, the lobby bin, the rooftop bricks and vent; plus the spawn-to-Tuff 'Nuff hallway pipes
- 'Cats on the Boulevard' by Chris Egert plays — rewards Beat of the Drum
Nunchuks
Punch open all the Torii gates, trigger the Inferno Disco alarm clock and melee the timed clocks (roof → strip club → subway) before the rewind ends; the first Mystery Wheel spin then gives the Nunchuks (permanently in the pool).
- Buy a Chi power from Pam Grier at the Black Cat Dojo so you can punch through the boarded Torii gates — open them all first for fast timed runs
- Clock 1: melee the Inferno Disco alarm clock to start the rewind timer
- Melee your character's item by the boarded portal, take the portal, turn left onto the rooftops and melee the matching second item on the pallets (Poindexter=comic, AJ=trophy, Andre=microphone, Sally=newspaper)
- Clock 2: melee the subway alarm clock (by Bang Bangs), portal into Bombstoppers, melee the dumpster item, teleport back and melee the item by Bang Bangs
- Clock 3: melee the Inferno rooftop clock, drop through the ceiling hole, melee the book by the Rack-9 wall-buy, then melee the matching book on the roof ledge
- Melee all three alarm clocks again in quick succession to spawn a Fire Sale
- Grab the Fire Sale and spin the Magic Wheel — the Nunchuks are guaranteed and stay in the pool for future games
Katana
Complete the main quest to claim it from the Dojo wall (then buyable for 10,000 points). Double Pack-a-Punch adds a blast on the third strike.
- Complete the full Shaolin Shuffle main Easter egg (buildables, Rat King fights, three-phase boss, Soul Key)
- Watch the ending cutscene through
- Return to the Black Cat Dojo and interact where Pam Grier stands to claim the Katana for free
- Base combo: two melee strikes, then a rechargeable spectral blast on the third
- Double Pack-a-Punch it so every third strike adds an explosive blast
Kung-fu Shaolin Styles
Learned from Pam Grier — Dragon, Crane, Snake, Tiger. Tier 1 melee, Tier 2 Shuriken, Tier 3 Chi ability, Tier 4 ultimate. Tied to character too (Andre=Dragon, AJ=Crane, Poindexter=Snake, Sally=Tiger).
- At the Black Cat Dojo, drink a coloured Chi gourd to learn a style: Yellow = Dragon, Blue = Crane, Green = Snake, Red = Tiger
- Tier 1→2: get melee kills in that stance (~15) to unlock the Shuriken
- Tier 2→3: get ~25 Shuriken kills to unlock the style's Chi ability
- Tier 3→4: get ~50 Chi-power kills to unlock the ultimate spirit summon
- Chi abilities: Dragon burns from the ground, Crane freezes, Snake summons a skeleton ally, Tiger drops a gravity grenade (exact kill counts vary slightly by source)
Double Pack-a-Punch (subway panel)
Press the projector-room button, sprint the Blue Bolts fast-travel to grab the Alien Fuses, charge them on the electrified subway rail with a passing train, then install them at the projector to unlock a second Pack-a-Punch tier (10,000 points) for the match.
- Have normal Pack-a-Punch built and a Chi power, with both ends of the Racin' Stripes-roof ↔ Main Street (Blue Bolts) fast-travel pair opened
- Enter the Pack-a-Punch room and press the button on the projector-room wall to start the timer
- Exit at once, run to the Main Street portal beside Blue Bolts and travel through it, then take the uncharged Alien Fuses from the wall box beside the destination portal — you have roughly 25 seconds
- Drop into Main Street Subway and place the fuses on either live rail; step clear (the train is the charger, not a timing test) and let a train run over them
- Pick up the charged fuses and install them in the projector — a once-upgraded weapon can now be double-Packed for 10,000 points for the rest of the match
Play as Pam Grier
Completing the quest (and a reported map-select code) unlocks Pam Grier as a playable character.
- Complete the Shaolin Shuffle main Easter egg as one of the four default characters (not Pam)
- Collect the Soul Key and watch the ending, then exit so it saves
- On the Custom Match Shaolin Shuffle map-select screen, enter Up, Up, Right, Left, Down, Left
- A Pam Grier icon confirms it — start the match; re-enter the code each session
Skull Buster — permanent perks
Shaolin's Ghosts 'N Skulls arcade quest — clean the machine, then collect six skulls and win the match-three minigame for permanent perks.
- Shaolin's Ghosts 'N Skulls cabinet is upstairs in the Disco Inferno — collect 6 skulls (about one per round) then win the minigame for permanent perks
- Skull 1 — clean the machine: find Glass Cleaner spray (Disco Inferno couches / Heebee Geebee's / subway lockers) and a Rag (Disco roof / left of the Rat King throne / above Mule Munchies), then wipe the blood off the cabinet screen
- Skull 2 — mahjong: carry loose mahjong tiles (one at a time) up to the Disco roof and place a valid winning hand to fill the tile line (most use a mahjong calculator)
- Skull 3 — shoot the four window numbers that spell 1972 (Inferno Room, Racing Stripes, Inferno bronze tiles, Black Cat Dojo) quickly before they reset
- Skull 4 — open the Chi door above Racin' Stripes and hop across the spawning white discs without falling
- Skull 5 — at Bang Bangs in the subway, jump in front of the incoming train to grab the skull (this downs you — solo needs Up 'N Atoms to self-revive)
- Skull 6 — dial 555-0152 on a subway payphone and hold until the message hangs up
- Win the minigame: Entangle a coloured cube and shoot it onto a question-mark box to reveal a skull; line up three same-colour skulls in a row/column/L, clearing all three frames (3 fails in a frame kicks you out)
- Reward: all perks permanently (except Up 'N Atoms solo), a Pack-a-Punched Magic Wheel and the Coin-Op achievement. (The optional Skull Hacker Fate card can unlock the cabinet without the six skulls.)
Interactive solvers
Every solver for Shaolin Shuffle, in the order you meet them. Each also appears inside its step in the walkthrough above — use whichever is handier. Browse every Zombies solver →
Morse Code Decoder
Shaolin phone · Beast Venom consoles · Shadowed Throne Nazi AxeTap in the dots and dashes you hear, using ▮ between letters — it decodes live. Used wherever a map plays Morse: Shaolin Shuffle's ringing phone (the poster number), The Beast from Beyond's Venom-Y/Z consoles, and The Shadowed Throne's Nazi Axe frequency (which decodes to coordinates).
Rooftop Cipher Key
Shaolin Shuffle — Disco Inferno roofThe Disco Inferno rooftop wall paints six glyphs from a fixed A–Z cipher; you spell one map-themed word by shooting them in order. Tap the glyphs you see (each tile shows our redraw of the key glyph plus its letter), and the accepted-word list narrows live — when one word is left, that is the answer.
Recommended loadouts
Three strong picks for this map — the map's Wonder Weapon plus reliable box/wall options. These are pre-augment-era games, so the setup is the gun plus Pack-a-Punch and perk synergy.
NV4 / RPR Evo / Mauler (Pack-a-Punched)
Primary — the final Eye trialThe field guide's core pick: a precise, high-reserve bullet weapon Pack-a-Punched — ideally double via the subway-panel quest. You must shoot wall and ceiling symbols in the Eye trial, and its Max Ammo only drops after a trial completes, so melee or explosives alone can soft-lock the run. Back it with Bang-Bangs and Tuff 'Nuff; carry a full reserve into the lair.
Katana (double Pack-a-Punch)
Boss-melter meleeThe map's melee Wonder Weapon, free off the Dojo wall after the quest — the third strike releases a spectral blast, and double-Packing makes every third strike explode. Great for the Rat King burn phases and horde control; pair with Tuff 'Nuff and a Chi style, but carry it alongside the bullet gun, not instead of it.
Nunchuks + a Chi style
Sustained horde clearWon from the Magic Wheel via the timed-clock rewind quest — strong, ammo-free melee for clearing Ninjas and filling the soul circles. Open with a Crane freeze or Tiger implosion Chi ability to buy space, and lean on Quickies and Trail Blazers to kite the Rat King's ground attacks.
Calling cards on this map
Cosmetic calling cards you can earn on this map. Global Dark Ops challenge cards are in the reference section below.
Director's Cut completion card
Main EEComplete the Shaolin Shuffle Director's Cut Easter egg and its Soul Key piece.
Exact card name not yet confirmed.
Fate cards reference (Infinite Warfare)
Infinite Warfare's 16 Fate cards — unlimited-use, unlocked as you level. Held in a deck of 5; the Fortune Teller refills twice a match. We uniquely cover IW — no competitor documents these. Per-card rarity isn't officially documented, so none is shown.

Nade Party
Grenades regenerate for 3 waves.

Shop Class
Spawns a Carpenter.
Scorching Skin
Your next 10 attackers burn.

Mana Up
Faster health regen for 15s.

Eagle Eyed
Sniper hits are always critical (50 shots).

Timely Torrent
Melee summons 6 lava torrents (5 charges).

Irish Luck
Spawns a random Fate/Fortune card.
Blood Clot
Longer bleedout.

Scoped Dollars
$300 per sniper kill (×10).

Static Shock
Melee arcs electricity (5 hits).

Med Kit
You're revived faster.

Getting Railed
Ballista EM3 gets infinite ammo for 30s.
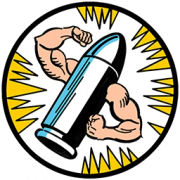
Best for Last
Last 4 bullets deal bonus damage for 3 waves.
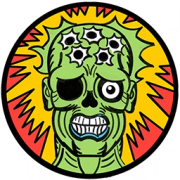
5 Second Muscle
+damage for 5s after a reload (1 wave).

Socialist
Cash is split evenly.

Stimulus
Shots release an ally-healing AoE for 60s.
Fortune cards reference (Infinite Warfare)
Infinite Warfare's Fortune cards — single-use, drawn from Zombie Crates (a selection of the 46; some grouped as compiled). Rarity (Common/Rare/Legendary/Epic) exists in-game but isn't documented per card, so none is asserted here (§ honesty).
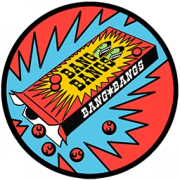
Perk Insured
Keep perks on revive.
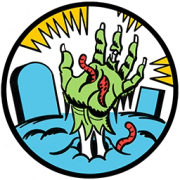
Reanimated
Auto self-revive (3× solo / 1× co-op).
Get Head
Headshots instakill (15).

Pimp Slap
Melee instakill (1 wave).

Twice the Pain
2× bullet damage for 30s.

Kabooom!
Drops a Nuke.

Death's Party
Drops an Instakill.
All the Ammos
Drops a Max Ammo.

Black Friday
Drops a Fire Sale.
Pay Day · Money Shot · On the Money
Cash-boost cards.

Get Packed
Your next wall-buy comes Pack-a-Punched.
Packin' Heat
A random 2×-upgraded weapon.

Packed Magic
Your next Magic Wheel weapon is upgraded.
Coupon Clipper · Refund Policy
Free / refunded purchases.

Rising Phoenix
Revive all downed players.

Second Wind
Kill nearby zombies when near death (3×).

Raining Bullets
Drops an Infinite Ammo power-up.

Power Play
Higher power-up drop chance for 2 waves.
Turn Coat
The next zombie that hits you turns (3×).
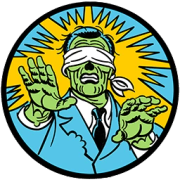
Hide n' Seek
Team invisible for 20s.
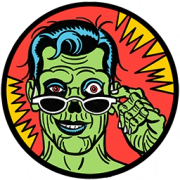
Zombie Magnet
All zombies aggro you for 10s.

Escape Route
Teleport to a safe spot.

Evade
A dodge ability for 2 waves.
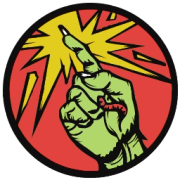
Explosive Touch
Contact zombies explode for 60s.

Twist of Fate
A roaming killer twister for 60s.
Scratch Post · Atomic Massacre · Dragon Breath · Black Hole Fun
Infinite special-weapon cards (30s each).

Super Minute Man
+1 weapon level for 60s.

Fire Chains
Kill-link to your closest ally for 30s.
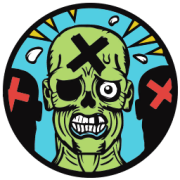
Shared Fate
ADS marks zombies for shared damage (60s).
Ammo Crate
A crate refills ammo and the card meter (60s).

Head Reloaded
Headshot kills instant-reload (1 wave).

Restored Losses
Missed bullets refund stock ammo (60s).
Home Remodel
Instant barrier rebuild with a bonus (5).

Slug Butt
Zombies move at their slowest for 30s.

Punching Bag$
$100 per hit taken for 60s.

The 2-Team
Invulnerable while your nearest team-mate has health (30s).

Ego Trip
+headshot damage for 60s.

Temporal Increase
Longer power-ups for 3 waves.

Purify
Heal all players and damage nearby zombies.
Skull Hacker
Activates the Ghosts 'N Skulls machine.
Super-EE cards (Infinite Warfare)
Infinite Warfare's headline animated cards for its cross-map ‘super’ Easter eggs. Per-map Director's Cut cards are listed on each map; Fate & Fortune is a separate system.

Demon Slayer
Super EEComplete every Director's Cut Easter egg (also unlocks the Director's Cut Camo).

Willard's Test
Super EEComplete ‘Sooooul Key’ as Willard Wyler.
Visual guides & sources
Screenshots and exact part locations live in these — open one on a second screen.