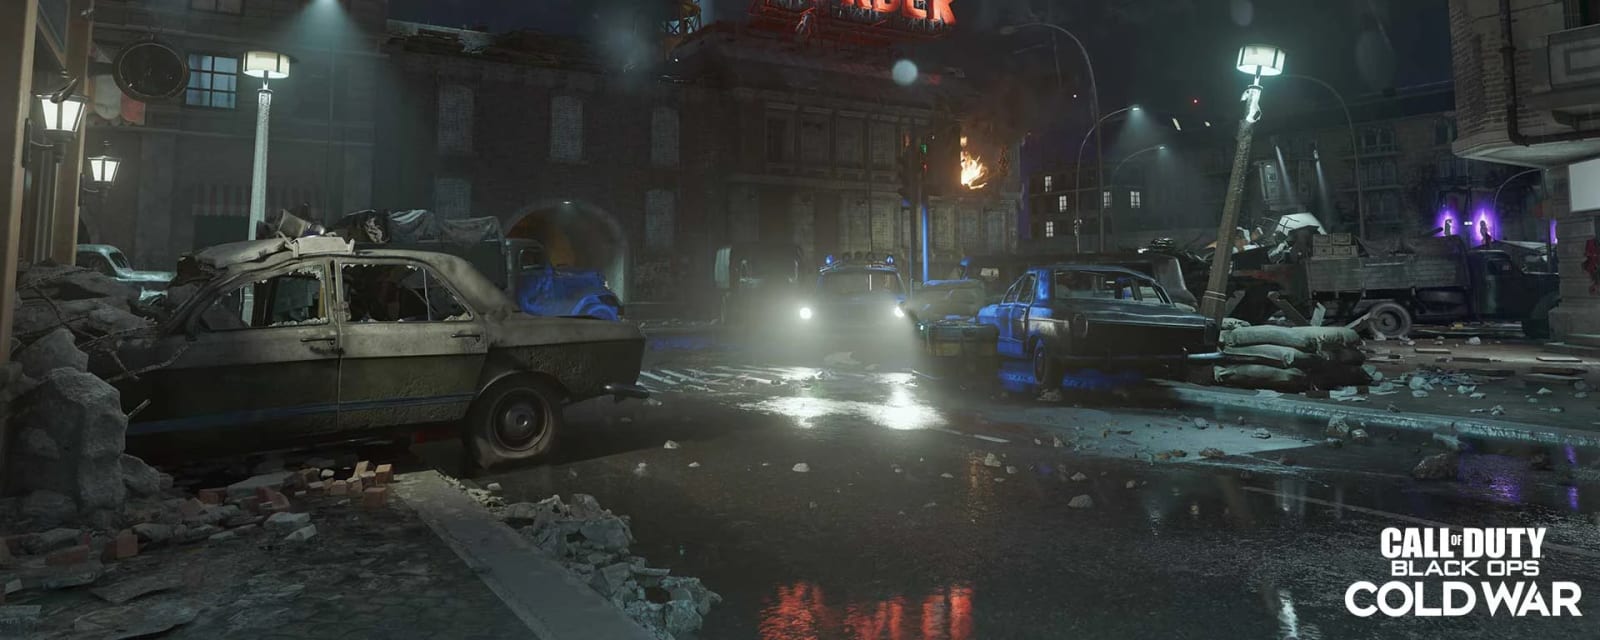

Mauer der Toten
Mauer der Toten drops the crew into a vertical 1980s East Berlin of rooftops, streets, subway tunnels and a hidden aether lab, split by the Wall itself. Its Tin Man Heart main quest hangs on KLAUS, a salvaged robot you build, feed kills, and fully upgrade before he can stop a train and carry the warhead home. The CRBR-S energy rifle and a randomised safe code round out the loop toward the Valentina boss fight.
Map & Key areas
The map layout first, then the areas worth knowing by name. Map imagery © Activision, self-hosted.
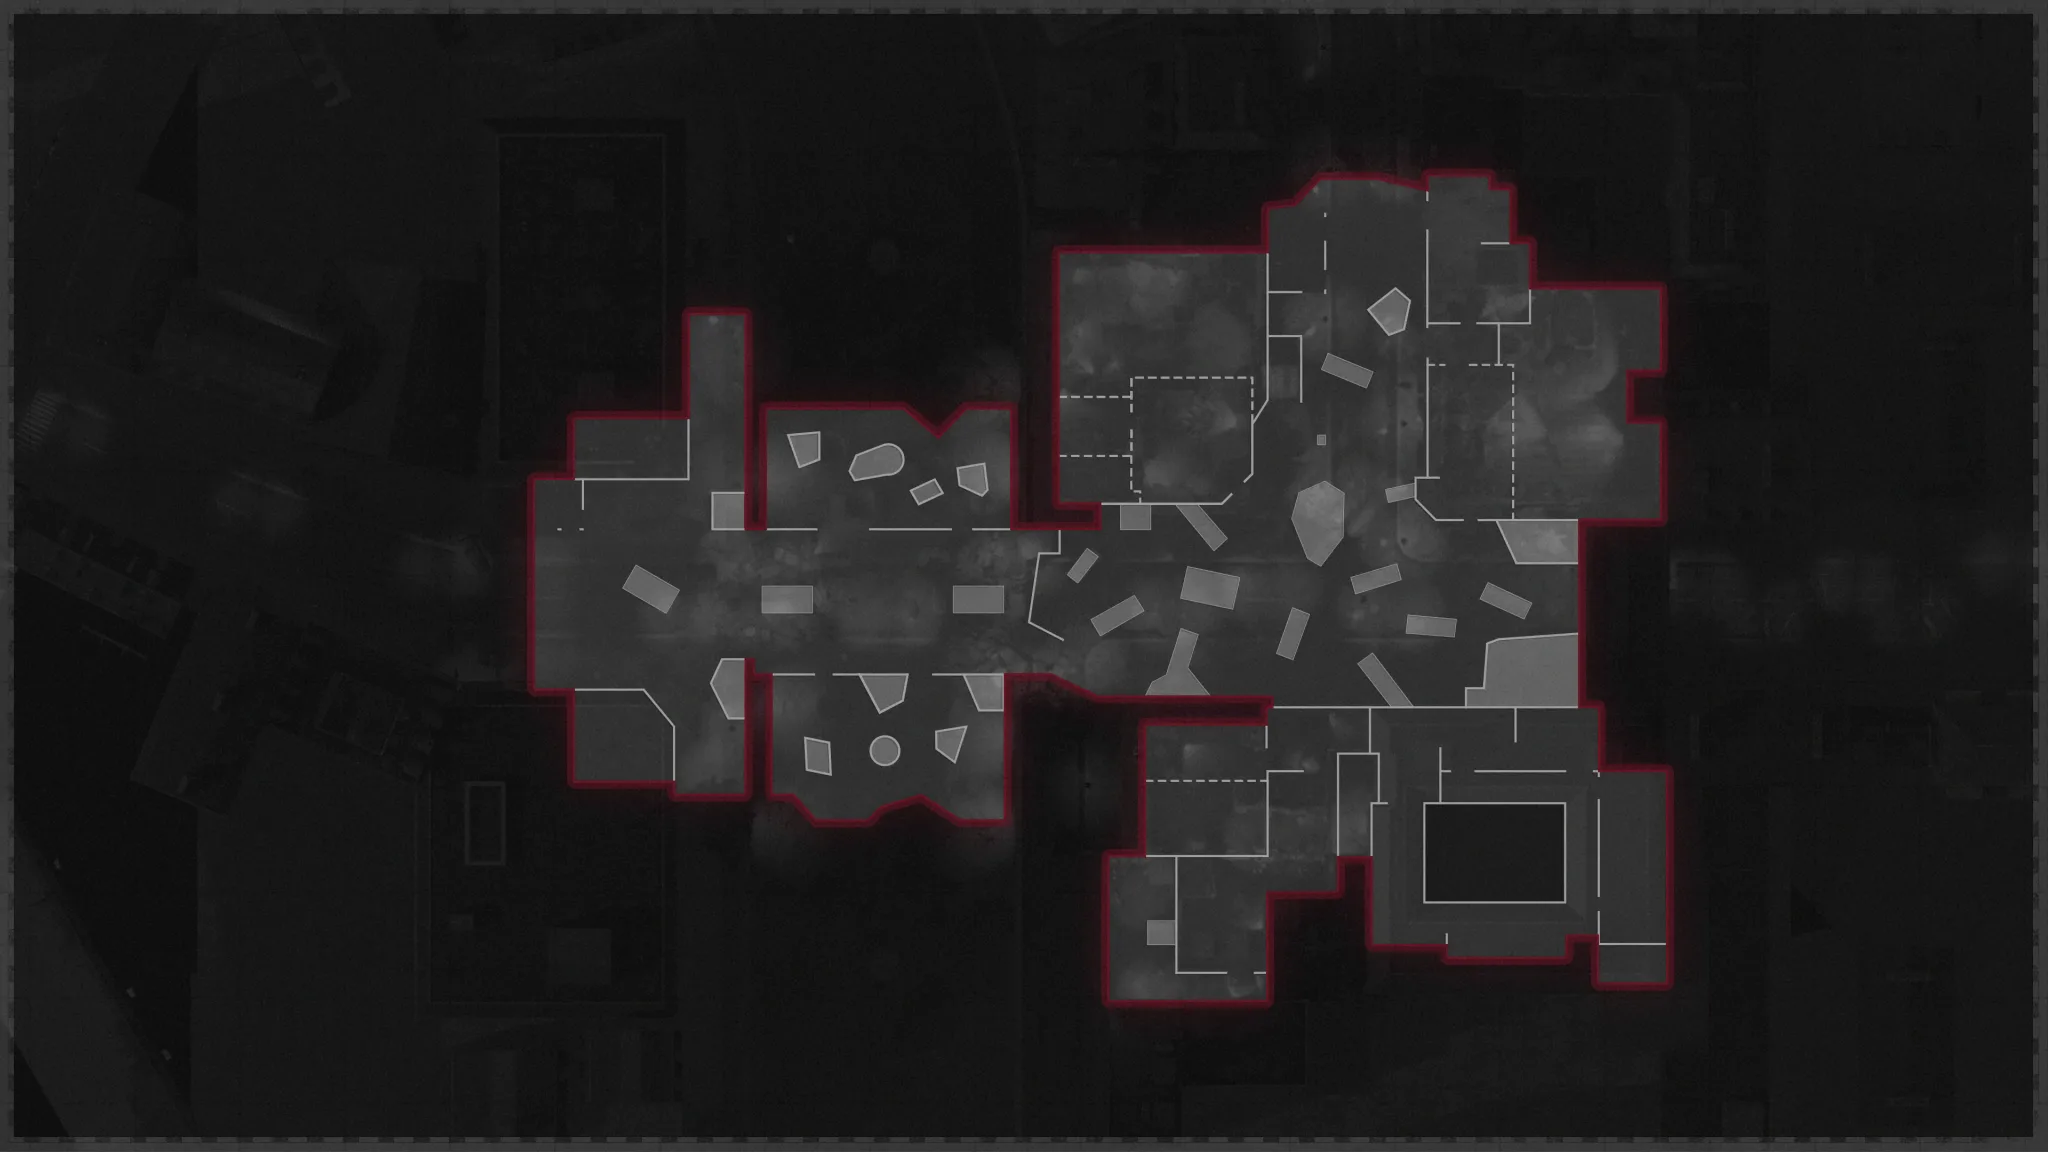
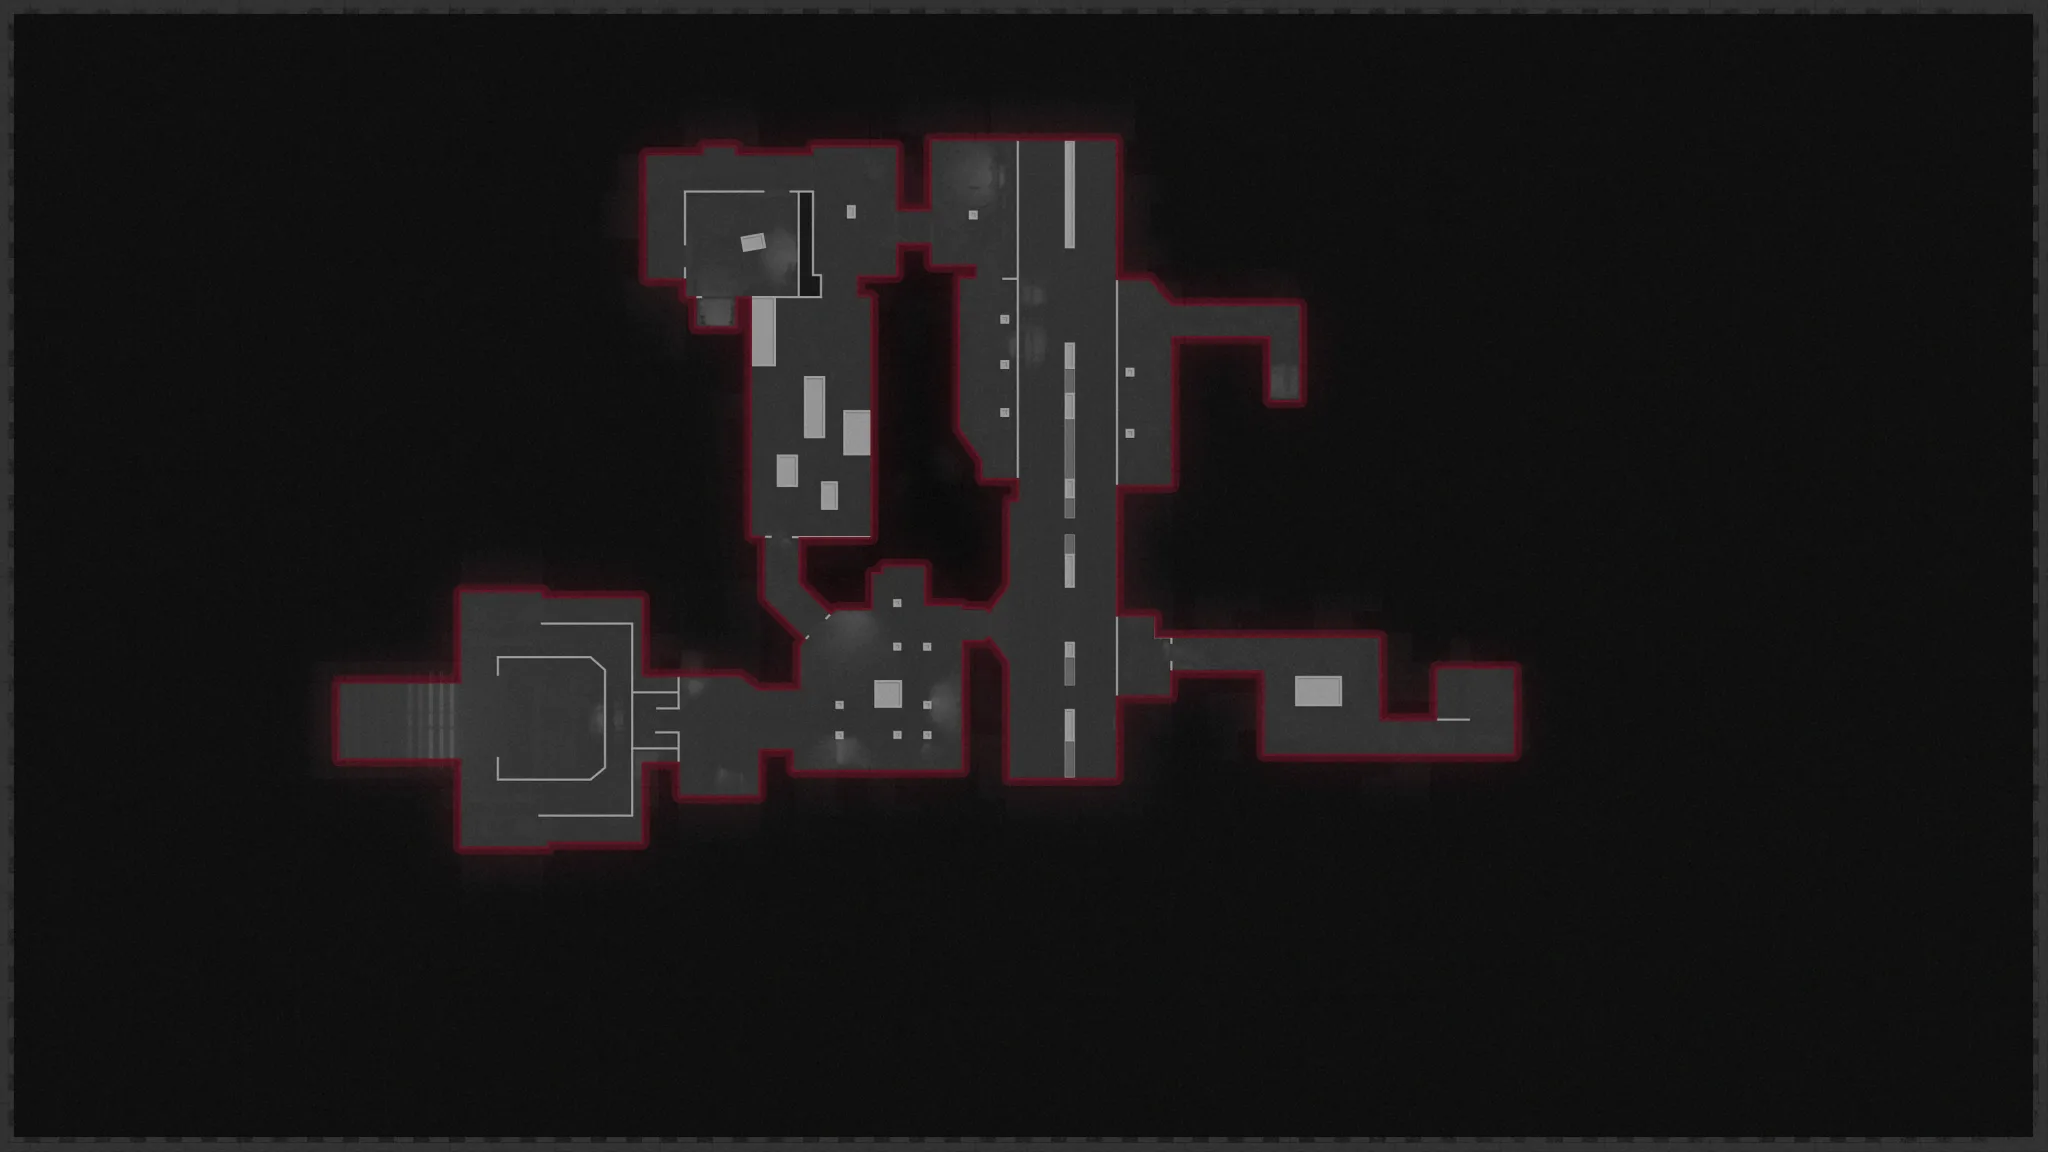
Spawn / West Berlin Street
Crafting and uranium benches, Tempest harvesters, and routes up into the Hotel and Garment Factory.
East Berlin Street
Klaus's patrol lanes, sewer loot access, the Electronics Store, and the way down to Ghost Station.
Safe House
Where you assemble, activate and install parts onto Klaus, plus the story computer.
Garment Factory
Klaus's upgrade station and one leg of the CRBR-S safe-code hunt; also a cassette-tape spot.
Ghost Station / Switch Control Room
The rail switch, the stopped-train boarding point by the M16 wall-buy, and Klaus's locker.
Sewer Access / Secret Lab
Brick wall Klaus punches, the Conversion Unit, canisters, Endstation Lures and the finale.
Steps at a glance
- Main quest is 'Tin Man Heart'; 1-4 players and fully solo-capable.
- Power comes from two Tempest fuses installed at the underground switch, not a normal breaker.
- Pack-a-Punch opens at Checkpoint Charlie once power is on and the wave is cleared.
- KLAUS is the spine of the quest: build him, charge him with kills, then fully upgrade him.
- The CRBR-S is a free wonder weapon from a safe in Hotel Room 305 using a randomised 3-number code.
- CRBR-S mod kits (Swarm, Blazer, Diffuser) drop from special CRBR-S zombie kills; empty the mag to revert.
- The Blazer beam is mandatory to melt the Secret Lab's inner metal wall.
- Tombstone Soda debuts on this map alongside the returning Cold War perk line-up.
- The Disciple is the map's signature elite; it heals and can wipe a squad if ignored.
- Inserting the second Cleansed Uranium is the point of no return and starts Valentina immediately.
- Valentina teleports across Berlin, then returns to the Secret Lab for the final burn.
- Side content: the ‘Amoeba’ song, a free Aether Tool challenge, and Mister Peeks' nightclub.
Full walkthrough
Restore power and open Pack-a-Punch
Descend via arrows, ziplines and the subway. Two quest Tempests underground each drop a fuse; install both at the power switch to energise the map, then return to Checkpoint Charlie, clear the wave and unlock Pack-a-Punch.
- Both Tempest fuses installed
- Power on
- Pack-a-Punch active at Checkpoint Charlie
Build KLAUS
Apply the Brain Rot ammo mod to a zombie and let it tear down the Room 305 barricade, then take the Robotic Hands from the corpse. Kill a Krasny Soldat (from around round 10) for its Battery. Install both into Klaus at the Safe House and activate him.
- Robotic Hands from Room 305
- Battery from a Krasny Soldat
- Klaus assembled and active
Base-upgrade Klaus (microwave dish)
Search the Death Strip debris piles until the Microwave Dish appears and mount it at the Garment Factory station. Let Klaus rack up roughly 45 kills until his monitor turns green, then command him into the station and defend him through the lockdown.
- Microwave Dish found and installed
- Klaus monitor green (~45 kills)
- Garment Factory defence survived
Fully upgrade Klaus (two floppy disks)
Take the blacklight (from the CRBR-S route) and scan six candidate electrical boxes; only two show the Klaus symbol and hold floppy disks. Insert each at the Garment Factory and complete its defence cycle. Klaus must be fully upgraded or he cannot hold the train.
- Candidate boxes: 5th Floor Apartments
- Hotel Lounge
- Ghost Station
- Maintenance Tunnel
- West Berlin Street
- Blasted Suite
- Two floppies inserted and both cycles completed
Claim the CRBR-S from the safe
Command Klaus to break the locker in the Switch Control Room for the blacklight, then read three marked numbers under UV. The code is randomised every match but always sits in the same three spots, and each number belongs to a specific dial — Garment Factory → dial 1, Service Passage → dial 2, Grocery Store → dial 3 (a number is only valid for its own dial). Dial them into the safe in Hotel Room 305 to collect the CRBR-S.
The numbers are invisible to the naked eye — you must have the blacklight equipped (it glows purple) to read them. The map marks each spot with a number-in-a-circle, but that marks the location, not the digit: only the position is fixed, the value rerolls each game, so never reuse a code from a video.
- Dial 1 — Garment Factory, by the staircase (read off in your match)
- Dial 2 — Service Passage tunnel, left of the ladders (read off in your match)
- Dial 3 — Grocery Store, corner of the room (read off in your match)
- Enter all three in order at the Room 305 safe — never guessed digits
Build and install the Hacking Helm
Shoot three Hacking Helm parts with the CRBR-S: the Apartment Rooftop radio tower, the Ghost Station wall box near the M16, and the correct Electronics Store boombox. Collect all three and craft the helm onto Klaus at the Safe House.
- Rooftop radio tower part
- Ghost Station wall-box part
- Electronics Store boombox part
- Helm installed on Klaus
Break into the Secret Lab
Command Klaus to punch the marked brick wall at Sewer Access, then melt the inner metal wall with the CRBR-S Blazer beam. Survive the forced Tormentor wave, take the three canisters from the Conversion Unit area, and shoot the lab machine to craft an Endstation Lure.
- Klaus punches the brick wall
- Blazer variant melts the metal wall
- Tormentor wave cleared
- Three canisters + first Endstation Lure collected
Charge three Tempest canisters
Three of seven harvester sites are live each match. At each: install a canister, throw an Endstation Lure, and kill the spawned Tempests close to the harvester so credit counts, then return the charged canister to the lab. Repeat until all three are charged.
- Possible sites: West Berlin Street
- Destroyed Penthouse
- East Berlin Street
- Korber Rooftop
- Alley
- Sewer Access
- Ghost Station (kill each Tempest inside the harvester radius)
Stop the train and take the Bomb
Flip the rail switch in the Switch Control Room, then position fully upgraded Klaus at Ghost Station on the far track — the one farthest from the Mule Kick machine (cross the near tracks and place him on the outer set). He physically stops the incoming train. Board it fast — the sequence is timed — and take the Bomb from the crate in the middle car and Rico's Keycard from the body in a seat, then install the Bomb in the Conversion Unit.
- Rail switch flipped
- Klaus holds the correct far track
- Rico's Keycard + Bomb collected
- Bomb placed in Conversion Unit
First uranium cycle
Advance the Safe House computer to begin the uranium objective. Kill the HVT Megaton for two Uranium Rocks, craft Uranium Devices at the West Berlin Street and Military Tent benches, and attach one to each end of the zipline (Destroyed Penthouse and Korber Rooftop) so they collide. Grab the Cleansed Uranium below and insert it into the Conversion Unit.
- Megaton killed, two rocks taken
- Two Uranium Devices crafted
- Devices collide on the zipline
- First Cleansed Uranium inserted
Second uranium cycle — point of no return
Repeat the full cycle for a second Cleansed Uranium. Buy everything first: armour, self-revive, perks, Pack-a-Punch upgrades, ammo and support streaks. Inserting the second rock immediately starts Valentina with no shop break.
- Second cycle completed
- All prep purchased
- Second Cleansed Uranium inserted (starts the boss)
Defeat Valentina
Valentina teleports through four arenas — Apartment Rooftop, West Berlin, East Berlin, then the Secret Lab. Break her blue shield before any health damage counts; it comes back at each health checkpoint and if you stop shooting, so bring sustained DPS (Pack-a-Punched CRBR-S/LMG or a gun streak). Keep armour up for the orange crystal barrage — an upgraded Ring of Fire in front of you destroys the crystals. The moment the screen ripples blue and the HUD shakes (the blue wipe aura), break line of sight behind cover or it one-shots you. Kill the floating zombies feeding her healing ring fast.
Helper: Valentina attack & counter reference.
- Orange barrage — sprint laterally
- Blue aura — break sight behind cover
- Healing ring — kill the linked floating zombies
- Shield broken each phase before health damage
- Final lab phase finished
Valentina — attacks & counters
Tin Man Heart boss fightValentina carries a blue shield over red health: break the shield before any health damage counts, and it comes back at each health checkpoint or if you stop shooting. She teleports through four arenas — Apartment Rooftop → West Berlin → East Berlin → the Secret Lab. Learn her tells:
Escort Klaus to the portal
With Valentina down, Klaus lifts the warhead and walks toward the portal. Clear every enemy off him so he keeps moving; when he reaches the portal the bomb detonates and the ending cinematic plays, completing 'Tin Man Heart'.
- Klaus takes the warhead
- Escort defended to the portal
- Completion cinematic triggers
Side Easter Eggs & extras
Everything beyond the main quest. Tap any entry to open the full how-and-where breakdown.
The Disciple
The map's signature elite — a hooded caster that downs players and heals nearby zombies. Prioritise it, especially near Pack-a-Punch.
“Amoeba” by the Adolescents
Collect three cassette tapes: the Garment Factory headless mannequin, the Electronics Store shelf, and the Blasted Suite.
Aether Tool challenge
After power, interact with the file on the Apartment Rooftop overlooking the Königshaus / Korber signs and shoot every moving target before time runs out.
Mister Peeks' nightclub
Carry six blue bunny parts to the marked window to warp to Mister Peeks' disco — the parts sit at Sewer Access, the Department Store, the Grocery Store, the Bar, the Alley and Hotel Room 304. Survive three mini-boss waves and pick a reward (free Jugger-Nog, the CRBR-S and more); return ~15 rounds later via the Hasenbau-window bunny.
Tombstone Soda
Debuts on this map — leaves a recoverable tombstone on death so you can reclaim perks and loadout.
KLAUS favours
Beyond the quest, Klaus can revive you, kill zombies, break the locker, punch the lab wall and soak pressure.
Sewer loot
Blow the East Berlin Street sewer access with explosives for repeatable loot attempts.
Interactive solvers
Every solver for Mauer der Toten, in the order you meet them. Each also appears inside its step in the walkthrough above — use whichever is handier. Browse every Zombies solver →
Valentina — attacks & counters
Tin Man Heart boss fightValentina carries a blue shield over red health: break the shield before any health damage counts, and it comes back at each health checkpoint or if you stop shooting. She teleports through four arenas — Apartment Rooftop → West Berlin → East Berlin → the Secret Lab. Learn her tells:
Recommended loadouts
Three strong picks for this map — the map's Wonder Weapon plus reliable box/wall options. These are pre-augment-era games, so the setup is the gun plus Pack-a-Punch and perk synergy.
CRBR-S (Wonder Weapon)
Free energy rifle with three swappable mod kitsOpen the Hotel Room 305 safe with the randomised three-number code read under Klaus’s blacklight. Kill special CRBR-S zombies for Swarm, Blazer and Diffuser kits — keep a Blazer ready for the lab wall.
M16 (Pack-a-Punched)
Burst-fire boss shredderWall-buy near the M16 / Ghost Station by the Mule Kick track; Pack-a-Punch and stack a good ammo mod for sustained damage on Valentina’s shield and health.
Gallo SA12 (Pack-a-Punched)
Crowd-clearing pump for tight holdsGrab from wall-buy or the box, Pack-a-Punch it, and lean on it for the forced Tormentor and escort waves where zombies swarm Klaus.
Field Upgrade reference (Cold War)
Black Ops Cold War introduced Field Upgrades — the tactical ability you charge with kills. Cold War upgraded them through Aetherium Crystal skill tiers (I–V), not the Major/Minor augment system that arrived in Black Ops 6.

Energy Mine
A proximity energy explosion.

Frost Blast
A frost AoE that slows enemies.

Healing Aura
Instant heal beams (also revives teammates in BO6/BO7).

Ring of Fire
A damage-boost ring that also burns enemies (15s).

Aether Shroud
Phase out of enemy detection.

Tesla Storm
Lightning links players, stunning and damaging enemies.

Frenzied Guard
Repair armour and taunt enemies; kills repair your armour.

Toxic Growth
Thorn vines that slow and damage.
Dark Ops & mastery cards (Cold War)
Black Ops Cold War introduced the Zombies ‘Dark Ops’ card system — hidden challenges earnable on any map (plus Dead Ops Arcade). Filter by category.
Another Round?
Dark OpsReach Round 100.

Reaper of the Undead
Dark OpsKill 1,000,000 zombies.

Invincible
Dark OpsReach Round 30 without going down.
Social Distancing
Dark OpsReach Round 20 without taking a hit.
Good Enough
Dark OpsReach Round 20 with your starting loadout.
Armed to the Teeth
Dark OpsHold 2 fully-upgraded weapons with ammo mods and 6 active perks.
Box Addict
Dark OpsBuy every Mystery Box weapon in one game.
Harbinger of Doom
Dark OpsKill 50 enemies with a single Support.

The Anvil
Dark OpsExfil a game using only melee attacks.

Evil Unleashed
Dark OpsComplete any main Easter-egg quest.

King of Silverbacks
Dead Ops ArcadeReach a cumulative Dead Ops Arcade score of 999,999,999.

Pristine Pelt
Dead Ops ArcadeBeat Mamaback (the DOA final round) without dying.

Dark Ops Master
MasteryComplete the Dark Ops set.
Intel
48 pieces — Requiem 21, Omega 16, Dark Aether 11 (no Maxis intel on this map) — as 11 Audio Logs, 19 Documents, 7 Radio Transmissions and 11 Artifacts. Only the audio logs and one Omega radio are in the map; documents drop from elite enemies, artifacts come from the main quest, the CRBR-S build and Klaus, and all Dark Aether intel is from the Trials computer. Story/lore only, no gameplay reward.
Audio Logs 11
Lost in Transit (Requiem)
Ghost Station — on the west pillar with a corpse, right in front of the Mule Kick machine.
Who's Laughing Now? (Requiem)
CIA Safe House — on the desk right of where Klaus is built.
A Handful (Requiem)
Hotel Room 305 — on the dresser inside the barricaded room (break in with Klaus or a brain-rot zombie).
Bad Days (Requiem)
CIA Safe House — in the locker by the ammo crate; only appears once Klaus is built.
Final Order (Requiem)
Secret Lab — by the canister device; collected during a late main-quest step.
Omega — Sewer Access
On the ground by the rock pile, left of the broken staircase up to the wall.
Omega — Blasted Suite
Off West Berlin Street (reach it by zipline) — under the bed.
Omega — Machine Gun Tower
Department Store / Death Strip — on the raised platform; shoot it with a sniper to drop it into the crater.
Dark Aether — 3 logs
Earned from the Trials computer, not found in the map (about 3 Trial-reward intel per game).
Radio Transmissions 7
Omega radio — 5 transmissions
Military Tent in East Berlin Street, beside the Ghost Station staircase (across from the Electronics Shop). One per game.
Dark Aether — 2 transmissions
From the Trials computer, not a physical radio.
Documents 19
Requiem documents — 10
Rico's Note (main-quest train step) and three from the Safe House computer; the other six drop from elite enemies (Manglers, Mimics, Tempests, Disciples).
Omega documents — 6
Random drops from elite enemies and mini-bosses (and golden chests), roughly one or two a game.
Dark Aether documents — 3
Day-numbered Stranger's journal entries, from the Trials computer.
Artifacts 11
Requiem — 6
From the main quest, the free CRBR-S build and Klaus: Klaus's Hands (the Room 305 corpse), the CRBR-S itself, Rico's Keycard, the Warhead, the Hacking Helm and the Improvised Collider.
Omega — 2
The Battery (kill the Krasny Soldat at Ghost Station) and the Endstation Lure (main-quest Secret Lab step).
Dark Aether — 3
Electrical Fuse (kill a Tempest — it also powers the map), Tempest Essence (main-quest harvester step) and Corrupted Uranium (kill an HVT Megaton during the uranium step).
Visual guides & sources
Screenshots and exact part locations live in these — open one on a second screen.