
Shadows of Evil
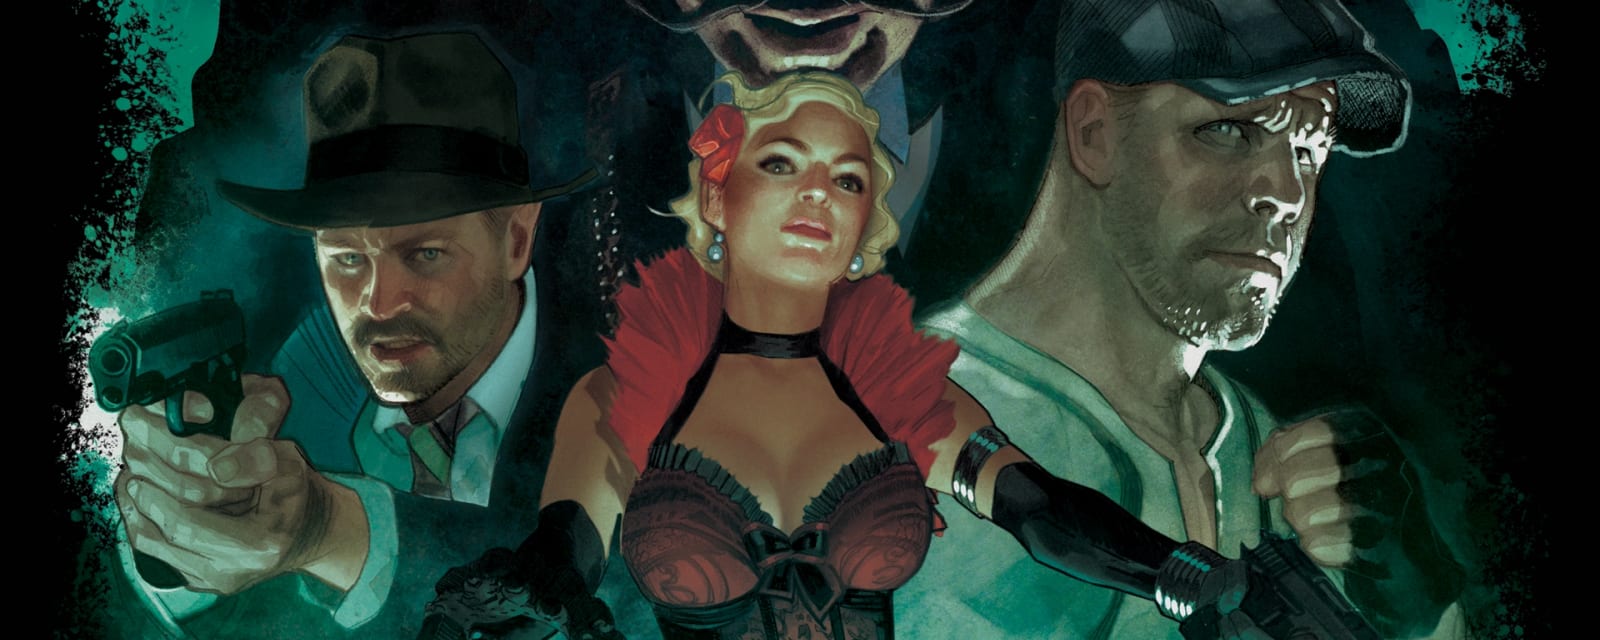
Four sinners in 1940s noir Morg City are manipulated by the Shadowman into performing rituals. Juggle human combat with monstrous Beast Mode across three districts to open Pack-a-Punch and complete Apocalypse Averted.
Map & Key areas
The map layout first, then the areas worth knowing by name. Map imagery © Activision, self-hosted.
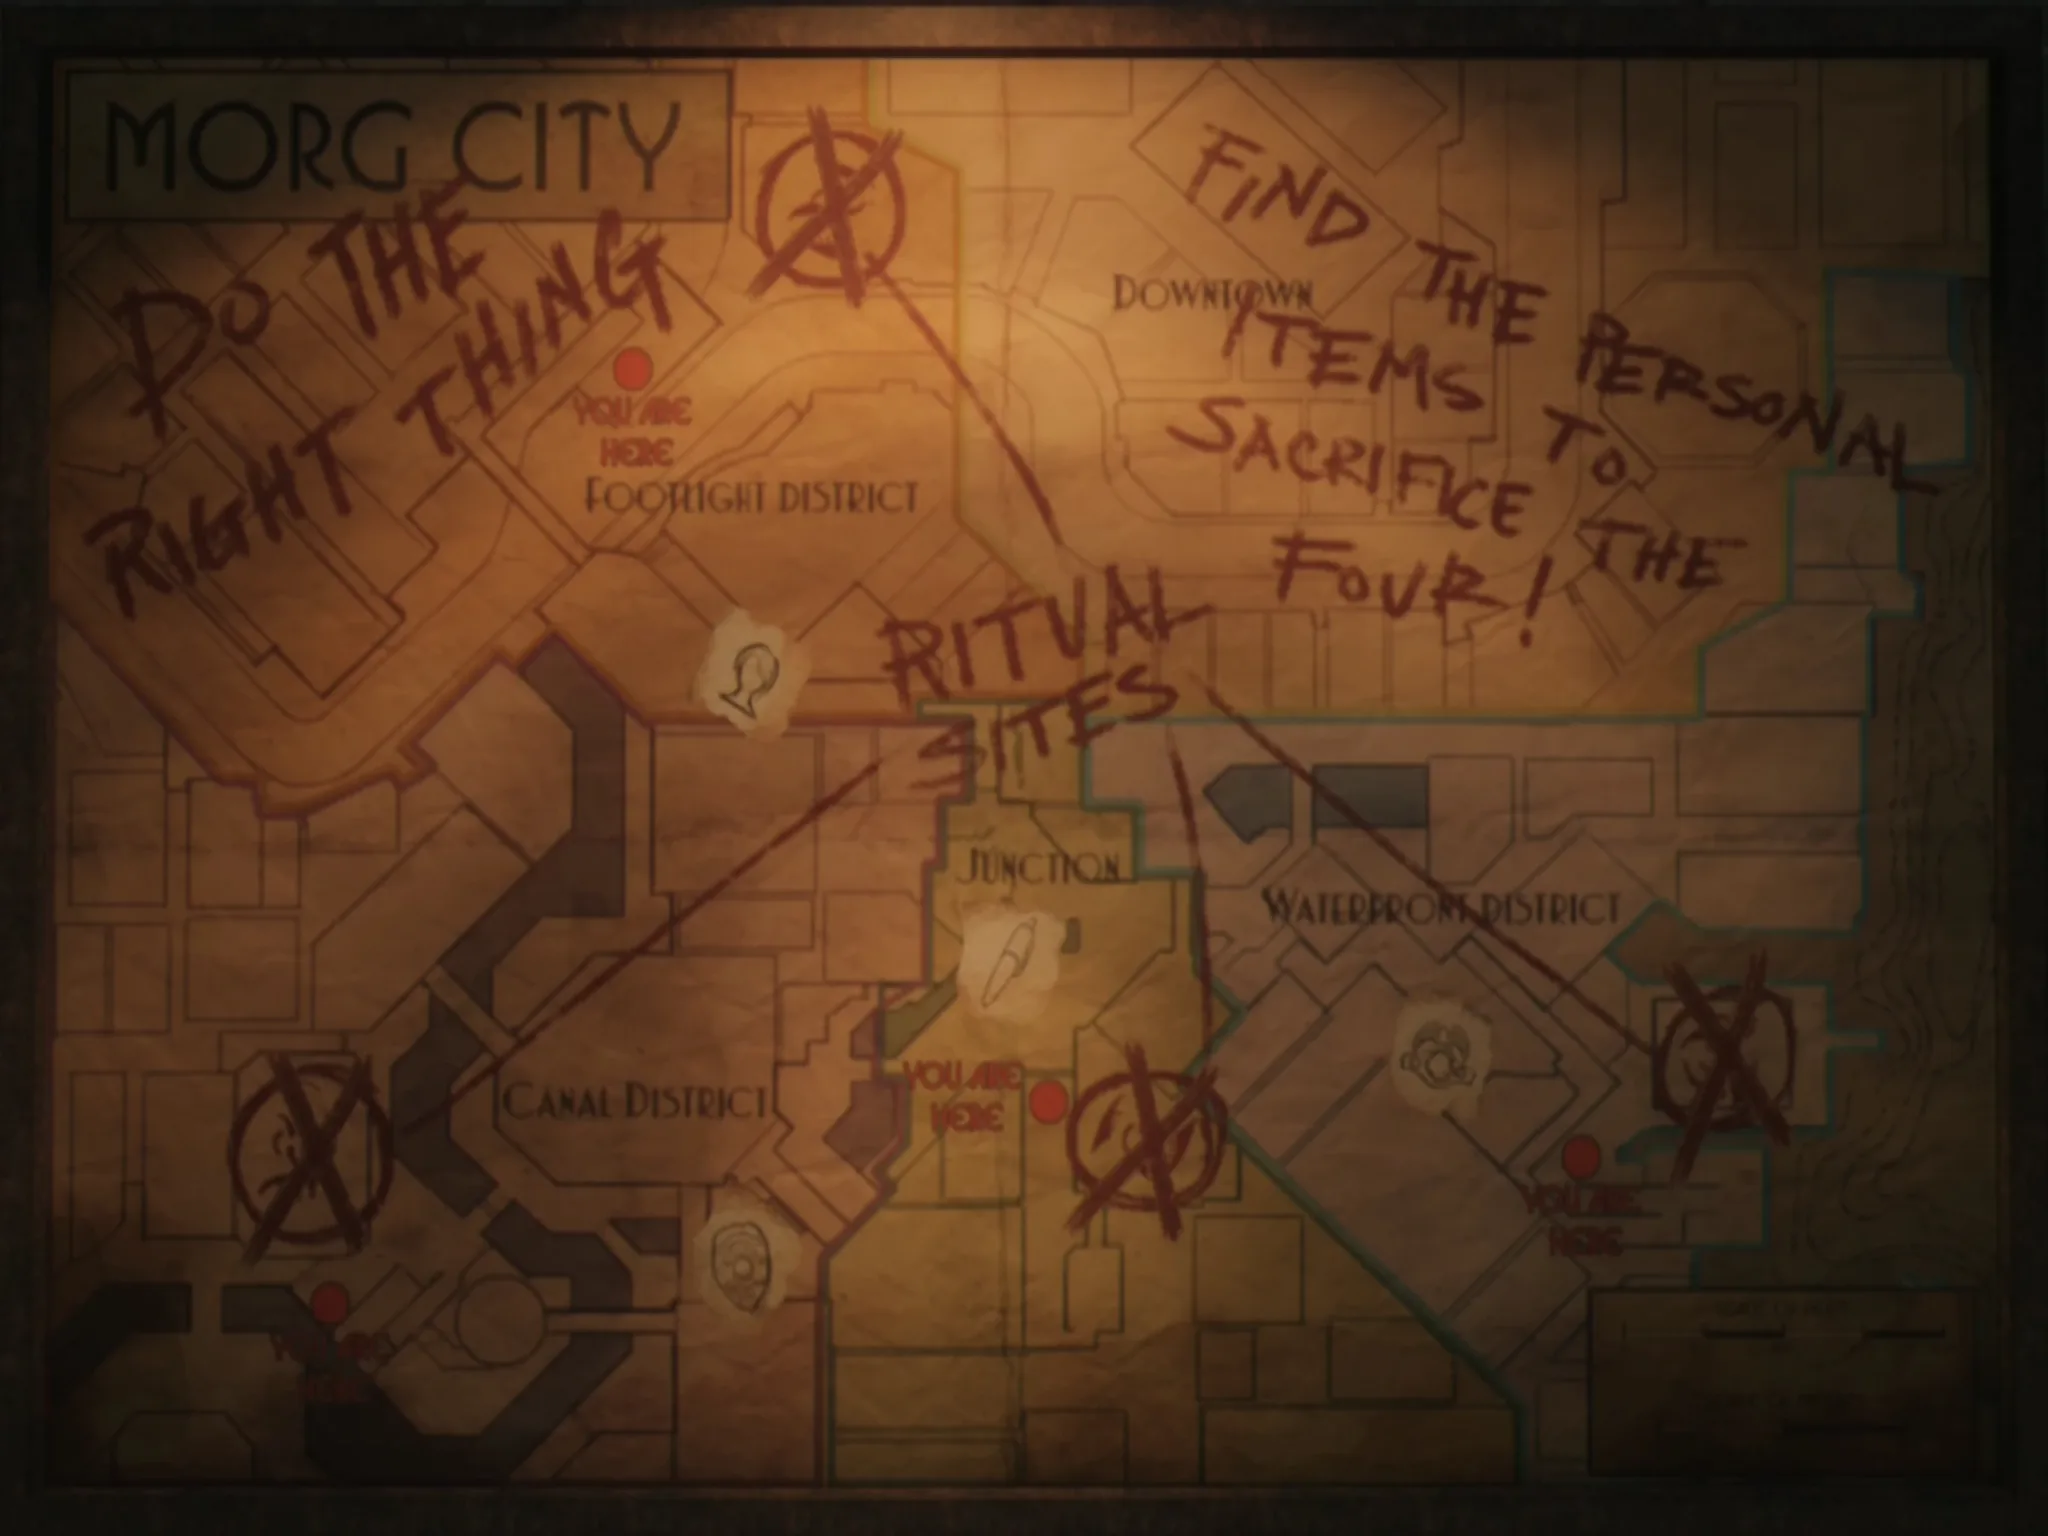
Junction (hub)
Central crossroads. The truck holds the Summoning Key; Quick Revive and the GobbleGum machine are here.
Canals — Ruby Rabbit
The Detective ritual (Badge), a rotating perk, a Cthulhu soul-statue and a radio.
Waterfront — Boxing Gym
The Boxer ritual (Belt), the Mystery Box, Stamin-Up and a radio.
Footlight — Black Lace
The Femme Fatale ritual (Hair Piece), the burlesque stage (Cold Hard Cash) and a radio.
Nero's Landing
The Magician ritual (Fountain Pen), Nero's Workshop and the quest book.
Rift → Sacred Place
Reached after the four rituals — the Gateworm cauldrons, the Apothicon Sword pedestal, Pack-a-Punch and the final Shadowman arena.
Steps at a glance
- Grab the Summoning Key (Junction truck)
- Complete all four district rituals → a Gateworm each
- Place the 4 Gateworms in the Sacred Place → Pack-a-Punch
- Ride the tram, read 3 symbols, zap them → the Apothicon Egg
- Incubate the Egg at the four Cthulhu statues → the Apothicon Sword
- Upgrade the Sword via the Arch-Ovum Margwa rituals
- Interact with the book in Nero's room
- Carry the flag to the pink rifts and Keeper altars
- Ready the four Keepers in the Sacred Place
- Drop the Shadowman's shield, trap him in the Summoning Key
- (4-player finale) tram-crush the Gateworm and zap the Keepers
Full walkthrough
Grab the Summoning Key
Touch the purple pod ahead to enter Beast Mode, melee-smash the crate on the parked truck's bed, revert to human, and pick up the Summoning Key.
The four rituals
Each character has a ritual item, reached in Beast Mode, then placed on its table and defended for ~30 seconds. Only one ritual runs at a time (the Summoning Key is a single shared item), and killing zombies doesn't speed it up — just survive. The 2nd and 4th completed rituals each spawn a Margwa on completion, so be ready to run. The four can be done in any order; each completed ritual drops a Gateworm.
- Magician — Golden Fountain Pen: Nero's Landing, zap the crane's electrical box to drop the crate
- Detective — Badge: Canals brothel, grapple to the roof and zap the box to lower the stairs
- Boxer — Championship Belt: Waterfront Mystery Box ledge, melee the crate down
- Femme Fatale — Hair Piece: Footlight casino roof, zap the box to release the crate
Open the Rift → Pack-a-Punch
Place the Summoning Key on the central altar and survive, then seat the four Gateworms in the cauldrons (two need a wall-run). The gateway becomes Pack-a-Punch.
Tram symbols → the Egg
Ride the tram between districts: each ride shows two symbols — one out each side, for the departing and arriving districts — and the three you need map to Footlight, Waterfront and Canals, so one full ride plus a second leg covers all three. Memorise them, then at the Subway wall enter Beast Mode and zap those three symbols among the nine to reveal the Apothicon Egg (Ovum).
Incubate the Egg → the Sword
In co-op, zapping the symbols reveals four eggs and four sword pedestals — every player takes their own Egg and fills it themselves. The four Cthulhu statues sit inside large crates that must be smashed open in Beast Mode first (any time, but before you place an Egg): opposite the Sword pedestal (Subway), by the Ruby Rabbit (Canals), under a Footlight perk machine, and upstairs in a Waterfront building. Place your Egg at each statue and get ~10 kills beside it so souls feed it — the Egg turns blue and shell-less when full. Return the charged Egg to its pedestal for the Apothicon Sword.
Upgrade the Sword
Take the Arch-Ovum from the Keeper at your altar and place it at a ritual circle to spawn Margwas (up to four per ritual); kill them and return the Arch-Ovum. Pacing that trips teams up: only one player can run a ritual at a time, each player does one ritual per round, and each must use a different circle each time until all four are done. Then hand the sword to your ghost Keeper for the upgraded Reborn Keeper Sword.
The book
Interact with the book on the floor of the Magician ritual area to advance the quest.
Flag defence
Pick up the flag in the centre of the Subway — this despawns the zombies and rapidly spawns Meatballs — and carry it to a sparking ground point. Each district route has two spark points (eight in all): defend the flag ~30s at the first — Parasites and periodic Shadowman strikes attack the cloth, so shoot him off it — a chime confirms the defence, drops a Max Ammo (up to two per district) and lets you move the flag to the second point; defend again, then deliver the charged flag to that district's Keeper altar to turn its ghost into a real Keeper. Only one district can be finished per round, so budget four rounds.
Ready the Keepers & drop the shield
Each player interacts with a pedestal to ready their Keeper. Once all are set the Keepers strip the Shadowman's shield — focus-fire him, and as he drifts to the summoning table interact with the Summoning Key to trap him.
Apocalypse Averted (4-player finale)
Kill Margwas to open Beast Mode; three players zap the tram-station electrical boxes while the fourth calls the tram. The tram crushes the giant Gateworm and you zap the three Keepers beneath the map to finish.
Side Easter Eggs & extras
Everything beyond the main quest. Tap any entry to open the full how-and-where breakdown.
“Snakeskin Boots”
Jack Wall. Interact with the three wooden speakers — the boxing gym, the Footlight tram-station bench and the Ruby Rabbit stair/switch area (Beast Mode reaches two of them).
- Interact with 3 radios — one radio TWICE, then the other two ONCE each (order flexible)
- Waterfront Boxing Gym — on a desk on the upper level (Beast Mode to reach)
- Canals, Ruby Rabbit entrance — on a table left of the entrance by the stairs
- Footlight — on a bench in the tram waiting area, near the GobbleGum machine
- 'Snakeskin Boots' (instrumental) by Jack Wall plays
“Cold Hard Cash”
Jack Wall. Collect 3 microphone parts and assemble them on the Black Lace Burlesque stage in Footlight.
- Collect 3 microphone parts and assemble them on the Black Lace Burlesque stage
- Microphone stand — Nero's Workshop, between the shelves and the saw blade
- Cable — Canals, at the bottom of a metal staircase
- Microphone — the rail-cart/tunnel area near Widow's Wine (top of the staircase, between a bin and a bench)
- Assemble on the Footlight stage — 'Cold Hard Cash' by Jack Wall plays
Apothicon Servant
Buildable Wonder Weapon: Margwa Heart (kill the first Margwa), Margwa Tentacle (from grown purple pods) and Xenomatter (from Parasites, ~round 12+). Fires a black hole. Note: on this map it can't be Pack-a-Punched — the GKZ-45 Mk3 upgrade was cut before release.
- Turn on power and reach a crafting station (the Zombie Shield benches, in the Junction/Rift area)
- Margwa Tentacle: hold a Fumigator (bug-spray) to open Apothicon Harvest Pods — a fully-grown purple pod can drop the tentacle (random, so keep harvesting)
- Margwa Heart: kill a Margwa (destroy all three heads) — it drops the heart
- Xenomatter: kill Parasites or Insanity Elementals from round ~12+ and grab the sample
- Assemble the three parts at a building station to claim the Apothicon Servant (a black-hole launcher)
- Note: on Shadows of Evil the Servant can't be Pack-a-Punched — its GKZ-45 Mk3 upgrade was cut before release (that upgrade only exists on Revelations)
Apothicon Sword
The melee Wonder Weapon earned by incubating the Ovum — upgradeable via the Arch-Ovum Margwa rituals. Clears tight lanes and downed-teammate crowds.
- Ride the tram between districts and memorise the three red glowing cuneiform symbols in the windows
- At the Subway station, enter Beast Mode and electric-zap the three matching symbols among the nine on the wall to reveal the statue holding the swords and Ovum eggs
- Grab an Ovum, then charge it at the four Cthulhu statues (Subway, Canals, Footlight under a perk, Waterfront) by killing zombies beside each
- Return the charged egg to the Subway sword holster to claim the Apothicon Sword
- Upgrade: at your character's home altar (Nero=Junction, Vincent=Canals, Jessica=Footlight, Floyd=Waterfront) take the Arch-Ovum from the Keeper
- Place it in the red circle to spawn a Margwa, kill it, then return to the Keeper for the upgraded Sword
Rocket Shield
One part in each of Canals, Waterfront and Footlight (three possible spawns per district — sweep the whole area). Build at any workbench; the back plate soaks hits and the boost bulldozes crowds for revives. Re-plate when it cracks.
Civil Protector
Collect one fuse in each district (on boxes/railings at tram-platform level), install all three in the fuse box in the Rift by the Waterfront portal, then pay 2,000 at a call box to summon an armoured ally that revives you and kills zombies for a time.
Goddard Apparatus (shield upgrade)
Land 12 Rocket-Shield boost attacks that each kill 10+ zombies to permanently upgrade the shield to four boosts (a fresh replacement can revert it).
Upgraded Lil' Arnies
Rack up ~100 Lil' Arnie kills, then throw an Arnie at the top hat in Nero's room, the cane in the Ruby Rabbit, the bow tie in the boxing gym and finally the Burlesque stage.
Margwa Head mask
From the moving tram, shoot all six visible Margwa-heart targets with the Ray Gun in no more than two trips, then claim the mask in the ritual-room display.
Free Mega GobbleGum
Buy Widow's Wine and throw its grenades into the four lion mouths in the Canals, take the plain gumball to the ice-cream-shop plate, and return after two round changes.
Free 500 points
After opening the first Junction door, cook and throw a grenade into the laundry-window alcove and pick up the point reward.
Round skip & Noir filter
Round 1, sustained-shoot the Shadowman on the spawn fire escape to jump to round 5/10/15 (this makes a full quest run harder). Crouch-interact the boxing-gym portrait to toggle a black-and-white Noir filter.
Beast Mode
Purple pods grant grapple, wall-run, melee and an electric zap that powers perk machines and progresses the quest — the map's core traversal.
- Hold interact at a glowing Beast-Mode gateway (Apothicon symbol) in each district to transform — a meter drains
- As the Beast you run fast and normal zombies ignore you
- Electric-zap fuse boxes on walls to power perk machines, doors and the Pack-a-Punch teleport pads (and the Sword-quest symbols)
- Melee smashes objects marked with a red icon; grapple overhead points to reach ledges the Beast can't otherwise get to
- You can revive teammates and interact with quest objects in Beast Mode
- A Beast run early each game is how you switch on perks and open the map's shortcuts
Margwa
The three-headed mini-boss — shoot into one of its open mouths to kill it; the first drops the Servant's Margwa Heart.
Recommended loadouts
Three strong picks for this map — the map's Wonder Weapon plus reliable box/wall options. These are pre-augment-era games, so the setup is the gun plus Pack-a-Punch and perk synergy.
Apothicon Servant
Crowd-clear Wonder WeaponBuild it from the three Margwa/Xenomatter parts — black-hole shots wipe hordes at any round; pair with Widow's Wine and a self-revive GobbleGum. (It can't be Pack-a-Punched on this map; the GKZ-45 Mk3 upgrade was cut.)
VMP (PaP)
Training workhorseCheap, fast-firing SMG — Pack-a-Punch and run Juggernog + Speed Cola + Double Tap II. Stack Danger Closest / In Plain Sight GobbleGums for reliable high-round trains.
Apothicon Sword
Melee crowd controlThe map's melee Wonder Weapon — upgrade it via the Arch-Ovum Margwa rituals. Great with Stamin-Up + Juggernog and an Anywhere But Here! escape.
Recommended kit & gum picks
Shadows of Evil predates Field Upgrades and Ammo Mods — your consumables are GobbleGums, and your "ammo mod" is the Alternate Ammo Type you roll when you Pack-a-Punch. Weapons and the Apothicon Sword are in Recommended loadouts above.
Frag / Semtex Grenade
Cook-and-throw crowd clear — your default lethal for the ritual crowds and Margwa adds.

Monkey Bomb
Pulled from the box — throw it to peel a train off you during a ritual or Beast-Mode setup.
Alternate Ammo Type
Pack-a-Punching rolls a random AAT (Fire Works, Dead Wire, Blast Furnace…). Fire Works and Dead Wire help most on the Margwa and the Shadowman's crowds.

Perkaholic
Ultra-RareEvery perk on the map at once.
Aftertaste
MegaKeep your perks after being revived (3 rounds).

Wall Power
Rare MegaYour next wall-buy comes Pack-a-Punched.

Kill Joy
Rare MegaDrops an Insta-Kill (2×).

Alchemical Antithesis
ClassicEvery 10 points earned becomes 1 reserve ammo — tops up the Apothicon Sword.
Perkaholic
Ultra-RareFull perks for whoever pops it.

Phoenix Up
MegaRevive all downed team-mates with perks kept.
Near Death Experience
Ultra-RareRevive nearby downed players just by being close (3 rounds).
Aftertaste
MegaKeep perks through a down during a ritual.

On the House
Rare MegaSpawns a free Random Perk bottle for the team.
Calling cards on this map
Cosmetic calling cards you can earn on this map. Global Dark Ops challenge cards are in the reference section below.

Apocalypse Averted
Map / EEComplete the Shadows of Evil main quest.
GobbleGum reference — Black Ops 3
All 63 Black Ops 3 GobbleGums by tier — Classic (free, packs of 5), Mega, Rare Mega and Ultra-Rare (Black-Market / Liquid Divinium). Filter by tier. Some seasonal/Chronicles gums are grouped as compiled.

Always Done Swiftly
ClassicFaster ADS walk and raise/lower for 3 rounds.

Arms Grace
ClassicRespawn with the guns you bled out with.

Coagulant
ClassicLonger bleedout time.

In Plain Sight
ClassicZombies ignore you (2×, 10s each).

Stock Option
ClassicAmmo drawn from your stockpile, not the magazine (2:30).

Impatient
ClassicRespawn near the end of the current round.

Sword Flay
ClassicMelee does 5× damage (2:30).

Anywhere But Here!
ClassicTeleport to a random location with a concussive blast (2×).

Danger Closest
ClassicZero explosive self-damage for 3 rounds.

Armamental Accomplishment
ClassicFaster weapon switch, melee and item use for 3 rounds.

Firing On All Cylinders
ClassicFire while sprinting for 3 rounds.

Arsenal Accelerator
ClassicCharge your special weapon faster for 10 min.

Lucky Crit
ClassicBetter Alternate Ammo Type proc for 1 round.

Now You See Me
ClassicAll zombies chase only you (2×, 10s).
Alchemical Antithesis
ClassicEvery 10 points earned becomes 1 reserve ammo (2×, 60s).
Projectile Vomiting · Newtonian Negation · Eye Candy · Tone Death
Classic (Whimsical)4 cosmetic-only DLC classics.
Aftertaste
MegaKeep perks on revive (3 rounds).

Burned Out
MegaYour next hit ignites nearby zombies (2 hits).

Dead of Nuclear Winter
MegaSpawns a Nuke (2×).

Ephemeral Enhancement
MegaHeld gun becomes Pack-a-Punched for 60s (2×).

I'm Feeling Lucky
MegaDrops a random power-up (2×).

Immolation Liquidation
MegaDrops a Fire Sale (3×).

Licensed Contractor
MegaDrops a Carpenter (3×).
Phoenix Up
MegaRevive all team-mates with perks.

Pop Shocks
MegaMelee electrocutes (5×).

Respin Cycle
MegaRe-spin the Mystery Box (2×).

Unquenchable
MegaAn extra perk slot when at 4.
Who's Keeping Score?
MegaDrops Double Points (2×).
Idle Eyes · Flavor Hexed · Board Games · Board To Death · +8 more
Mega12 further Megas incl. Crawl Space, Fatal Contraption, Unbearable, Disorderly Combat, Slaughter Slide, Mind Blown (DLC/Chronicles).

Cache Back
Rare MegaDrops a Max Ammo.
Kill Joy
Rare MegaDrops an Insta-Kill (2×).
On the House
Rare MegaDrops a Random Perk Bottle.
Wall Power
Rare MegaYour next wall-buy comes Pack-a-Punched.
Undead Man Walking · Fear in Headlights · Temporal Gift · Crate Power · Bullet Boost · Extra Credit · Soda Fountain
Rare Mega7 further Rare Megas (DLC/Chronicles).

Killing Time
Ultra-RareFreeze all zombies for 20s; shot ones die.
Perkaholic
Ultra-RareEvery perk on the map.
Near Death Experience
Ultra-RareProximity revive with perks (3 rounds).

Reign Drops
Ultra-RareAll core power-ups at once (2×).
Shopping Free · Round Robbin' · Head Drama · Secret Shopper · Profit Sharing · Self Medication · Power Vacuum
Ultra-Rare7 further Ultra-Rares (DLC/Chronicles).
Dark Ops & prestige cards (Black Ops 3)
Black Ops 3 has few Zombies calling cards and mostly no per-map cards; its main-quest cards are on the maps themselves.

Primis Rulz
Dark OpsComplete all the Zombies story quests.

Prestigious Protagonist
PrestigeEnter Prestige after reaching Deresurrectionist (Zombies rank Lv 35).
Visual guides & sources
Screenshots and exact part locations live in these — open one on a second screen.