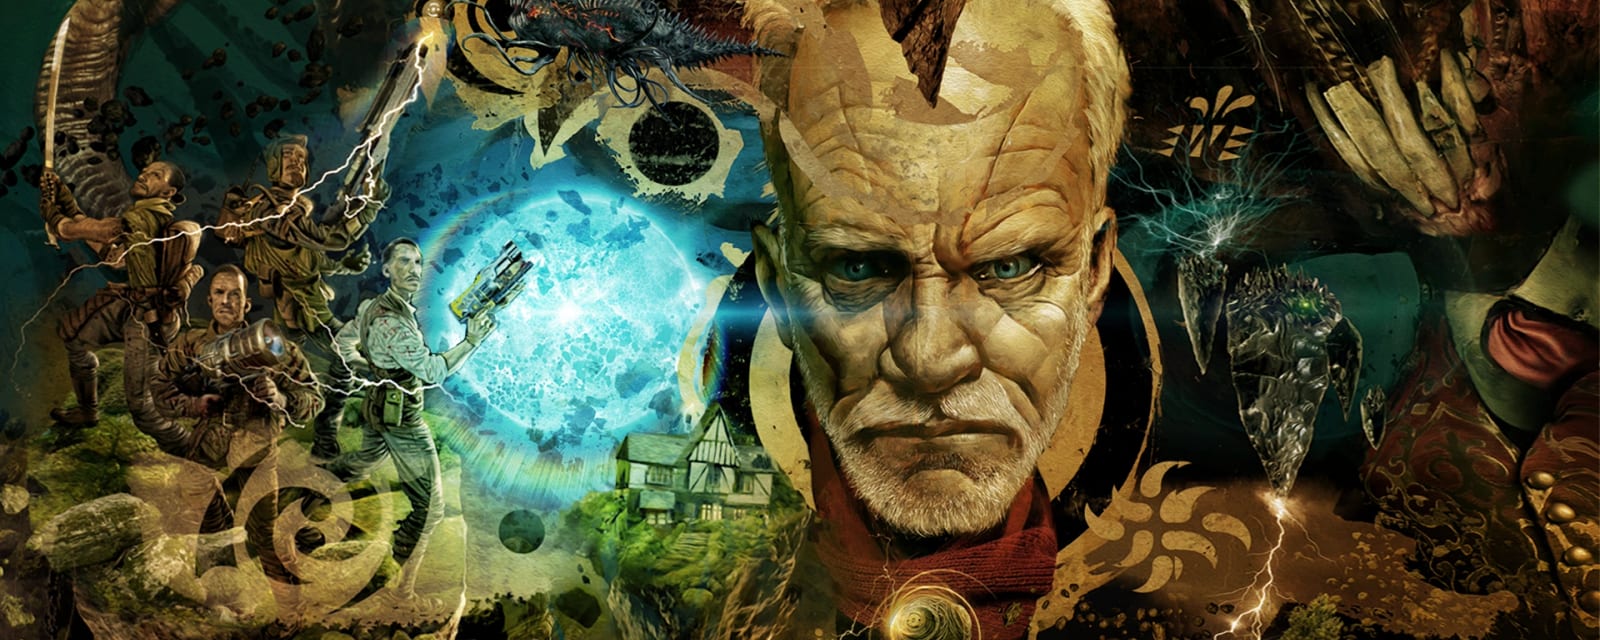

Revelations
The final BO3 map — shards of Nacht, Verrückt, Kino, Mob, Der Eisendrache, Shangri-La and Origins floating in the Apothicon void. In For The Good Of All, the Primis crew charge the Summoning Key and face the Shadowman before Dr. Monty and The House.
Key areas
Nacht der Untoten (hub)
Central island — the trap terminal that stuns the Apothicon, Pack-a-Punch access and the classic-song radio.
Verrückt
Asylum fragment with the KN-47 wall-buy, wheelchairs and a jump-pad island.
Kino der Toten
Theatre island — the stage podium (Kronorium) and the teleport to The House.
Mob / Origins
Twinned prison-cafeteria and trench island linked by tunnels; a corruption engine and dig parts.
Der Eisendrache
Castle-ruins island with wall-runs and a corruption engine.
The Apothicon (worm)
The giant creature whose mouth holds Pack-a-Punch, the Arnie holes and the egg nests.
Steps at a glance
- Shoot the four gravestones in order
- Activate all four Corruption Engines
- Stun the Apothicon in Nacht → Pack-a-Punch
- Build the Keeper Protector; run its ritual
- Get & upgrade the Apothicon Servant → Estoom-Oth
- Shoot slabs → collect Sophia's bones
- Throw Lil' Arnies into the 9 holes; kill Margwas
- Turn the engines into turrets → summon Sophia
- Follow Sophia to Kino → get the Kronorium
- Incubate 4 gateworm eggs; plant them → runes
- Complete the rune trials → the Summoning Key
- Throw the Key at 7 map targets
- Charge & throw the Key; defeat the Shadowman
Full walkthrough
Shoot the gravestones
Fire at the four crew gravestones in the crew's death order — Richtofen → Dempsey → Takeo → Nikolai (read the engraved names; this is not their left-to-right order). A thunder cue confirms each correct shot; if it fails, wait a moment and restart from Richtofen.
Activate the Corruption Engines
At each circular ritual table, pay 500 points and stay in the ring until it charges. This restores power and traversal and gates everything after.
Stun the Apothicon → PaP
Ride the flying Apothicon into Nacht, wait for the giant Elder God to sit over the electric floor trap, and hit the four-screen panel to shock it open. Shoot the three glowing internal organs holding the machine; it drops to the floor and Pack-a-Punch becomes usable.
Keeper Protector ritual
Gather the three Keeper Protector parts and build it at a workbench (it costs 5,000 points to summon). The ritual pad is marked by a small pointy rock at the back-centre of one of three jump pads (Shangri-La's, Mob's or Verrückt's) — stand on the rock briefly while the pad is inactive to begin. Summon the Protector, lead it onto the pad and defend it through the 3-minute kneeling ritual. Panzers ignore everything to reach the Keeper and slam it — kill any Panzer instantly or the ritual fails (parasite rounds are safe windows). Take the audio reel and play it in the reel player by Juggernog in Nacht.
The three audio reels (this one, then Sophia's, then the Lil' Arnie reel) must be collected in order — the next can't progress until the previous is seated in its player; you needn't listen, just place it.
- Flag — the Origins and Mob of the Dead fragments (walls, sandbags, door-side hooks)
- Skull — the Verrückt fragment (kitchen / courtyard rooms and wall pegs)
- Crystal / gem — the Der Eisendrache and Kino fragments (desks, statues, corner shelves)
Servant → Estoom-Oth
Get the Apothicon Servant from the Box, then fire a direct base-Servant shot at five floating blue 115 rocks in the skyboxes (each must visibly react — a vortex that opens in front of a rock can miss it). With all five hit, take the Servant inside the Apothicon and Pack-a-Punch it into Estoom-Oth — required for the bone step.
- Shangri-La — above and beyond the pyramid / temple skyline
- Spawn — face away from the portal and scan the high sky to the right
- Mob of the Dead — face the portal and scan the high left skyline
- Verrückt (Mob jump-pad side) — look across the void from the jump pad
- Verrückt (portal side) — the upper exterior near the portal-facing wall
Collect Sophia's bones
At each of the six bone sites, first shoot the hidden object with any Pack-a-Punched weapon except the Apothicon Servant (a scoped gun helps spot them) until it changes, then capture the freed floating bone by shooting it with the Pack-a-Punched Servant / Estoom-Oth (the base or non-Servant weapon won't capture it). Return to Nacht and shoot the bone pile between the reel player and Juggernog; S.O.P.H.I.A.'s body forms — shoot it with the Servant to reconstruct her, then play the reel in the Origins excavation player.
- Nacht — small object on the wall above the Der Eisendrache portal
- Verrückt — outside the map near the waterfall, right of the portal
- Origins — on the ground near a giant robot footprint / path edge
- Shangri-La — high above the Stamin-Up area
- Spawn — in the broken church remains outside the playable edge
- Der Eisendrache — along the third wall-run / free-perk wall-run route
Lil' Arnies → the Margwas
Get Lil' Arnie from the Box, enter the Apothicon and throw one into each of the nine wall holes without leaving — a correct throw vanishes into the hole (a bounce to the floor means it isn't done). They complete in three groups of three; after each group three Margwas spawn, so clear all nine across the sweep. Start near the Pack-a-Punch side and follow one wall around. Take the reel from the pustules (it spawns on the top bridge) and play it at the Kino record player, right of the stage.
Prone in front of a hole to make the throw trivial (solo, do it at round end). Leaving the Apothicon resets an unfinished group — completed groups are saved; in co-op only the thrower must stay inside. A solo down mid-Margwa-fight resets that group. With enough Lil' Arnies (and a Max Ammo) you can throw all nine at once and fight nine Margwas in a single wave.
Summon S.O.P.H.I.A.
Convert each Corruption Engine into a laser turret and shoot the blue crystal floating outside the map above it. All four hit, S.O.P.H.I.A. appears and flies to Kino.
Retrieve the Kronorium
All players hold-interact together on the teleport pod Sophia opens to enter The House, grab the Kronorium, and return.
Grow the gateworms
Place the Kronorium on the Kino stage podium, then find four Apothicon eggs (Spawn, Origins, Verrückt, Kino), place each in an incubation nest inside the Apothicon and feed it souls until it hatches into a gateworm.
Plant worms → rune trials
Carry each grown worm through the four search islands and follow its sonar beeping (faster = closer) to an invisible rune. Bring all four runes to the Kino teleporter room and read the per-match order off the Kronorium (the four runes are Fire, Lightning, Cage and Anti-gravity, but the order is randomised each game); enter them in that order and survive four mini-boss waves (Margwas, Panzers, Furies) to earn the Summoning Key.
Throw the Key at 7 targets
Carry the Summoning Key and throw it into seven props, waiting for it to bounce back each time: the Kino chandelier radio, the Der Eisendrache clock face, the Shangri-La convergence stone in the statue's palm, the Origins excavation gravestone, the Mob cell poster, the Verrückt mounted MG42, and the Nacht red barrel by the truck. Stand close and aim at each prop's centre, then return to the Kino teleporter for the finale.
Defeat the Shadowman
Charge the Key at the green holders, then throw it into S.O.P.H.I.A.'s ghost to strip the Shadowman's shield. Damage him until he's pulled into the Apothicon's mouth, then interact with the Kronorium to finish — the ending plays out in The House with Dr. Monty.
Side Easter Eggs & extras
Everything beyond the main quest. Tap any entry to open the full how-and-where breakdown.
“The Gift”
Kevin Sherwood ft. Elena Siegman & Malukah. Hold Use on 3 teddy bears: the Mob/Origins tunnel (on a stool by a wheelchair), Verrückt (on a wheelchair by the KN-47 room), and Kino (on a front-row chair before the stage).
- Hold Use on 3 teddy bears, in any order (a chime confirms each)
- Mob/Origins tunnel — on a stool beside a wooden wheelchair by the stairs
- Verrückt — on a wheelchair in the room with the green containers and KN-47 wall-buy
- Kino der Toten — on a chair in the front row directly before the main stage
- 'The Gift' by Kevin Sherwood ft. Elena Siegman & Malukah plays
Classic jukebox radio
With the engines active, press the 4 hidden buttons around Nacht, then shoot the WWII radio to cycle a jukebox of past Easter-egg songs. (Exact button spots vary by guide.)
- All four buttons are in the Nacht der Untoten section
- Button 1: dark corner right of the Der Eisendrache portal (low)
- Button 2: upstairs in the Apothicon tesla-coil room, right wall by the crates
- Button 3: top of the stairs by the Tombstone/weapon-swap room, under a bright light
- Button 4: bottom level by the LCAR-9 wall-buy / spiral stairs, at the cracked corner wall
- Hit all four quickly (it's timed) — a WW2 radio appears in Nacht; shoot it to play a track, shoot again to skip, melee to stop
Apothicon Servant → Estoom-Oth
The Box Wonder Weapon — a portable black-hole launcher, upgraded via the 5 blue rocks then Pack-a-Punched. Mandatory for the bone and blue-rock steps.
- Get the Apothicon Servant from the Mystery Box (rare — may take many spins)
- With it equipped, shoot five blue 115 rocks floating outside the map
- One above each of the four Corruption Engine zones (Spawn, Der Eisendrache, Mob of the Dead, Verrückt) plus one at Nacht der Untoten
- Each looks like a small light dot high in the sky — shoot each once and it's pulled toward Pack-a-Punch
- Pack-a-Punch the Servant (5,000) for Estoom-Oth (red portals, stronger, longer)
Dragon Shield
A second buildable alongside the Keeper Protector — one part from each of the Origins, Der Eisendrache and Verrückt fragments (three possible spawns per region). Build at a workbench and re-plate before the mini-boss and Shadowman arenas.
Corruption Engines
Four ritual altars you activate for power and traversal, later converted into laser turrets to summon Sophia.
- Four engines — Spawn, Verrückt, Mob of the Dead, Der Eisendrache
- Interact and pay 500 to override one (2,000 for all four) — this triggers a defend/swarm with poison gas; survive until it charges
- A charged engine restores power to its zone; repeat at all four (each harder)
- Later (main quest): mount each engine as a laser turret and aim the beam at the correct light-coloured sky rock
- A correct hit kicks you off the turret; do all four to materialise S.O.P.H.I.A
Riding the Apothicon
Enter the flying Apothicon to shuttle between the floating map fragments.
The House & Dr. Monty
The audio reels and the Kronorium retrieval carry the story to its conclusion with Dr. Monty in The House.
Super Easter Egg — RK5
With the host's profile already showing the Shadows of Evil Summoning Key icon and the four Gateworm icons (The Giant, Der Eisendrache, Zetsubou No Shima, Gorod Krovi), completing Revelations unlocks A Better Tomorrow — the RK5 as a starting weapon plus bonus progression. A special wisp then appears by the Spawn truck for an extra secret.
Wall-run perk
Complete the Der Eisendrache anti-gravity wall-run route across the hidden blue chalk runes for a free perk.
Masks & hats
Earn the set kills/interactions in the Kino mask room against matching enemies — Wolf, Margwa, Panzer, Fury, Keeper, Viking and God masks — each giving a defensive or movement bonus.
M1927 chalk table
Collect the chalk weapon outlines from their source areas and place them on the Kino stage table to unlock the wall-buy arrangement.
Time trials
Reach the milestone rounds before the map's listed times to claim melee rewards from the time-trial board.
Recommended loadouts
Three strong picks for this map — the map's Wonder Weapon plus reliable box/wall options. These are pre-augment-era games, so the setup is the gun plus Pack-a-Punch and perk synergy.
Apothicon Servant → Estoom-Oth
Quest-critical crowd controlThe Box Wonder Weapon is mandatory for the blue-rock and bone steps; its black hole clears trains and staggers Margwas. Run Widow's Wine + Stamin-Up.
KN-44 (PaP)
Reliable workhorseThe map's AR wall-buy — Pack-a-Punch and run Double Tap II + Speed Cola for the Margwa and rune-trial rounds.
High-ammo LMG (PaP)
Soul-farming & holdsA big magazine for feeding souls into the gateworm eggs and the Shadowman fight; Wonderbar GobbleGum grabs the Servant/Arnie fast, and carry Mule Kick + Quick Revive.
Recommended kit & gum picks
Revelations predates Field Upgrades and Ammo Mods — consumables are GobbleGums; the upgraded Apothicon Servant (Estoom-Oth) is your crowd answer (in Recommended loadouts). Alchemical Antithesis keeps it fed for the Shadowman finale.
Frag / Semtex Grenade
Clears the Margwas at the Lil' Arnie holes and the rune-trial crowds.

Monkey Bomb
Buys space during the Corruption-Engine turret step and the Key-throw route.
Alternate Ammo Type
PaP the KN-44/LMG for a random AAT — Fire Works and Dead Wire thin the mixed fragment-map swarms.

Perkaholic
Ultra-RareEvery perk at once — worth it for this long finale map.

Aftertaste
MegaKeep your perks after a revive (3 rounds).

Wall Power
Rare MegaNext wall-buy comes Pack-a-Punched.

Alchemical Antithesis
ClassicEvery 10 points = 1 reserve ammo — refills the Apothicon Servant.

Kill Joy
Rare MegaInsta-Kill (2×) to buy a breather in the rune trials.
Perkaholic
Ultra-RareFull perks for whoever pops it.

Phoenix Up
MegaRevive all downed team-mates, perks kept — vital at the Shadowman.

Near Death Experience
Ultra-RareProximity revive during the finale.
Aftertaste
MegaKeep perks through a down.

On the House
Rare MegaFree Random Perk bottle for the squad.
Calling cards on this map
Cosmetic calling cards you can earn on this map. Global Dark Ops challenge cards are in the reference section below.

Home Sweet Home
Map / EEComplete the Revelations main quest.
GobbleGum reference — Black Ops 3
All 63 Black Ops 3 GobbleGums by tier — Classic (free, packs of 5), Mega, Rare Mega and Ultra-Rare (Black-Market / Liquid Divinium). Filter by tier. Some seasonal/Chronicles gums are grouped as compiled.

Always Done Swiftly
ClassicFaster ADS walk and raise/lower for 3 rounds.

Arms Grace
ClassicRespawn with the guns you bled out with.

Coagulant
ClassicLonger bleedout time.

In Plain Sight
ClassicZombies ignore you (2×, 10s each).

Stock Option
ClassicAmmo drawn from your stockpile, not the magazine (2:30).

Impatient
ClassicRespawn near the end of the current round.

Sword Flay
ClassicMelee does 5× damage (2:30).

Anywhere But Here!
ClassicTeleport to a random location with a concussive blast (2×).

Danger Closest
ClassicZero explosive self-damage for 3 rounds.

Armamental Accomplishment
ClassicFaster weapon switch, melee and item use for 3 rounds.

Firing On All Cylinders
ClassicFire while sprinting for 3 rounds.

Arsenal Accelerator
ClassicCharge your special weapon faster for 10 min.

Lucky Crit
ClassicBetter Alternate Ammo Type proc for 1 round.

Now You See Me
ClassicAll zombies chase only you (2×, 10s).
Alchemical Antithesis
ClassicEvery 10 points earned becomes 1 reserve ammo (2×, 60s).
Projectile Vomiting · Newtonian Negation · Eye Candy · Tone Death
Classic (Whimsical)4 cosmetic-only DLC classics.
Aftertaste
MegaKeep perks on revive (3 rounds).

Burned Out
MegaYour next hit ignites nearby zombies (2 hits).

Dead of Nuclear Winter
MegaSpawns a Nuke (2×).

Ephemeral Enhancement
MegaHeld gun becomes Pack-a-Punched for 60s (2×).

I'm Feeling Lucky
MegaDrops a random power-up (2×).

Immolation Liquidation
MegaDrops a Fire Sale (3×).

Licensed Contractor
MegaDrops a Carpenter (3×).
Phoenix Up
MegaRevive all team-mates with perks.

Pop Shocks
MegaMelee electrocutes (5×).

Respin Cycle
MegaRe-spin the Mystery Box (2×).

Unquenchable
MegaAn extra perk slot when at 4.

Who's Keeping Score?
MegaDrops Double Points (2×).
Idle Eyes · Flavor Hexed · Board Games · Board To Death · +8 more
Mega12 further Megas incl. Crawl Space, Fatal Contraption, Unbearable, Disorderly Combat, Slaughter Slide, Mind Blown (DLC/Chronicles).

Cache Back
Rare MegaDrops a Max Ammo.
Kill Joy
Rare MegaDrops an Insta-Kill (2×).
On the House
Rare MegaDrops a Random Perk Bottle.
Wall Power
Rare MegaYour next wall-buy comes Pack-a-Punched.
Undead Man Walking · Fear in Headlights · Temporal Gift · Crate Power · Bullet Boost · Extra Credit · Soda Fountain
Rare Mega7 further Rare Megas (DLC/Chronicles).

Killing Time
Ultra-RareFreeze all zombies for 20s; shot ones die.
Perkaholic
Ultra-RareEvery perk on the map.
Near Death Experience
Ultra-RareProximity revive with perks (3 rounds).

Reign Drops
Ultra-RareAll core power-ups at once (2×).
Shopping Free · Round Robbin' · Head Drama · Secret Shopper · Profit Sharing · Self Medication · Power Vacuum
Ultra-Rare7 further Ultra-Rares (DLC/Chronicles).
Dark Ops & prestige cards (Black Ops 3)
Black Ops 3 has few Zombies calling cards and mostly no per-map cards; its main-quest cards are on the maps themselves.

Primis Rulz
Dark OpsComplete all the Zombies story quests.

Prestigious Protagonist
PrestigeEnter Prestige after reaching Deresurrectionist (Zombies rank Lv 35).
Visual guides & sources
Screenshots and exact part locations live in these — open one on a second screen.