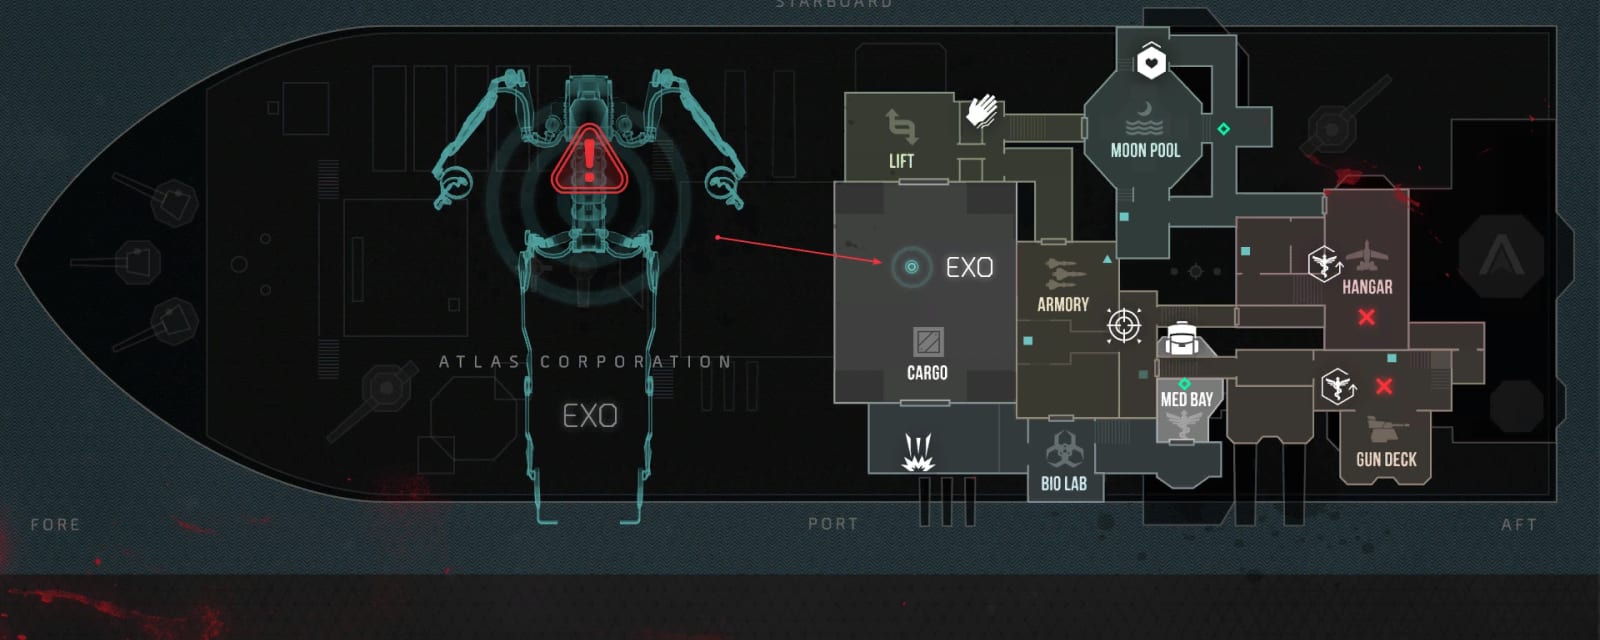

Carrier
Carrier is the third Exo Zombies map (Supremacy DLC) — a stricken Atlas aircraft carrier where the crew begins in a split spawn and must reconnect through Cargo. Its long, RNG-heavy main quest Flotsam & Jetsam powers a hidden Chompy generator, builds a fishing pole, then collects four tablets — a grenade-disposal sequence, a drunk laser maze, a teleporter-island dig and Captain DJ's shark-eye locker — before feeding C4 into the completed vault to sink the ship.
Quick answers
How do you complete the Carrier Easter egg?
- Round-based survival for 1-4 players, fully solo-capable; a high-difficulty, RNG-heavy quest (60–90 min) that ends by sinking the ship rather than a boss fight.
- Same Exo systems as the other maps (Exo Suit, local power, 3D Printer, Mark upgrade station, EMZ, infection/decon) plus Carrier-specific ones below.
- Two disposal machines run the quest: the Weapon Disposal Machine consumes your held weapon and returns random items (fishing parts, the bottle, C4), and the Grenade Disposal takes grenade types in a set sequence for tablet 1 — always swap to a cheap Printer weapon before feeding disposal, never a Mk-upgraded primary.
- Setup gate: buy Teleport Grenades in the Armory, open the Chompy room and power its hidden generator (this activates both disposal machines), then build the fishing pole from three Weapon-Disposal parts on the Gun Deck rail (each cast then costs 100 points).
- Four tablets install in a central vault; once all four are in, feed disposal until C4 appears, plant it on the vault and the ship sinks.
- Map-specific hazards: split spawn (reconnect through Cargo early), teleporting enemies, Atlas strike teams and toxic gas bombs that interrupt rounds — plus the Chompy lane and the shark, which kill carelessly.
- Several items are random (fishing parts, shovel, red fish, C4), so preserve points and expect repeated attempts; the laser maze is voided by touching a beam, so isolate the route rooms in co-op.
How long does the Carrier Easter egg take?
Can you do the Carrier Easter egg solo?
Is there a song Easter egg on Carrier?
What are the main areas on Carrier?
How many side Easter eggs are on Carrier?
When was Carrier released?
Map & Key areas
The map layout first, then the areas worth knowing by name. Map imagery © Activision, self-hosted.
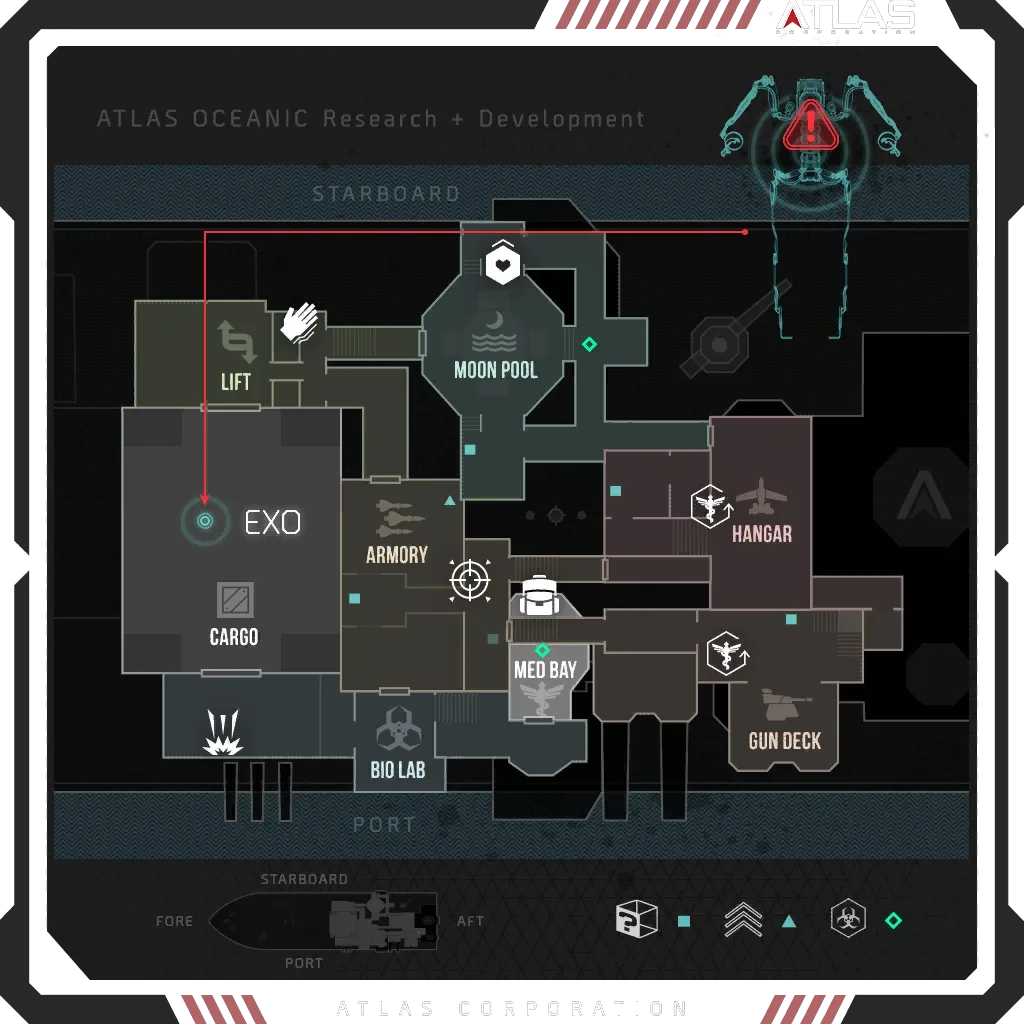
Gun Deck
A split-spawn side; the fishing-pole build on the rail and mini-shark song tools.
Armory
Teleport Grenades (required for the Chompy room).
Cargo / Chompy
The Chompy machine, its hidden generator room and the Grenade & Weapon Disposal machines.
Bio Lab
The lower teleporter (charged with fragments for the island route).
Lift / Moon Pool
The laser-maze route; the shark cage, chum grates and drone-lever box.
Hangar
Captain DJ's retina cabinet/locker, the island-teleporter exit and mini-shark song tools.
Steps at a glance
- Round-based survival for 1-4 players, fully solo-capable; a high-difficulty, RNG-heavy quest (60–90 min) that ends by sinking the ship rather than a boss fight.
- Same Exo systems as the other maps (Exo Suit, local power, 3D Printer, Mark upgrade station, EMZ, infection/decon) plus Carrier-specific ones below.
- Two disposal machines run the quest: the Weapon Disposal Machine consumes your held weapon and returns random items (fishing parts, the bottle, C4), and the Grenade Disposal takes grenade types in a set sequence for tablet 1 — always swap to a cheap Printer weapon before feeding disposal, never a Mk-upgraded primary.
- Setup gate: buy Teleport Grenades in the Armory, open the Chompy room and power its hidden generator (this activates both disposal machines), then build the fishing pole from three Weapon-Disposal parts on the Gun Deck rail (each cast then costs 100 points).
- Four tablets install in a central vault; once all four are in, feed disposal until C4 appears, plant it on the vault and the ship sinks.
- Map-specific hazards: split spawn (reconnect through Cargo early), teleporting enemies, Atlas strike teams and toxic gas bombs that interrupt rounds — plus the Chompy lane and the shark, which kill carelessly.
- Several items are random (fishing parts, shovel, red fish, C4), so preserve points and expect repeated attempts; the laser maze is voided by touching a beam, so isolate the route rooms in co-op.
Full walkthrough
Power Chompy and build the fishing pole
Buy Teleport Grenades in the Armory. Activate Chompy in Cargo and throw a Teleport Grenade through the opening into its room to reach and power the hidden generator (this activates both disposal machines). Then feed expendable Printer weapons into Weapon Disposal until it returns the reel, line and hook, and build the fishing pole on the Gun Deck rail.
- Teleport Grenades bought
- Chompy hidden generator powered
- Fishing pole built (3 parts) on Gun Deck
Tablet 1 — Grenade Disposal sequence
Put a Teleport Grenade in the top slot, then throw the indicated grenade as each icon lights, completing three rows in order (waiting for each registration): Row 1 Distraction Drone → Frag/Contact; Row 2 Explosive Drone → Distraction Drone → Explosive Drone → Frag/Contact; Row 3 Explosive Drone → Nano Swarm → Explosive Drone → Distraction Drone → Explosive Drone → Frag/Contact. Three green lights confirm — take the tablet to the vault.
- Three grenade rows completed
- Tablet 1 installed in the vault
Tablet 2 — drunk laser maze
Feed Weapon Disposal until it returns a bottle; pick it up to enter the drunk movement state. While drunk you can only Exo Jump and Slide (normal running/aiming is disabled) — that restriction is what makes the route hard. Press the green keypad (Bio Lab/Cargo route) and cross Cargo → Lift → Moon Pool → Hangar without touching any laser beam. The tablet is on the floor by the Hangar teleporter — take it to the vault.
- Bottle drunk (movement state)
- Laser route crossed clean
- Tablet 2 installed
Tablet 3 — teleporter island dig
Collect teleporter fragments from teleporting zombies/dogs and feed roughly twenty into the inactive lower Bio Lab teleporter until it glows steady blue. Fish from the Gun Deck pole until you catch a shovel, then use the teleporter to reach the small island and dig the sand search points for the briefcase tablet.
- Bio Lab teleporter charged (~20 fragments)
- Shovel caught
- Island briefcase dug — Tablet 3 installed
Tablet 4 — shark eye & Captain DJ
Interact with Captain DJ's locked cabinet (Hangar) to trigger the retina route. Destroy the empty drone of the linked pair and install its dropped lever in the Moon Pool wall box. Fish for the red fish, then chum the water by killing zombies over the Moon Pool grates until the shark appears. Enter the cage holding the red fish, interact with the shark's mouth during its bite to trade the fish for the eyeball, then use the eye on the Hangar retina scanner to open the locker and take tablet 4.
- Retina route triggered + drone lever installed
- Red fish caught, water chummed, shark spawned
- Shark eye taken → Tablet 4 installed
Finale — sink the ship with C4
With all four tablets in the vault, keep feeding expendable Printer weapons to Weapon Disposal until C4 appears. Plant it on the completed vault — the destruction sequence begins, the ship sinks, and Flotsam & Jetsam completes when the state registers.
- C4 obtained from Weapon Disposal
- C4 planted — ship sinks (quest complete)
Side Easter Eggs & extras
Everything beyond the main quest. Tap any entry to open the full how-and-where breakdown.
Fishing pole
Built from three Weapon-Disposal parts on the Gun Deck rail; each 100-point cast can return the shovel and the red fish needed for tablets 3 and 4. A quest tool, not a weapon.
Teleport Grenades
Bought in the Armory — mandatory to reach the Chompy generator room and start the grenade-disposal sequence, and handy to rescue a blocked player mid-round.
“Mars”
Interact with three mini shark toys — atop the elevator outside Cargo (above the shark containers), in the Hangar above Captain DJ's locker, and the Hangar upper corridor reached by Exo-jumping above the power switch toward Gun Deck. The third starts the full track.
Weapon & Grenade Disposal
Two machines fed from the powered Chompy generator: Weapon Disposal consumes your held gun for random returns (fishing parts, bottle, C4); Grenade Disposal takes the tablet-1 grenade sequence. Only ever feed cheap, expendable weapons.
LZ-52 Limbo
A strong line-damage weapon for the carrier's crowded corridors — a good survival primary to keep upgrading while cheap Printer guns are sacrificed to the disposal machines.
Recommended loadouts
Three strong picks for this map — the map's Wonder Weapon plus reliable box/wall options. These are pre-augment-era games, so the setup is the gun plus Pack-a-Punch and perk synergy.
LZ-52 Limbo
Line damageStrong straight-line damage for the carrier's crowded corridors — a good survival primary to keep Mk-upgrading while cheap Printer guns are fed to the disposal machines.
Teleport Grenades
Quest toolBought in the Armory: mandatory to reach the Chompy generator room and start the tablet-1 grenade sequence, and a lifeline for escaping a blocked lane or teleporting enemies.
Visual guides & sources
Screenshots and exact part locations live in these — open one on a second screen.