
The Shadowed Throne
A burning, war-torn 1945 Berlin. The Raven crew reclaim another shard of Barbarossa's sword — building the beam-firing Wunderbuss, forging three melee relics, and downing a multi-phase zeppelin boss in the Stadtjäger Down quest.
Map & Key areas
The map layout first, then the areas worth knowing by name. Map imagery © Activision, self-hosted.
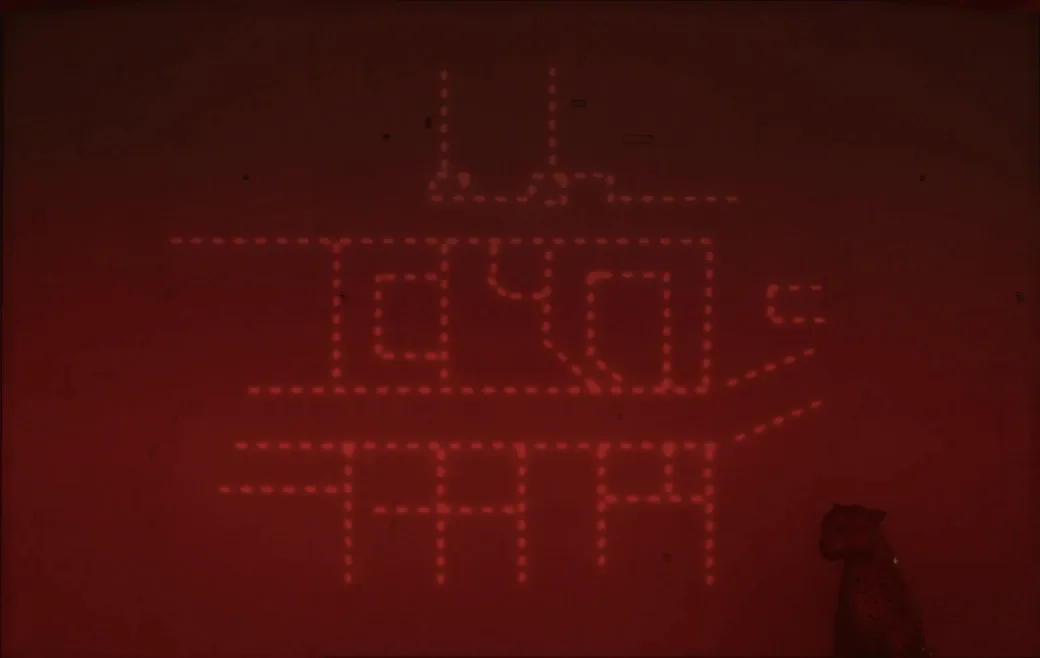
Main Street / Plaza
Central hub — the story radio, the flare box that summons the airship, and the first tether pod.
The Apartment (+ basement)
The Wunderbuss crafting station, the Dancer's Dagger safe, and the song's record player.
Kronprinz Theatre
The projector, film reel and magnifying glass; the cabaret bells for the audio-log egg.
Museum
Wunderbuss battery spawns, the scale puzzle for the Nazi Axe and Faustblitz.
Church
The three stone relic slots (bat/dagger/axe) and the coordinate map.
Underbelly / Hidden Courtyard
The Übersprengen (Pack-a-Punch) lift and the sealed Barbarossa statue puzzle.
Steps at a glance
- Tune the Main Street radio (coordinates)
- Shoot the flare box → summon the airship
- Build the Wunderbuss (stem + battery)
- Charge the tether anchors with the Wunderbuss
- Contact & trade with the Smuggler
- Power the theatre projector → project the map
- Smuggler's Bat (knock on the basement door)
- Dancer's Dagger (clown-doll counts → safe code)
- Nazi Axe (Morse → magnifying glass → scale puzzle)
- Charge all three relics → open the Hidden Courtyard
- Barbarossa statue + raven puzzle → the blade
- Board the airship, beat the Stadtjäger
Full walkthrough
Contact via radio
Read the region name on the Church map, match it to the coordinate chart, and input the coordinates on the Main Street radio.
Summon the airship
Shoot the lock off the flare box, then melee it to fire the flare and call the zeppelin.
Build the Wunderbuss
Melee-kill a Sizzler (lava zombie from the airship) for the stem, grab the battery (Theatre / Museum top floor / Museum ground floor), and combine them at the basement station. Refill by holding ADS on zombies.
Pack-a-Punch (Übersprengen)
Blow the covers off the two fuse panels (sewer bars + Destroyed Building) with explosives, then hit the wires with the Wunderbuss — the first charge lowers the Übersprengen, the second opens the lift.
Charge the tether anchors
Charge the three Zeppelin anchors with 150 Wunderbuss ammo each — the Destroyed Building ceiling (across from Übersprengen), the Museum ceiling, and the Plaza near Double Tap (the Plaza one locks to whichever method you start with — nearby kills or Wunderbuss fire, don't mix). Each anchor eats close to a full Wunderbuss charge, so siphon a zombie to full first (hold ADS) before you start one or it stalls halfway. When all three turn yellow, the drop pod lowers over Main Street. A separate ceiling anchor inside Barbarossa's Refuge also takes 150 Wunderbuss.
The Smuggler
Shoot the basement cash register with the Wunderbuss to reveal a frequency; enter it on the radio. Open the marked GAS floor tile by the BAR, pass a bullet weapon through to the Smuggler, survive ~2 rounds, then deposit Jolts in the Cabaret GAS hole to pay him.
Smuggler's Bat
Melee the basement side-room door three times, take the gold bat from the heavy that appears, and slot it in its Church stone.
Dancer's Dagger
Shoot the Apartment hallway painting, run the projector and film reel, then hit the projector with the Wunderbuss to reveal a minimap. The four clown dolls are marked with green markers on the Cabaret map; kills near each doll charge it, and each doll's kill count is one digit of the combination. At the safe (next to the vanity in the dead woman's Apartment), hold interact between rounds, reset it with two full dial rotations, then enter the four numbers right, left, right, left. Open it for the dagger and slot it in the Church.
Nazi Axe
Find the frequency digits (Theatre / Museum / elevator), input them, and translate the returned Morse code to coordinates. Use the Theatre magnifying glass on the Church map for the Scale Bowl, Sizzler-head + bowl on the Museum scales, get kills by the rabbit, and take the Axe — slot it in the Church.
Helper: Morse Code Decoder
Morse Code Decoder
Shaolin phone · Beast Venom consoles · Shadowed Throne Nazi AxeTap in the dots and dashes you hear, using ▮ between letters — it decodes live. Used wherever a map plays Morse: Shaolin Shuffle's ringing phone (the poster number), The Beast from Beyond's Venom-Y/Z consoles, and The Shadowed Throne's Nazi Axe frequency (which decodes to coordinates).
Standard international Morse. Short beep = dot, long beep = dash; a pause between letters = ▮. A ? means that letter's dots/dashes don't match a code yet.
Charge the relics → the courtyard
With all three relics slotted by the Church red door, charge the weapon wall in this exact order: 20 normal zombies, then 10 Sizzlers, then 10 Pests (out-of-order kills don't count toward the current category). The red door then opens into Barbarossa's Refuge (the Hidden Courtyard).
Statue & raven puzzle
Rotate the wall statues so they all face the central golden Barbarossa (turning one rotates its neighbours). When solved, place the four raven statues at the base in the correct order to receive the sword blade.
Board the airship → the Stadtjäger
All players enter the pod and fire a full Wunderbuss at the ceiling cable together to lift off. Inside, route the glowing power ball through the terminals (green connections only) to open all five gates — take the upper branch first, then the lower one into Straub's room — dropping the Stadtjäger. It's only vulnerable in a phase-specific window: phase 1 shoot the orange chest engine while he charges · phase 2 damage him during his Geistbolt throw (kill the Sizzlers he spawns) · phase 3 shoot the gas cloud he releases to electrify it, then burn him while he stands in it. Each phase ends when he injects himself; after phase 3, return to the pod.
Side Easter Eggs & extras
Everything beyond the main quest. Tap any entry to open the full how-and-where breakdown.
“Dark Wings” (Shadowed Throne)
Don Veca ft. Nikola Printz. Shoot the Apartment hallway painting (leading to Main Street) to drop a vinyl, place it on the Apartment living-room record player, and power it with the Wunderbuss.
- Shoot the painting in the Apartment hallway (leading to Main Street) to drop a vinyl record
- Place the record on the record player in the Apartment living room
- Power it with the Wunderbuss — 'Dark Wings' plays
- (The same song as The Final Reich, with a different trigger)
Wunderbuss
The beam Wonder Weapon — a Sizzler stem + a battery, crafted at the Apartment basement station; refills by siphoning zombies with ADS.
The three melee relics
Smuggler's Bat, Dancer's Dagger and Nazi Axe — each obtained and charged with geistkraft during the quest, then slotted in the Church.
- Smuggler's Bat: pay the Smuggler (cash-register frequency + the floor-panel trade), melee the basement door 3 times, take the bat from the heavy, slot it in the Church
- Dancer's Dagger: run the Theatre projector + film reel, hit the projector with the Wunderbuss for a minimap, count the souls at the four clown dolls, open the balcony safe with those counts
- Nazi Axe: Morse frequency → coordinates, magnifying glass on the Church map for the Scale Bowl, Sizzler-head + bowl on the Museum scales, kills by the rabbit → the Axe
- Charge each with its enemy type (bat = Pests, dagger = zombies, axe = Sizzlers) to open the Hidden Courtyard
Geistschild (Spirit Shield)
A purchasable machine (Plaza, by the doorway to Barbarossa's Refuge) that absorbs up to three otherwise-fatal hits — starts at 500 Jolts, scaling up.
Treasure Zombie
Kill a Treasure Zombie for a single free purchase — randomly a Blitz, the Geistschild or the Mystery Box.
Cabaret bells (audio recording)
Shoot the eight bells/lamps around the Cabaret in sequence within ~25 seconds to unlock a story recording (far easier with the Wunderbuss).
- In the Kronprinz Theatre / Cabaret, shoot 8 bells or lamps in sequence within ~25 seconds
- Order: front desk, the instruments table, the centre rubble, the piano on stage, the backstage levers, the 2F costume rack, the cheetah-poster table, then the front desk again
- The Wunderbuss makes hitting them all in time far easier
- Completing it unlocks a hidden story recording
Cabaret sign Hangman
On the far-left Cabaret sign, shoot the arrows to cycle each letter and the centre dot to submit it. Spell a word for a reward: DAMNATION (Nuke) · REAPER (Insta-Kill) · GEISTKRAFT (full specialist) · FAMISHED (Max Ammo) · GLUTTONY (double Jolts) · WONDER (Tesla Gun + Ripsaw) · THEJACKBOX (Jack-in-the-Boxes). Wrong letters add to the noose; a full body resets the word.
Five hats (1,952 Jolts + power-ups)
Carry one hat at a time and place it on the Cabaret stage Cheetah statue in order — Fedora, Pilot Cap, Garrison Cap, Officer Hat, Red Hat (each has two possible spawns across the Church, Cabaret, Museum, Underbelly and Apartments). After the fifth, 1,952 Jolts and five power-ups appear by the statue.
“The Classic” PPSh-41 (mirrors)
Backstage in the Cabaret, drop Jolts at each of the three mirrors and interact exactly when the travelling light returns to bottom-centre (each mirror runs faster). All three done adds The Classic to the Mystery Box pool.
“Thule's Errand” camo
Set the Main Street radio frequency to 39 / 39 to unlock a hidden weapon camo.
Interactive solvers
Every solver for The Shadowed Throne, in the order you meet them. Each also appears inside its step in the walkthrough above — use whichever is handier. Browse every Zombies solver →
Morse Code Decoder
Shaolin phone · Beast Venom consoles · Shadowed Throne Nazi AxeTap in the dots and dashes you hear, using ▮ between letters — it decodes live. Used wherever a map plays Morse: Shaolin Shuffle's ringing phone (the poster number), The Beast from Beyond's Venom-Y/Z consoles, and The Shadowed Throne's Nazi Axe frequency (which decodes to coordinates).
Recommended loadouts
Three strong picks for this map — the map's Wonder Weapon plus reliable box/wall options. These are pre-augment-era games, so the setup is the gun plus Pack-a-Punch and perk synergy.
Wunderbuss
Wonder WeaponThe quest's beam gun — charges anchors, opens PaP and finishes the boss. Refill by siphoning zombies with ADS; keep a charge banked before timed steps.
BAR (PaP)
Horde workhorsePack-a-Punch via Übersprengen and pair with the weapon-damage and faster-reload Blitz for sustained wave clearing.
Combat Shotgun (PaP)
Close-range panicStrong point-blank clears; keep one un-upgraded to pass to the Smuggler through the floor panel, or PaP for the boss.
Visual guides & sources
Screenshots and exact part locations live in these — open one on a second screen.